
How to: Five-Minute Breakfast Soup
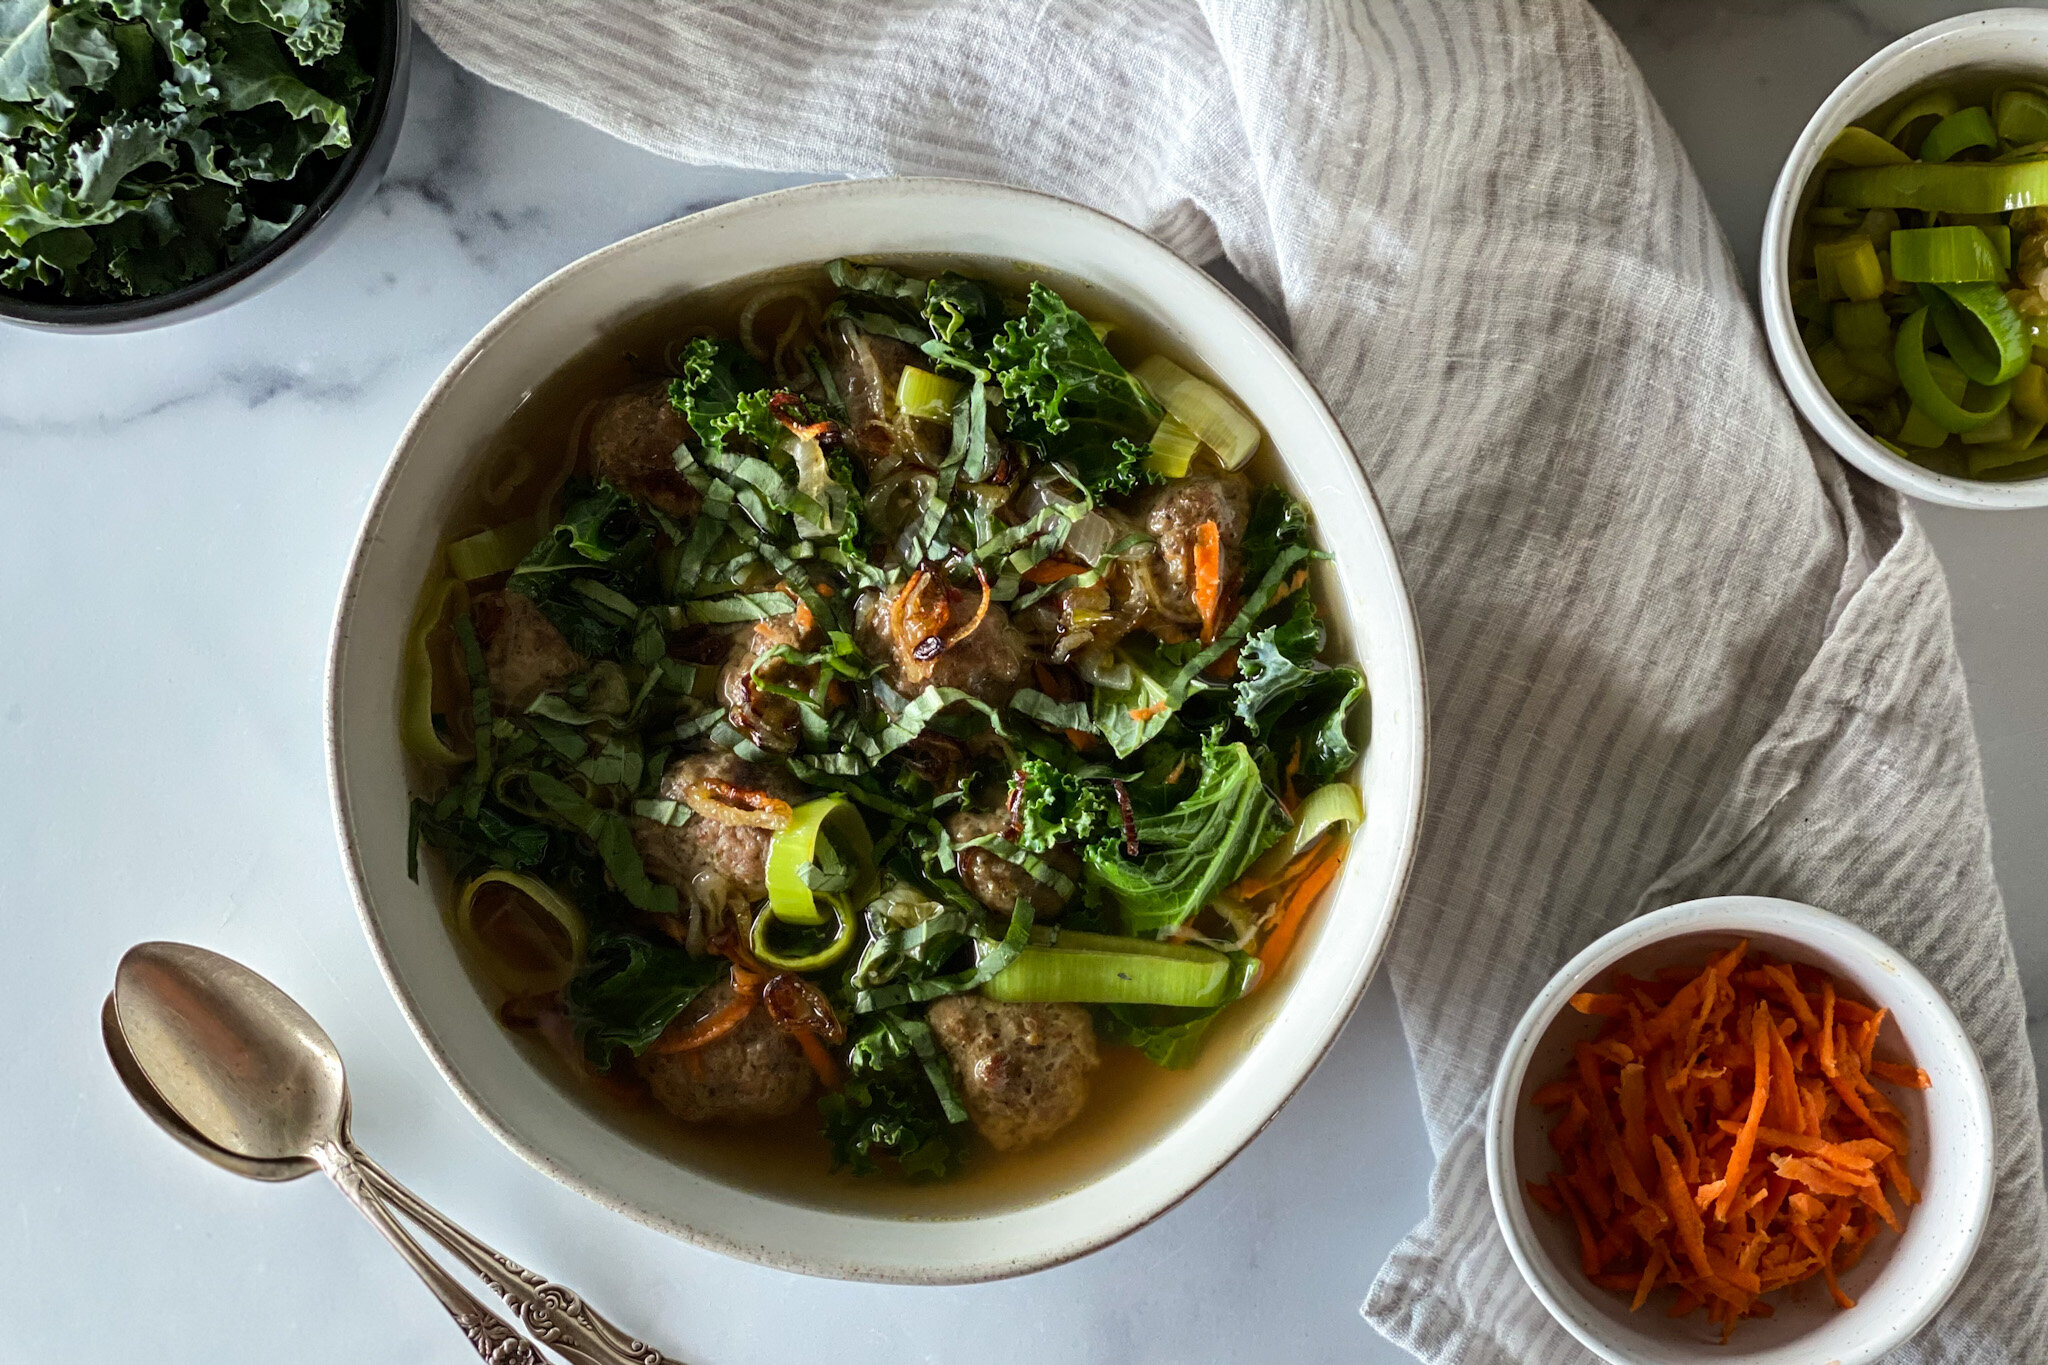
Breakfast soup may seem like an unconventional choice, but this tutorial for Five-Minute Breakfast Soup will turn you into a breakfast-soup-believer! You can throw together a satisfying, deeply nourishing soup packed with greens, veggies, potatoes, meat, or eggs and adapted to fit any flavor profile in just five minutes. Jump to tutorial.

Friends, let me tell you something…breakfast soup is the new green smoothie. I know the concept may sound odd, but hear me out: breakfast soup can be just about anything you want it to be – packed with greens, roasted veggies, potatoes, fresh herbs, noodles, meat, or eggs and adapted to fit any flavor profile.
Soup may not be a typical breakfast in the states, but all over the world different soups + stews are commonplace at the breakfast table. Whether it’s changua in Colombia, menudo in Mexico, miso in Japan, congee in China, or Mohinga, a common pho-like street food eaten for breakfast in Myanmar, other cultures know that soup delivers essential nutrients and can be make a wonderfully nourishing breakfast.
Soup is known to support digestion and boost energy levels, all while boosting your veggie & nutrient intake for the day. It’s like the cold weather version of a green smoothie and I am here for it.
You may be thinking that having soup for breakfast may seem like a great idea in fall + winter, but you can also have soup for breakfast in the summer; if you don’t feel like hot soup in the summer months, you can try refreshing chilled soup recipes like gazpacho.
What we’re not doing: making a big batch of one kind of soup and eating that throughout the week. Instead, we’re keeping things simple + exciting by making a single serving of breakfast soup from pre-prepped or leftover ingredients we already have on hand in about 5-10 minutes.
The base of a quick + easy breakfast soup is good quality broth or stock. Then I like to incorporate tons of aromatics, greens and pre-cooked vegetables with leftover meat or a soft-boiled egg. The best part? You can mix and match whatever your favorites are – there are no rules.
Aromatics such as ginger, garlic, and turmeric provide flavor + nutrients, umami ingredients like tamari, miso, or fish sauce provide an instant flavor bomb, and pre-cooked or quick cooking greens, veggies, meat or eggs provide nourishment + calories and fresh herbs, bean sprouts, or a squeeze of citrus add brightness.

STEP-BY-STEP HOW TO: FIVE-MINUTE BREAKFAST SOUP
STEP 1: AROMATICS
In a small saucepan, start by sautéing 1-2 tablespoons aromatics like fresh, minced garlic, ginger, turmeric, peppers, onion, leeks or shallots in little olive oil until soft + fragrant. Aromatics will deliver deep, rounded flavor + aroma to your breakfast soup when you sweat them a bit before adding the broth.
STEP 2: BROTH BASE
Next, poor in about 2 cups of the broth of your choice. The base of a quick + easy breakfast soup is good quality broth or stock. You can make your own or buy a high-quality broth from your local or online grocery store [I like Bonafide Provisions, Thrive Market, or Nona Lima broths]. The sky is the limit here — you can use chicken, beef, lamb, turkey, pork, bison, mushroom or vegetable broth as your base.
STEP 3: MIX-INS
Add umami to your soup with mix-ins like tamari, chickpea miso, or fish sauce provide depth and an instant flavor bomb. You can also add sambal chili paste, tomato paste, harissa, pesto, salsa verde, or ghee, butter, or coconut milk for a creamier soup. If your broth is on the richer side, add a splash of vinegar, lemon or lime juice to bring some brightness + balance.
STEP 4: PROTEIN
Add 4-5 ounces of pre-cooked protein or 1-2 soft boiled eggs. I usually opt for leftover shredded beef or chicken and/or a soft-boiled egg in my breakfast soup but you can do any variation of pre-cooked shredded or ground chicken, beef, lamb, turkey, pork, bison, or even bacon, sausage, or eggs for the ultimate breakfast vibe.
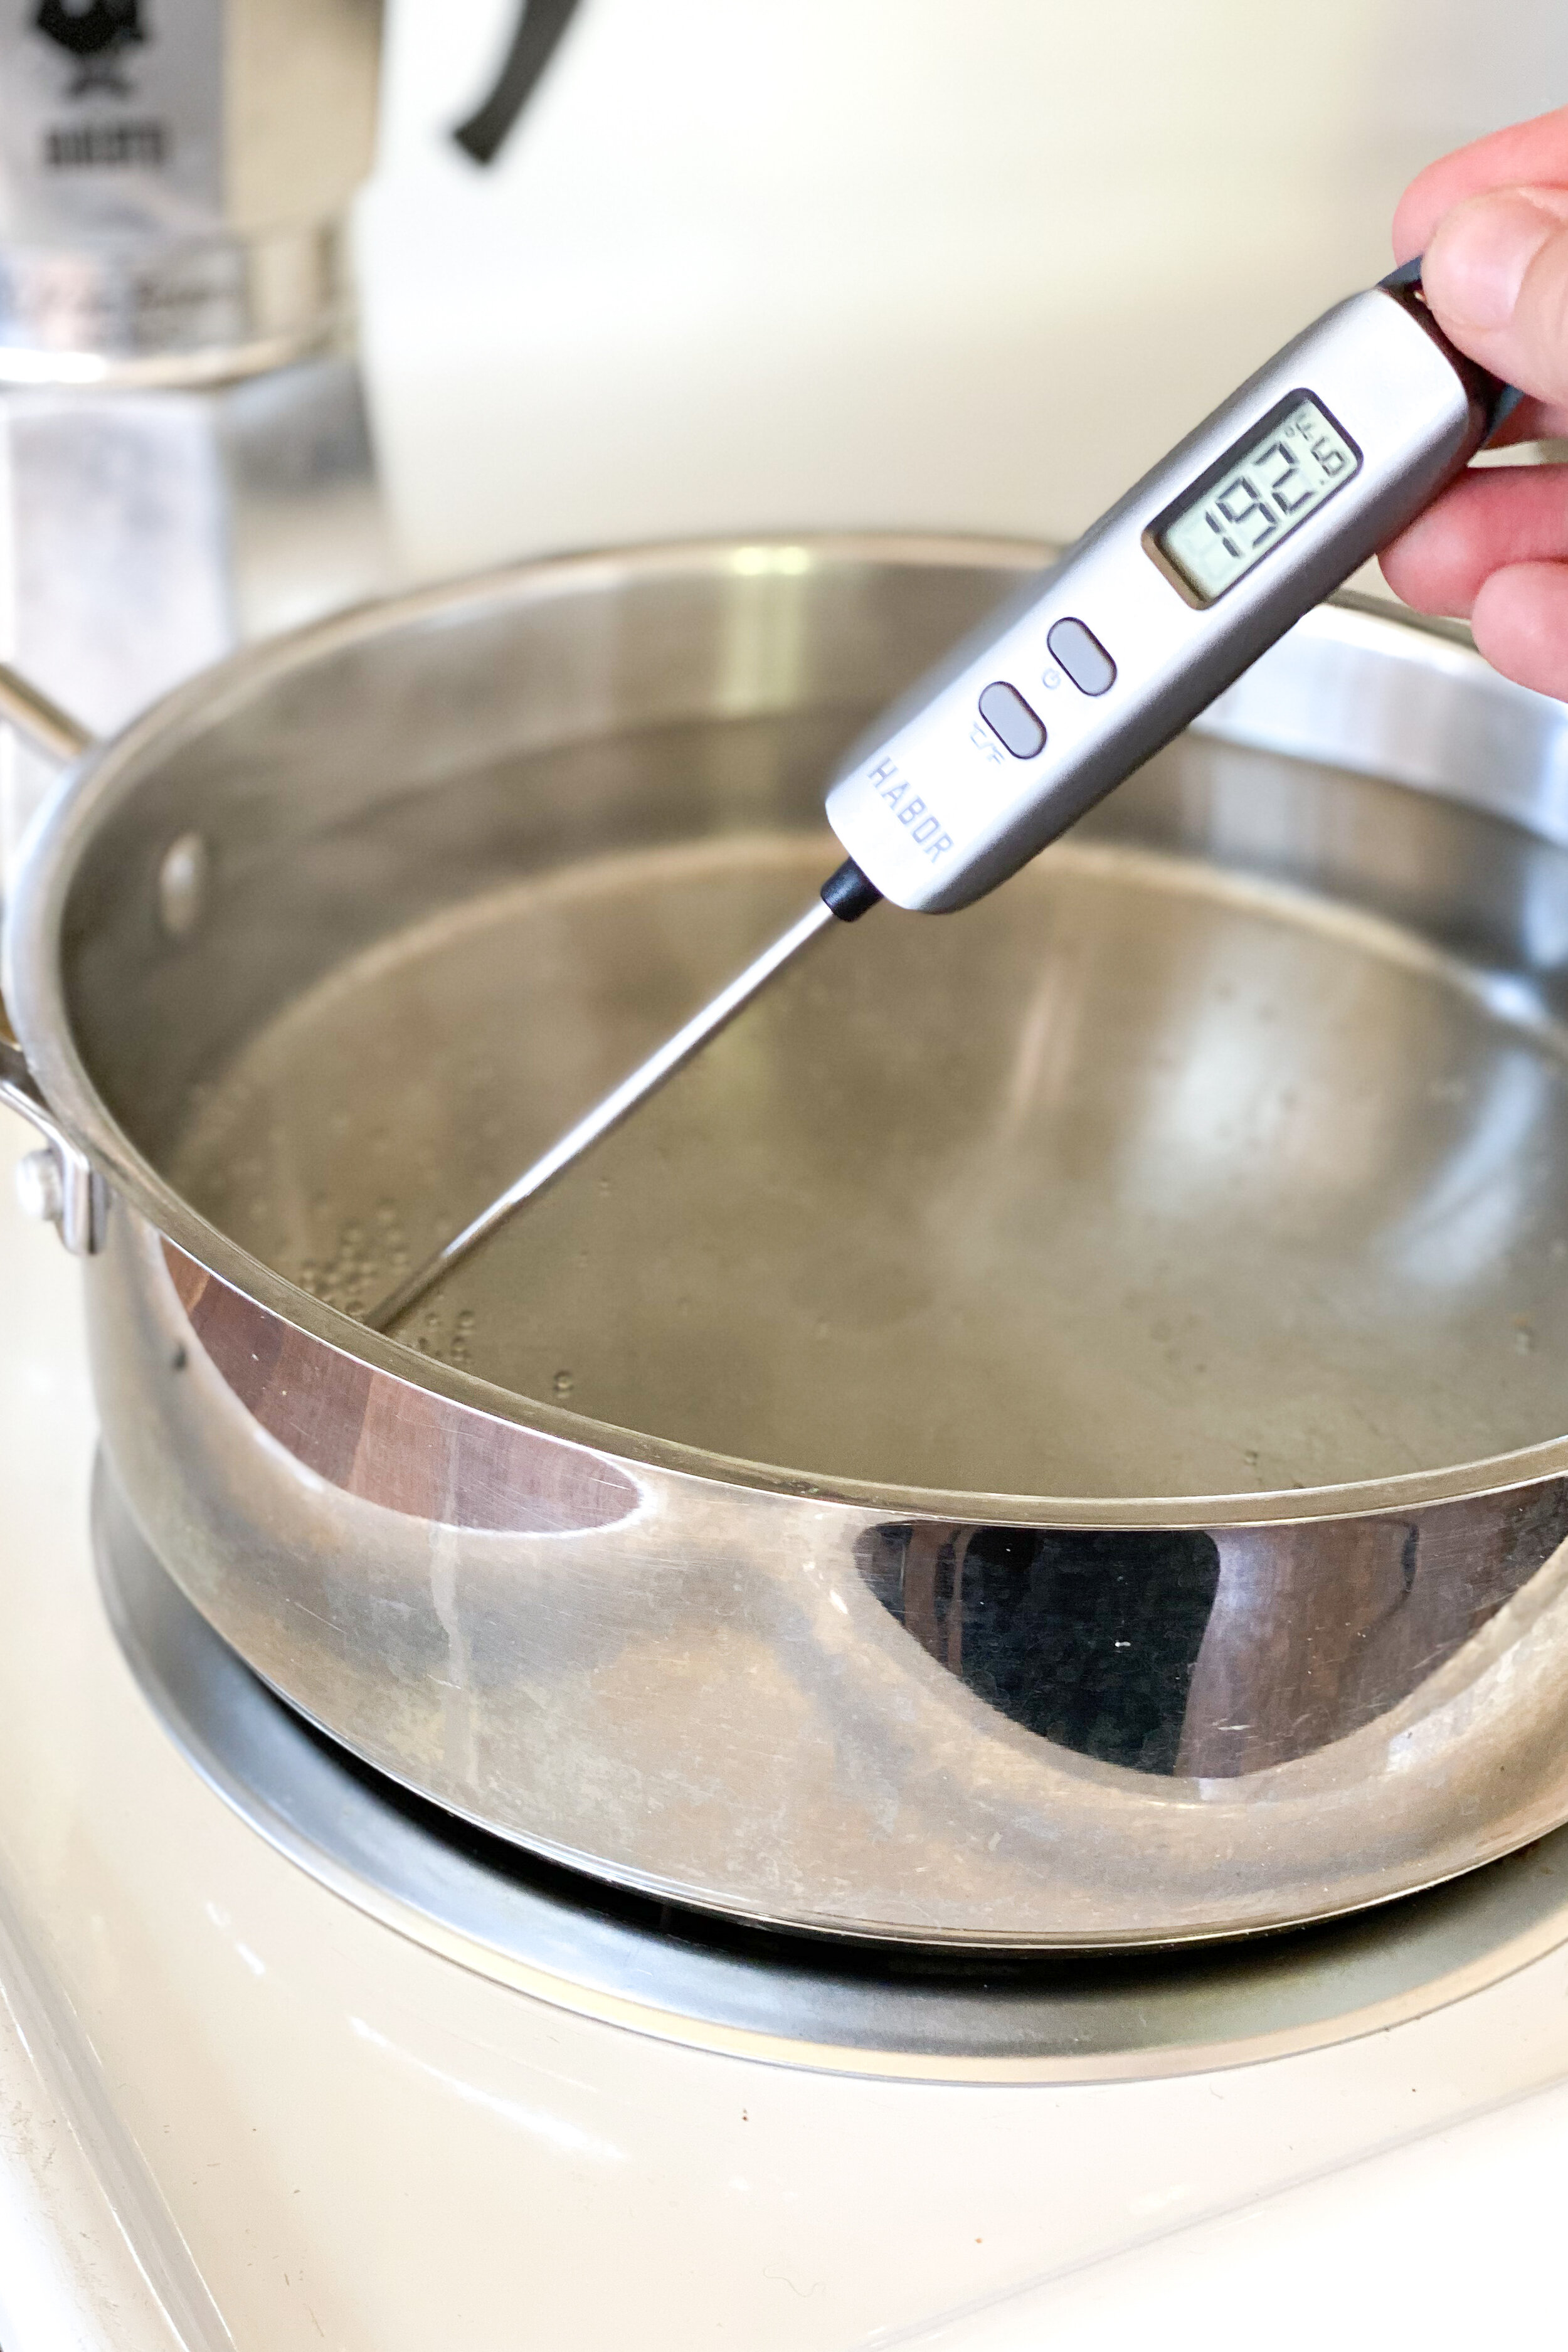
You can also poach an egg or two in the broth before adding additional ingredients. Simply bring the broth to a simmer. The broth should be between 190-195 degrees F since the eggs will bring the water temp down to the optimal spot. Create a vortex of broth with a spoon, crack the egg over a fine mesh sieve placed over a small bowl and gently slide it into the middle of the vortex directly from the sieve. Set a timer for 3 minutes, remove the egg from the broth using a slotted spoon, and set aside until the rest of your breakfast soup is prepared. Before serving, add poached egg and the soup will rewarm the egg. If you’re new to poached eggs, make sure to read through my how-to here.
STEP 5: GREENS + VEG + LEGUMES
Add 1-2 cups of greens, quick-cooking/leftover veggies or legumes for filling nutrients, flavor, and texture. This is great opportunity to use up those random greens leftover in your fridge! I typically use pre-chopped or shredded kale or cabbage for a quick add-in. You can opt for spinach, collards, chard, arugula or mustard greens. I also love adding colorful veggies like sautéed peppers, mushrooms, cabbage or roasted bok choy, carrots, cauliflower, broccoli, potatoes, beets or tomatoes. Pre-cooked or canned lentils, chickpeas, cannellini beans or other legumes are also a wonderful addition to breakfast soup.
STEP 6: TOPPINGS
Get crazy with your garnish, paying special attention to flavor + texture! I love to add extra fat + crunch in this last step.
Add more greens: broccoli sprouts, alfalfa sprouts, pea shoots, micro-greens, scallions, and fresh herbs like cilantro, basil, tarragon, parsley or mint add a great nutritional punch and a ton of fresh flavor + texture.
Add extra fat + texture: olive oil, sesame oil, avocado, crumbled feta or cotija cheese, fresh grated parmesan, yogurt or sour cream add a boost of healthy fat and a creamier texture. For a little crunch + fiber, add some pine nuts, sunflower or pumpkin seeds. Want next level crunch + flavor? Add homemade croutons, crispy prosciutto or bacon, parmesan crisps, tortilla chips, fresh sauerkraut or pickled veggies.
Season it up: top with flavored or smoked salt, tajin, gomasio, or furikake to add a nice finishing flavor


SOME OF MY FAVORITE COMBINATIONS
ITALIAN MEATBALL SOUP: shallot or garlic, leeks, beef broth, leftover meatballs, lemon juice, shredded kale, grated carrots
BROTHY ROASTED TOMATO + AVOCADO SOUP: shallot or onion, jalapeño, chicken broth, salsa verde, roasted grape tomatoes, avocado, soft-boiled or poached egg, fresh cilantro, dill, and scallions
EGG & MISO BREAKFAST SOUP: ginger, pork broth, chickpea miso, shiitake and beech mushrooms, spinach, soft-boiled or poached egg, scallions

how to: five-minute breakfast soup
Breakfast soup may seem like an unconventional choice, but this tutorial for Five-Minute Breakfast Soup will turn you into a breakfast-soup-believer! You can throw together a satisfying, deeply nourishing soup packed with greens, veggies, potatoes, meat, or eggs and adapted to fit any flavor profile in just five minutes.
STEP 1: AROMATICS
In a small saucepan, start by sautéing 1-2 tablespoons of aromatics like fresh, minced garlic, ginger, turmeric, peppers, onion, leeks or shallots in little olive oil until soft + fragrant. Aromatics will deliver deep, rounded flavor + aroma to your breakfast soup when you sweat them a bit before adding the broth.
STEP 2: BROTH BASE
Next, poor in about 2 cups of the broth of your choice. The base of a quick + easy breakfast soup is good quality broth or stock. You can make your own or buy a high-quality broth from your local or online grocery store [I like Bonafide Provisions, Thrive Market, or Nona Lima broths]. The sky is the limit here — you can use chicken, beef, lamb, turkey, pork, bison, mushroom or vegetable broth as your base.
STEP 3: MIX-INS
Add umami to your soup with mix-ins like tamari, chickpea miso, or fish sauce provide depth and an instant flavor bomb. You can also add sambal chili paste, tomato paste, harissa, pesto, salsa verde, or ghee, butter, or coconut milk for a creamier soup. If your broth is on the richer side, add a splash of vinegar, lemon or lime juice to bring some brightness + balance.
STEP 4: PROTEIN
Add 4-5 ounces of pre-cooked protein or 1-2 soft boiled eggs. I usually opt for leftover shredded beef or chicken and/or a soft-boiled egg in my breakfast soup but you can do any variation of pre-cooked shredded or ground chicken, beef, lamb, turkey, pork, bison, or even bacon, sausage, or eggs for the ultimate breakfast vibe.
You can also poach an egg or two in the broth before adding additional ingredients. Simply bring the broth to a simmer. The broth should be between 190-195 degrees F since the eggs will bring the water temp down to the optimal spot. Create a vortex of broth with a spoon, crack the egg over a fine mesh sieve placed over a small bowl and gently slide it into the middle of the vortex directly from the sieve. Set a timer for 3 minutes, remove the egg from the broth using a slotted spoon, and set aside until the rest of your breakfast soup is prepared. Before serving, add poached egg and the soup will rewarm the egg. If you’re new to poached eggs, make sure to read through my how-to here.
STEP 5: GREENS + VEG + LEGUMES
Add 1-2 cups of greens, quick-cooking/leftover veggies or legumes for filling nutrients, flavor, and texture. This is great opportunity to use up those random greens leftover in your fridge! I typically use pre-chopped or shredded kale or cabbage for a quick add-in. You can opt for spinach, collards, chard, arugula or mustard greens. I also love adding colorful veggies like sautéed peppers, mushrooms, cabbage or roasted bok choy, carrots, cauliflower, broccoli, potatoes, beets or tomatoes. Pre-cooked or canned lentils, chickpeas, cannellini beans or other legumes are also a wonderful addition to breakfast soup.
STEP 6: TOPPINGS
Get crazy with your garnish, paying special attention to flavor + texture! I love to add extra fat + crunch in this last step.
Add more greens: broccoli sprouts, alfalfa sprouts, pea shoots, micro-greens, scallions, and fresh herbs like cilantro, basil, tarragon, parsley or mint add a great nutritional punch and a ton of fresh flavor + texture.
Add extra fat + texture: olive oil, sesame oil, avocado, crumbled feta or cotija cheese, fresh grated parmesan, yogurt or sour cream add a boost of healthy fat and a creamier texture. For a little crunch + fiber, add some pine nuts, sunflower or pumpkin seeds. Want next level crunch + flavor? Add homemade croutons, crispy prosciutto or bacon, parmesan crisps, tortilla chips, fresh sauerkraut or pickled veggies.
Season it up: top with flavored or smoked salt, tajin, gomasio, or furikake to add a nice finishing flavor
Don't forget to tag us @thenorthwestkitchen on Instagram when you use this tutorial to dream up a delicious breakfast soup!
![How to: Bone Broth + Common Mistakes [Instant Pot & Stovetop Method]](https://images.squarespace-cdn.com/content/v1/5cae4a324d87112fb4f0c0c7/1619893985558-ITUC6JYEECHVO1WWEMXK/IMG_8845_jpg.jpg)
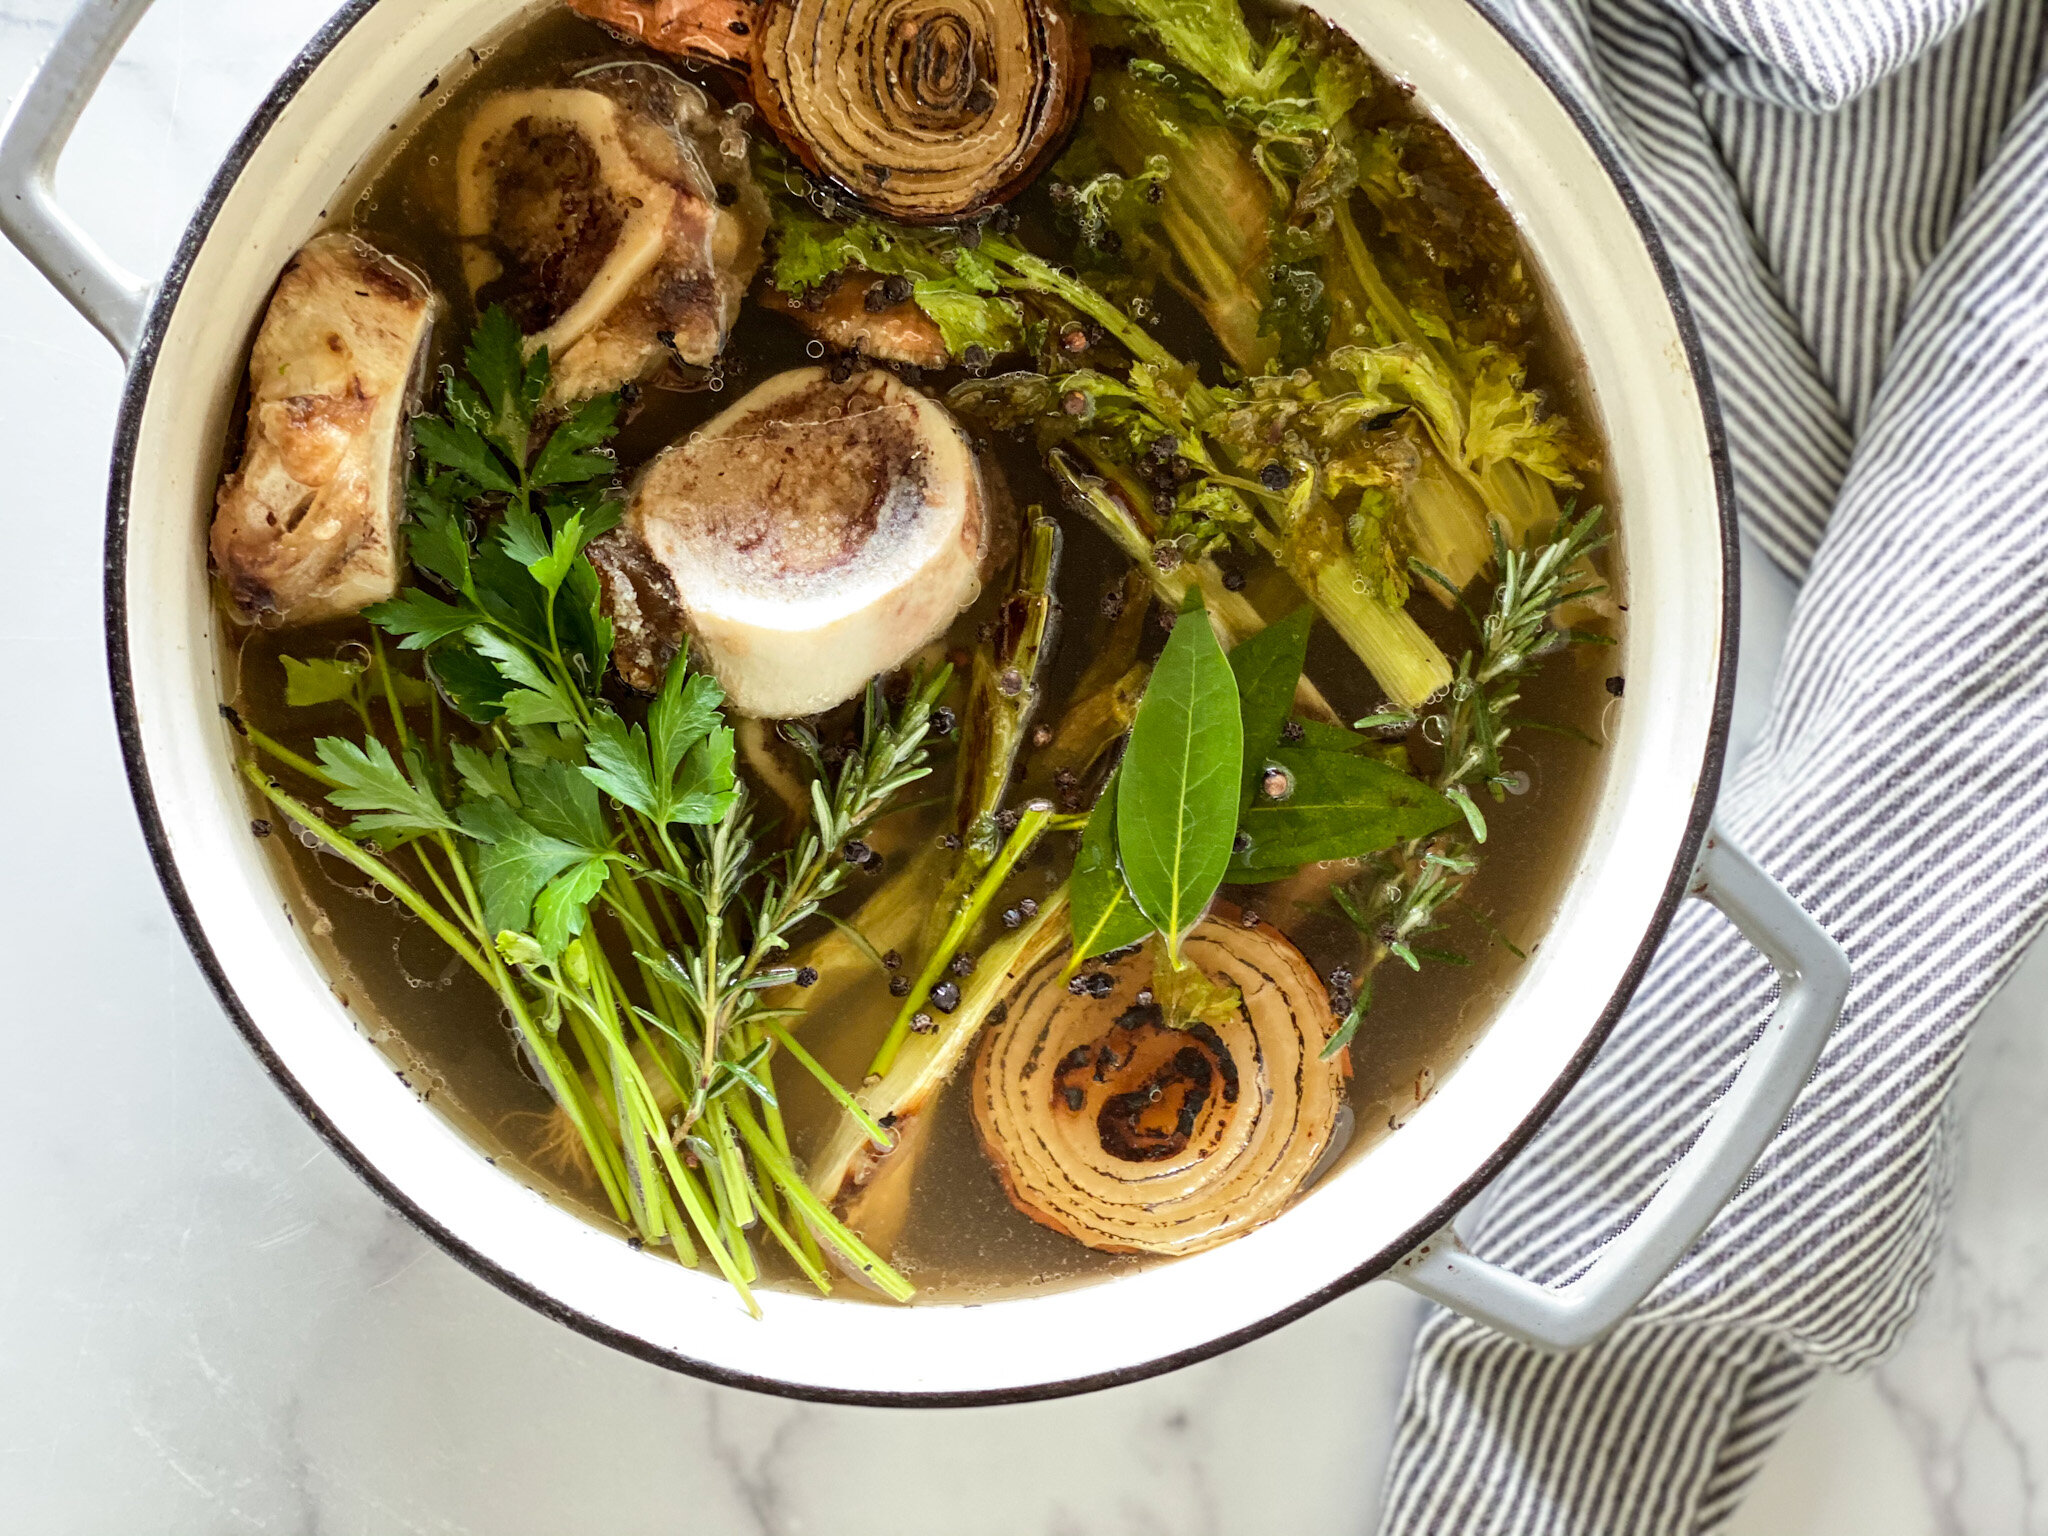
How to: Bone Broth + Common Mistakes [Instant Pot & Stovetop Method]
Homemade Bone Broth is the unsung hero of home kitchens across the world. Use this broth as a base for a quick weeknight soup, in sauces or braises, or drink it straight from a mug. The added step of roasting the bones develops rich, long-cooked flavor that will transform almost any dish into one that’s exponentially more delicious. Simple + doable for any home cook! Jump to recipe.
A great bone broth is a home chef’s secret weapon. There’s a reason that every restaurant makes it daily and why every home cook should keep a few quarts in the freezer. Keeping broth on hand means access to instant flavor for any dish. Add meat, veggies, and noodles and you have an instantly satisfying soup. Drink it straight from a mug with fresh grated garlic + ginger for a bit of nourishment. Use it as a cooking liquid for grains or legumes, or as a flavorful base for sauces, soups, and braises. Taking the time to create a great base of flavor is actually the ultimate shortcut, and sometimes it doesn’t take that long at all — especially when you use a pressure cooker.
Below, I’ll walk you through both a stovetop and Instant Pot [pressure cooker] method as well as common mistakes you may be making. I prefer the Instant Pot method for ease and speed, but either method produce a rich, flavorful broth that can be used for a myriad of applications.

COMMON MISTAKES YOU MIGHT BE MAKING:
Not hanging on to your kitchen scraps: every professional chef out there has a freezer full of root ends of onions, scallion butts, leafy tops and root ends of celery, and herb stems stowed away in their freezer. Not only is this a great way to reduce food waste, it’s an opportunity to impart flavor with something you would have otherwise tossed out [or composted]. I recommend keeping a large freezer bag [I like these half-gallon size reusable Stasher bags] on hand for adding some choice vegetable scraps to throughout the week for a flavorful weekend broth. I wouldn’t both saving the carrots unless you’re using them for a veggie stock.

Skipping the blanching step: If you’ve ever had a bone broth that tastes a bit funky, this is likely the culprit. Before roasting and simmering your bones, cover the bones with cold water, bring to a boil, and let them cook at an aggressive simmer for about 20 minutes before draining and roasting. If you are using the Instant Pot method below, you can do this using the sauté setting — see directions below.
Not roasting the bones: repeat after me, “I will always roast my bones.” While roasting your bones isn’t a required step in putting together a simple broth, it will most certainly give your broth a richer, more long-cooked flavor. Roasting the bones browns and caramelizes them, lending to tons of flavor.

Adding too much stuff to your broth: a good broth doesn’t need a bunch of add-ins. I recommend a few aromatics like fresh herbs/herb stems, onion ends, garlic, black peppercorns, and plenty of sea salt. Pro tip: keep the carrots out unless you want a sweeter broth. Keep the flavor focused and concentrated will allow your broth to fit a myriad of applications.
Letting the finished broth cool slowly: In professional kitchens, broth chilling is serious business. Letting your broth cool slowly means the potential for harmful bacteria to grow. Once you've strained out the bones + other bits, transfer your broth to a shallow and wide container, where it will lose heat more rapidly. You can even add a few cups of ice to speed up the process — don't worry about the ice diluting the broth; it's so intensely flavored that the ice won't drastically impact the flavor. Whatever you do, don't put hot broth in the fridge — it will invite bacterial growth almost immediately and raise the temperature of the fridge.
Adding vinegar to your broth: Don’t worry, I was making this mistake for years! It was widely accepted for some time that apple cider vinegar would aid in pulling the mineral content out of the bones, making a more nutrient dense broth. After attending this talk by Dr. Kayla Daniels at the Ancestral Health Symposium in 2014, I stopped using vinegar in my bone broth and the flavor is much improved.
Freezing broth in jars instead of a silicone mold/ice tray: After making a batch of broth, I tend to reserve as much broth as I need for cooking/drinking purposes over the course of 4 or 5 days and store it in an airtight container in the fridge. Whatever’s left gets frozen in a silicone mold and transferred to a freezer bag. The broth cubes freeze in about 6 hours and will keep in the freezer for up to 6 months, making it a cinch to take one out when you need broth for a recipe. Each block is also the perfect amount to defrost for a quick mug of broth or you can defrost two blocks for an individual serving of soup.

Now that you know how to avoid these common mistakes, let’s get to it!

how to: bone broth
Homemade Bone Broth is the unsung hero of home kitchens across the world. Use this broth as a base for a quick weeknight soup, in sauces or braises, or drink it straight from a mug. The added step of roasting the bones develops rich, long-cooked flavor that will transform almost any dish into one that’s exponentially more delicious. Simple + doable for any home cook!
INGREDIENTS:
- 4 pounds beef bones (I like a mix of marrow, knuckle, and oxtail)
- 1 tablespoon olive oil
- 1 teaspoon kosher salt
- 2 onion root ends with skin, 1 celery root end + leafy top, 1 bunch of herb stems (such as parsley, cilantro, rosemary, and/or thyme)
- 2 garlic cloves or 1 bunch scallion ends
- 2 bay leaves
- 1/2 teaspoon black peppercorns
- 1 tablespoon sea salt
INSTRUCTIONS:
Preheat oven to 400°F.
Blanch your bones: place bones in large stock pot or instant pot insert and cover the bones with cold water, bring to a boil, and let them cook at an aggressive simmer for about 20 minutes (if you're using the Instant Pot method, simply use the sauté setting to bring to a rolling boil). While the bones cook, skim any brown foam that rises to the top with a slotted spoon. Drain the bones and pat dry.
Place bones on a rimmed baking sheet and coat evenly with olive oil and a bit of salt. Roast until bones are crispy and caramelized, about 30 minutes.
STOVETOP METHOD
- Place roasted bones, onion, celery, herbs, garlic or scallions, bay leaves, peppercorns, salt, and 6 quarts cold water in a large stock pot and bring to a boil, skimming any foam that rises to the top. Turn heat down to medium-low for a gentle simmer and set a lid on top, leaving a bit of room for venting. Simmer, stirring and skimming every 2 hours or so for 6-12 hours. As the broth cooks, edge heat down to low and add water as needed.
INSTANT POT METHOD:
- Place roasted bones, onion, celery, herbs, garlic or scallions, bay leaves, peppercorns, and salt in Instant Pot insert. Add cold water to the max fill line (no more than 2/3 of the way up the pot). Secure the lid and set vent to sealing. Cook at high pressure for 3 hours. Allow broth to naturally release, do not adjust the steam valve. This will take about 90 minutes.
STRAIN & STORE:
- Strain out & discard the bones + other bits using a fine mesh seive into a shallow and wide container, where it will lose heat more rapidly.
- Fill a sink or basin with ice water and place your container of broth in the ice bath. Stir regularly until the broth is cooled to about 50°F, about 15-20 minutes. Transfer the broth to airtight containers or jars. Refrigerate or allow broth to chill in the fridge overnight and freeze the following day.
NOTES:
- You can use this recipe with any mix of beef, pork, or chicken bones.
- Broth can be refrigerated for up to 5 days or frozen for up to 6 months. I tend to reserve as much broth as I need for cooking/drinking purposes over the course of 4 or 5 days and store it in an airtight container in the fridge. Whatever’s left gets frozen in a silicone mold like this one and transferred to a freezer bag. The broth cubes freeze in about 6 hours and will keep in the freezer for up to 6 months, making it a cinch to take one out when you need broth for a recipe. Each block is also the perfect amount to defrost for a quick mug of broth or individual serving of soup.
Don't forget to tag us @thenorthwestkitchen on Instagram when you give this simple Beef Bone Broth a try!

Classic Eggs Benedict
Ready to make this brunch staple at home like a pro? We’ve got you covered! This Classic Eggs Benedict has all the essential elements — buttery english muffins [gluten-free of course], sweet & salty ham, perfectly poached eggs, and the easiest blender hollandaise sauce. This recipe comes together in under 45 minutes and much of it can be prepped in advance, providing a stress-free morning with a restaurant-quality meal. Jump to recipe.

Before I worked brunch at my first restaurant job, eggs Benedict seemed so complicated to me. I was that person who double-checked the brunch menu before heading out to brunch with friends to make sure they served some version of the dish because I couldn’t possibly pull it off at home. What I would later learn: this decadent brunch favorite is actually pretty simple to pull-off with the right tips + tricks! Read on to learn how to make poached eggs for a crowd and master my simple blender hollandaise. You’ll definitely have an Instagram-worthy breakfast on your hands, so don’t forget to tag us @thenorthwestkitchen!
Some notes for the home chef before getting started:
Order + timing are everything — first, you’ll want to make your hollandaise. As long as the sauce is emulsified, it won’t break if you store it in a warm spot, like next to the stovetop, until you’re ready to serve. Serve within about 30 minutes or so. Whisk until smooth before serving. Next, crisp up the Canadian bacon, poach your eggs and toast the English muffin.
If you eat low carb or grain-free, I highly recommend serving this dish over a bed of arugula [or any greens really] dressed in extra virgin olive oil, fresh lemon, and sea salt. The acidity of the lemon and peppery greens balance out the richness of the dish.
Cooking for a crowd? Poach the Eggs Ahead: Poach as many eggs as needed and store the eggs in a sealed container of cold water. To reheat, simply place them in a bowl of hot water for 30-60 seconds before serving. I use this method when I’m making eggs Benedict for a large group and it works beautifully!


Tips for Getting the Perfect Poached Egg:
Use the freshest eggs possible. Fresh eggs have firmer whites and tend to hold their shape better, which means less whispies. Old eggs aren’t a deal breaker if you use the two methods below, but it does result in a much tidier + tastier poached egg.
Yes, you do need a thermometer. This is the moment as a home chef where you have to decide it’s finally time. This is the one I use for cooking and baking.
Cold eggs work best, but it’s important to note that cold eggs drop the water temperature. This is where the thermometer comes in handy! As you’re poaching, you can check the temp of the water to see if you need to adjust the burner heat.
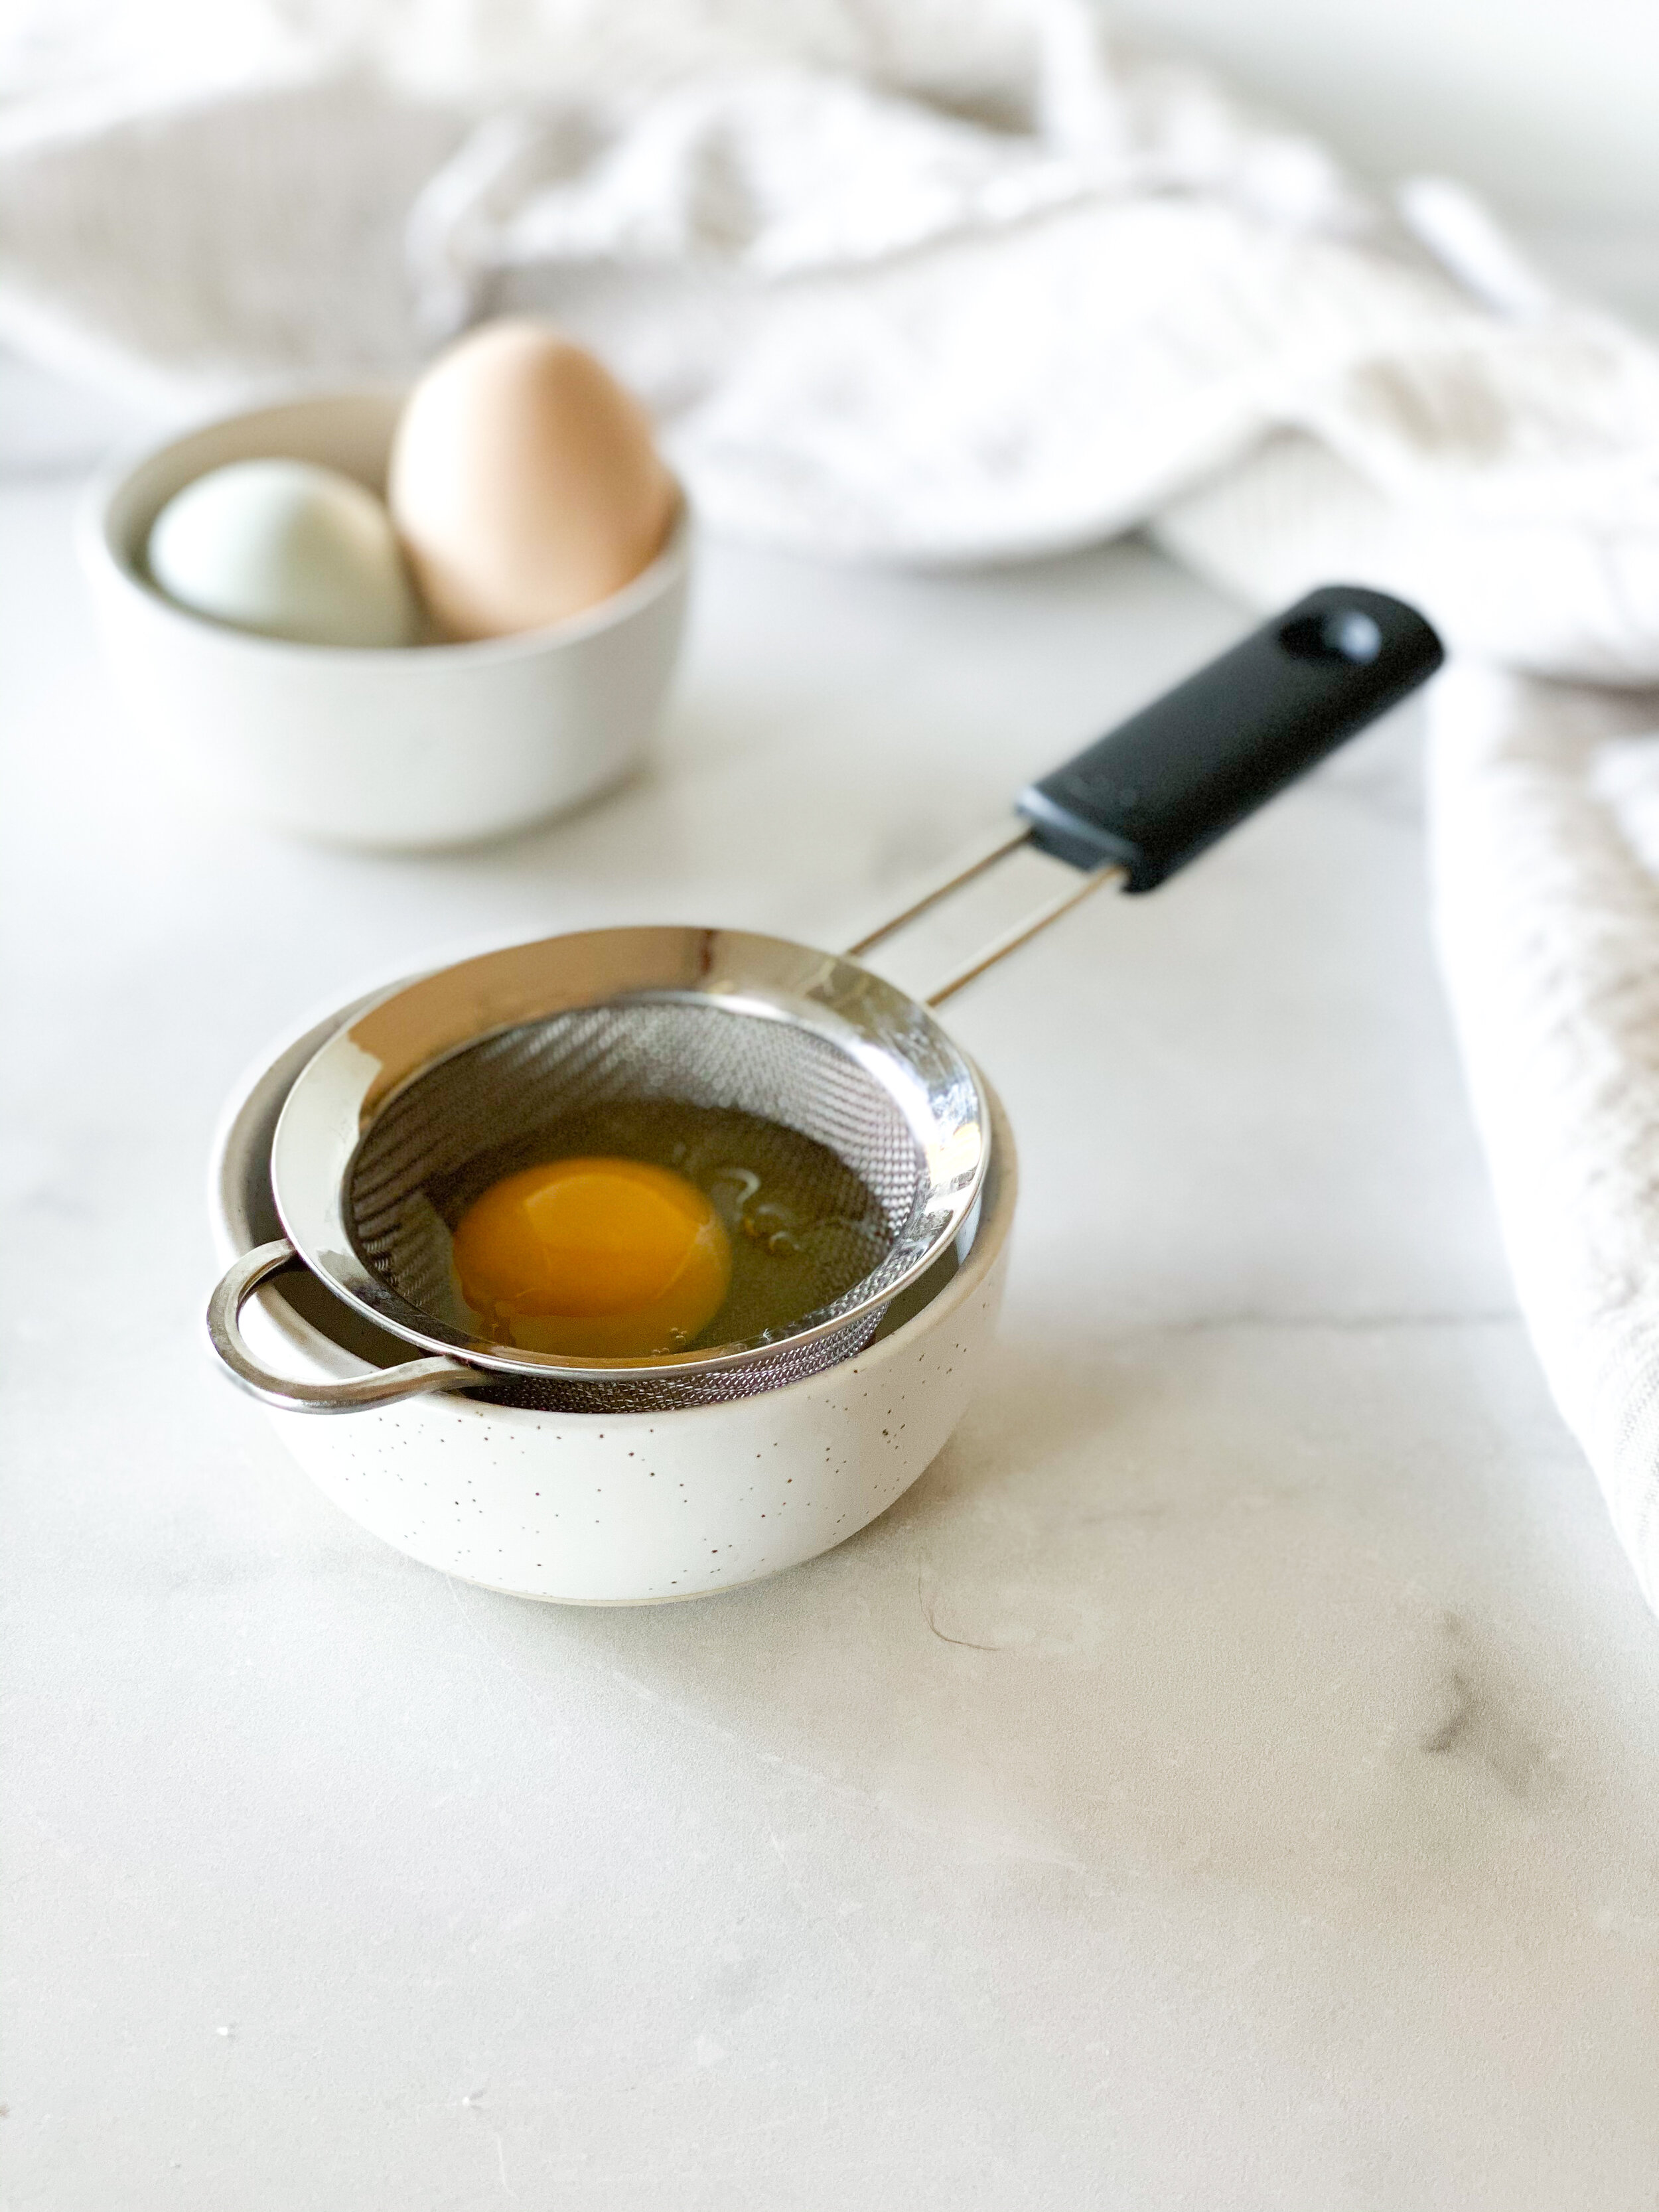
Using a strainer or fine mesh sieve is key to preventing all those little whispies! It also allows you to forgo the vinegar which, in my opinion, results in a much tastier egg.
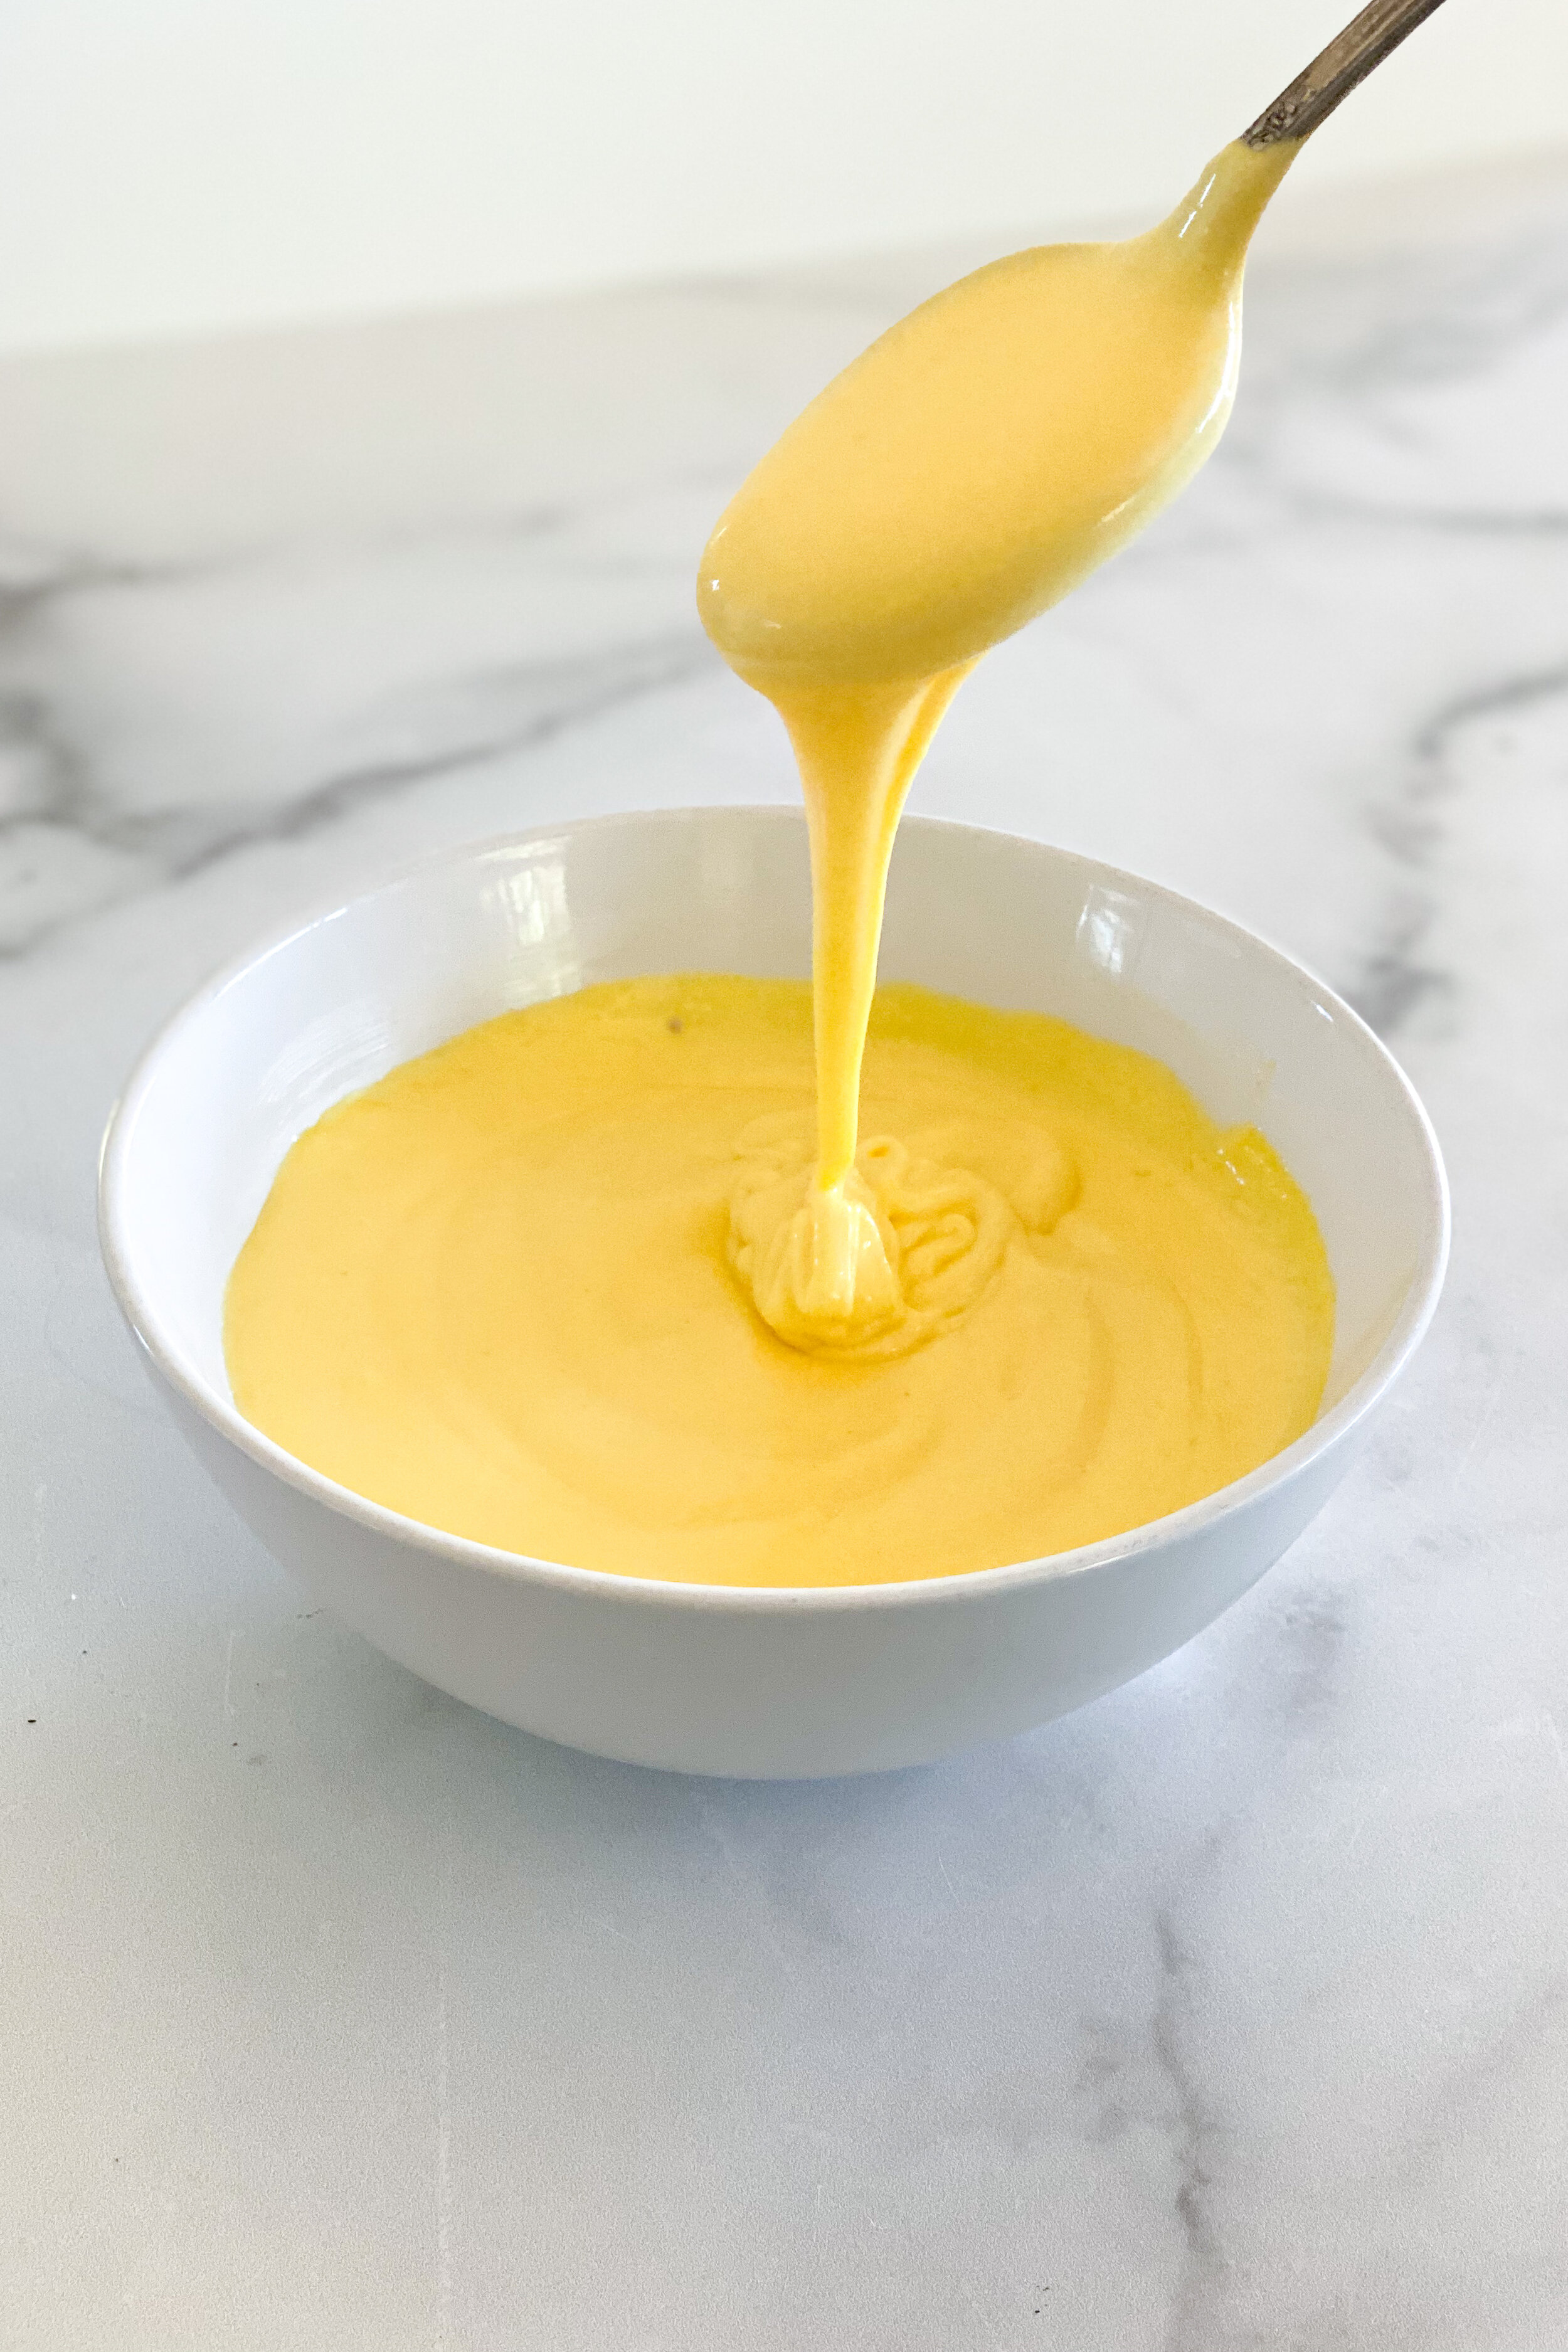
Mastering Hollandaise at Home:
Hollandaise is meant to be served warm. It’s best if used as soon as it’s ready, so I usually wait until all the other components of the meal are ready. Store it in a warm spot, like next to the stovetop, until you’re ready to serve. Serve within about 30 minutes or so. If you need to store sauce for more than 30 minutes before serving, transfer to a heatproof bowl, cover tightly with plastic wrap, and set in a small saucepan of very hot water to keep warm. Whisk until smooth before serving.
If your hollandaise sauce breaks, all is not lost! Try blending in 1-2 teaspoons of hot water. Run the blender for 30 to 60 seconds. If the sauce looks good, you can continue adding butter and/or serve.

classic eggs benedict
Ready to make this brunch staple at home like a pro? We’ve got you covered! This Classic Eggs Benedict has all the essential elements — buttery english muffins, sweet & salty ham, perfectly poached eggs, and the easiest blender hollandaise sauce. This recipe comes together in under 45 minutes and much of it can be prepped in advance, providing a stress-free morning with a restaurant-quality meal.
INGREDIENTS:
Poached Eggs:
- 4 fresh, cold eggs
Hollandaise Sauce:
- 10 tablespoons unsalted butter
- 3 egg yolks, room temperature
- 1-2 tablespoons fresh lemon juice
- 1/2 teaspoon sea salt
- pinch cayenne pepper
Assembly:
- 2 English muffins, split or 4 small slices gluten-free bread
- 4 slices Canadian bacon, ham or priosciutto (about 4 ounces)
- flakey salt + freshly ground pepper to taste
- 1 tablespoon chives, thinly sliced
INSTRUCTIONS:
For the Poached Eggs:
- Bring the water to a simmer (with bubbles forming on the bottom of the pan and only slight activity on the top). The water should be between 190-195 degrees Fahrenheit since the eggs will bring the water temp down to the optimal spot of about 180-185 degrees.
- Crack each egg, one at a time, over a fine mesh sieve placed over the pinch bowl to catch the runny part of the egg white. Transfer the eggs to a small bowl as you strain them.
- Gently slide the eggs into the pot with an inch or so in between. You can poach up to four eggs at a time in this liquid; work in batches for more. Keep in mind that throughout the process, both the eggs and the water should move as little as possible for this method.
- Set a timer for 4-5 minutes, remove the egg from the water using the slotted spoon when it's reached your desired texture, and you've got a near-perfect poached egg. Let drain on a clean kitchen towel.
For the Hollandaise:
- Fill a blender with hot water and set aside.
- Melt butter slowly in a small saucepan over medium heat until foaming. Remove pan from the stove.
- Discard water from the blender and dry well. Add egg yolks, 1 tablespoon lemon juice, salt and cayenne to blender and cover. Blend on medium high speed egg yolk mixture until lightened in color, about 30 seconds.
- Turn blender to lowest setting, remove fill cup from lid and slowly pour hot butter into blender in a thin stream, discarding the milk solids in bottom of the saucepan. Blend until creamy sauce forms.
- Adjust salt and lemon juice to taste. It should be buttery, lemony and just lightly salty. If you like a thinner consistency, add a little warm water. Pulse briefly to incorporate the ingredients one more time.
- Store until needed in a warm spot, like next to the stovetop. Serve within about 30 minutes or so. If you need to store sauce for more than 30 minutes before serving, transfer to a heatproof bowl, cover tightly with plastic wrap, and set in a small saucepan of very hot water to keep warm. Whisk until smooth before serving.
Aseembly:
- Using a toaster or oven, toast the English muffins until crisp and golden brown.
- Cook the Canadian bacon, ham, or prociutto in a large skillet over medium-high heat, flipping once, until warmed through and crisp around the edges, about 2 minutes per side.
- If poached eggs are cold, simply place them in a bowl of hot water for 30-60 seconds to reheat.
- Place two halves of the toasted english muffin, cut-side up, on each plate and butter generously. Top each with a slice of Canadian bacon, ham, or prosciutto, and then carefully top with a poached egg. Spoon hollandaise sauce over top the eggs, sprinkle with chives, flakey sea salt and freshly cracked pepper. Serve immediately.

How to: Easy Blender Hollandaise
This quick & easy take on a creamy, classic French hollandaise sauce is the perfect complement for roasted veggies, fresh seafood, and of course, eggs Benedict! My Easy Blender Hollandaise fresh and lemony, and just takes a few minutes to make. Jump to recipe.
If you’ve ordered eggs Benedict before, then you know the secret is this creamy, buttery, slightly tangy sauce. Whether it’s over eggs bene at a weekend brunch spot or a plate of roasted asparagus at family dinner, hollandaise elevates just about any dish.
Even to a skilled home chef, there are certain cooking techniques that seem to feel inherently intimidating — grilling the perfect steak, getting the perfect texture on a gluten-free cake, poaching the perfect egg and making hollandaise that doesn't break. What you might not know — this seemingly fancy sauce can be made in just a few minutes using a blender and a few staple ingredients you likely have in your kitchen.
With this how-to you will learn how to make restaurant-quality hollandaise in your home kitchen!

Some notes for the home chef before getting started:
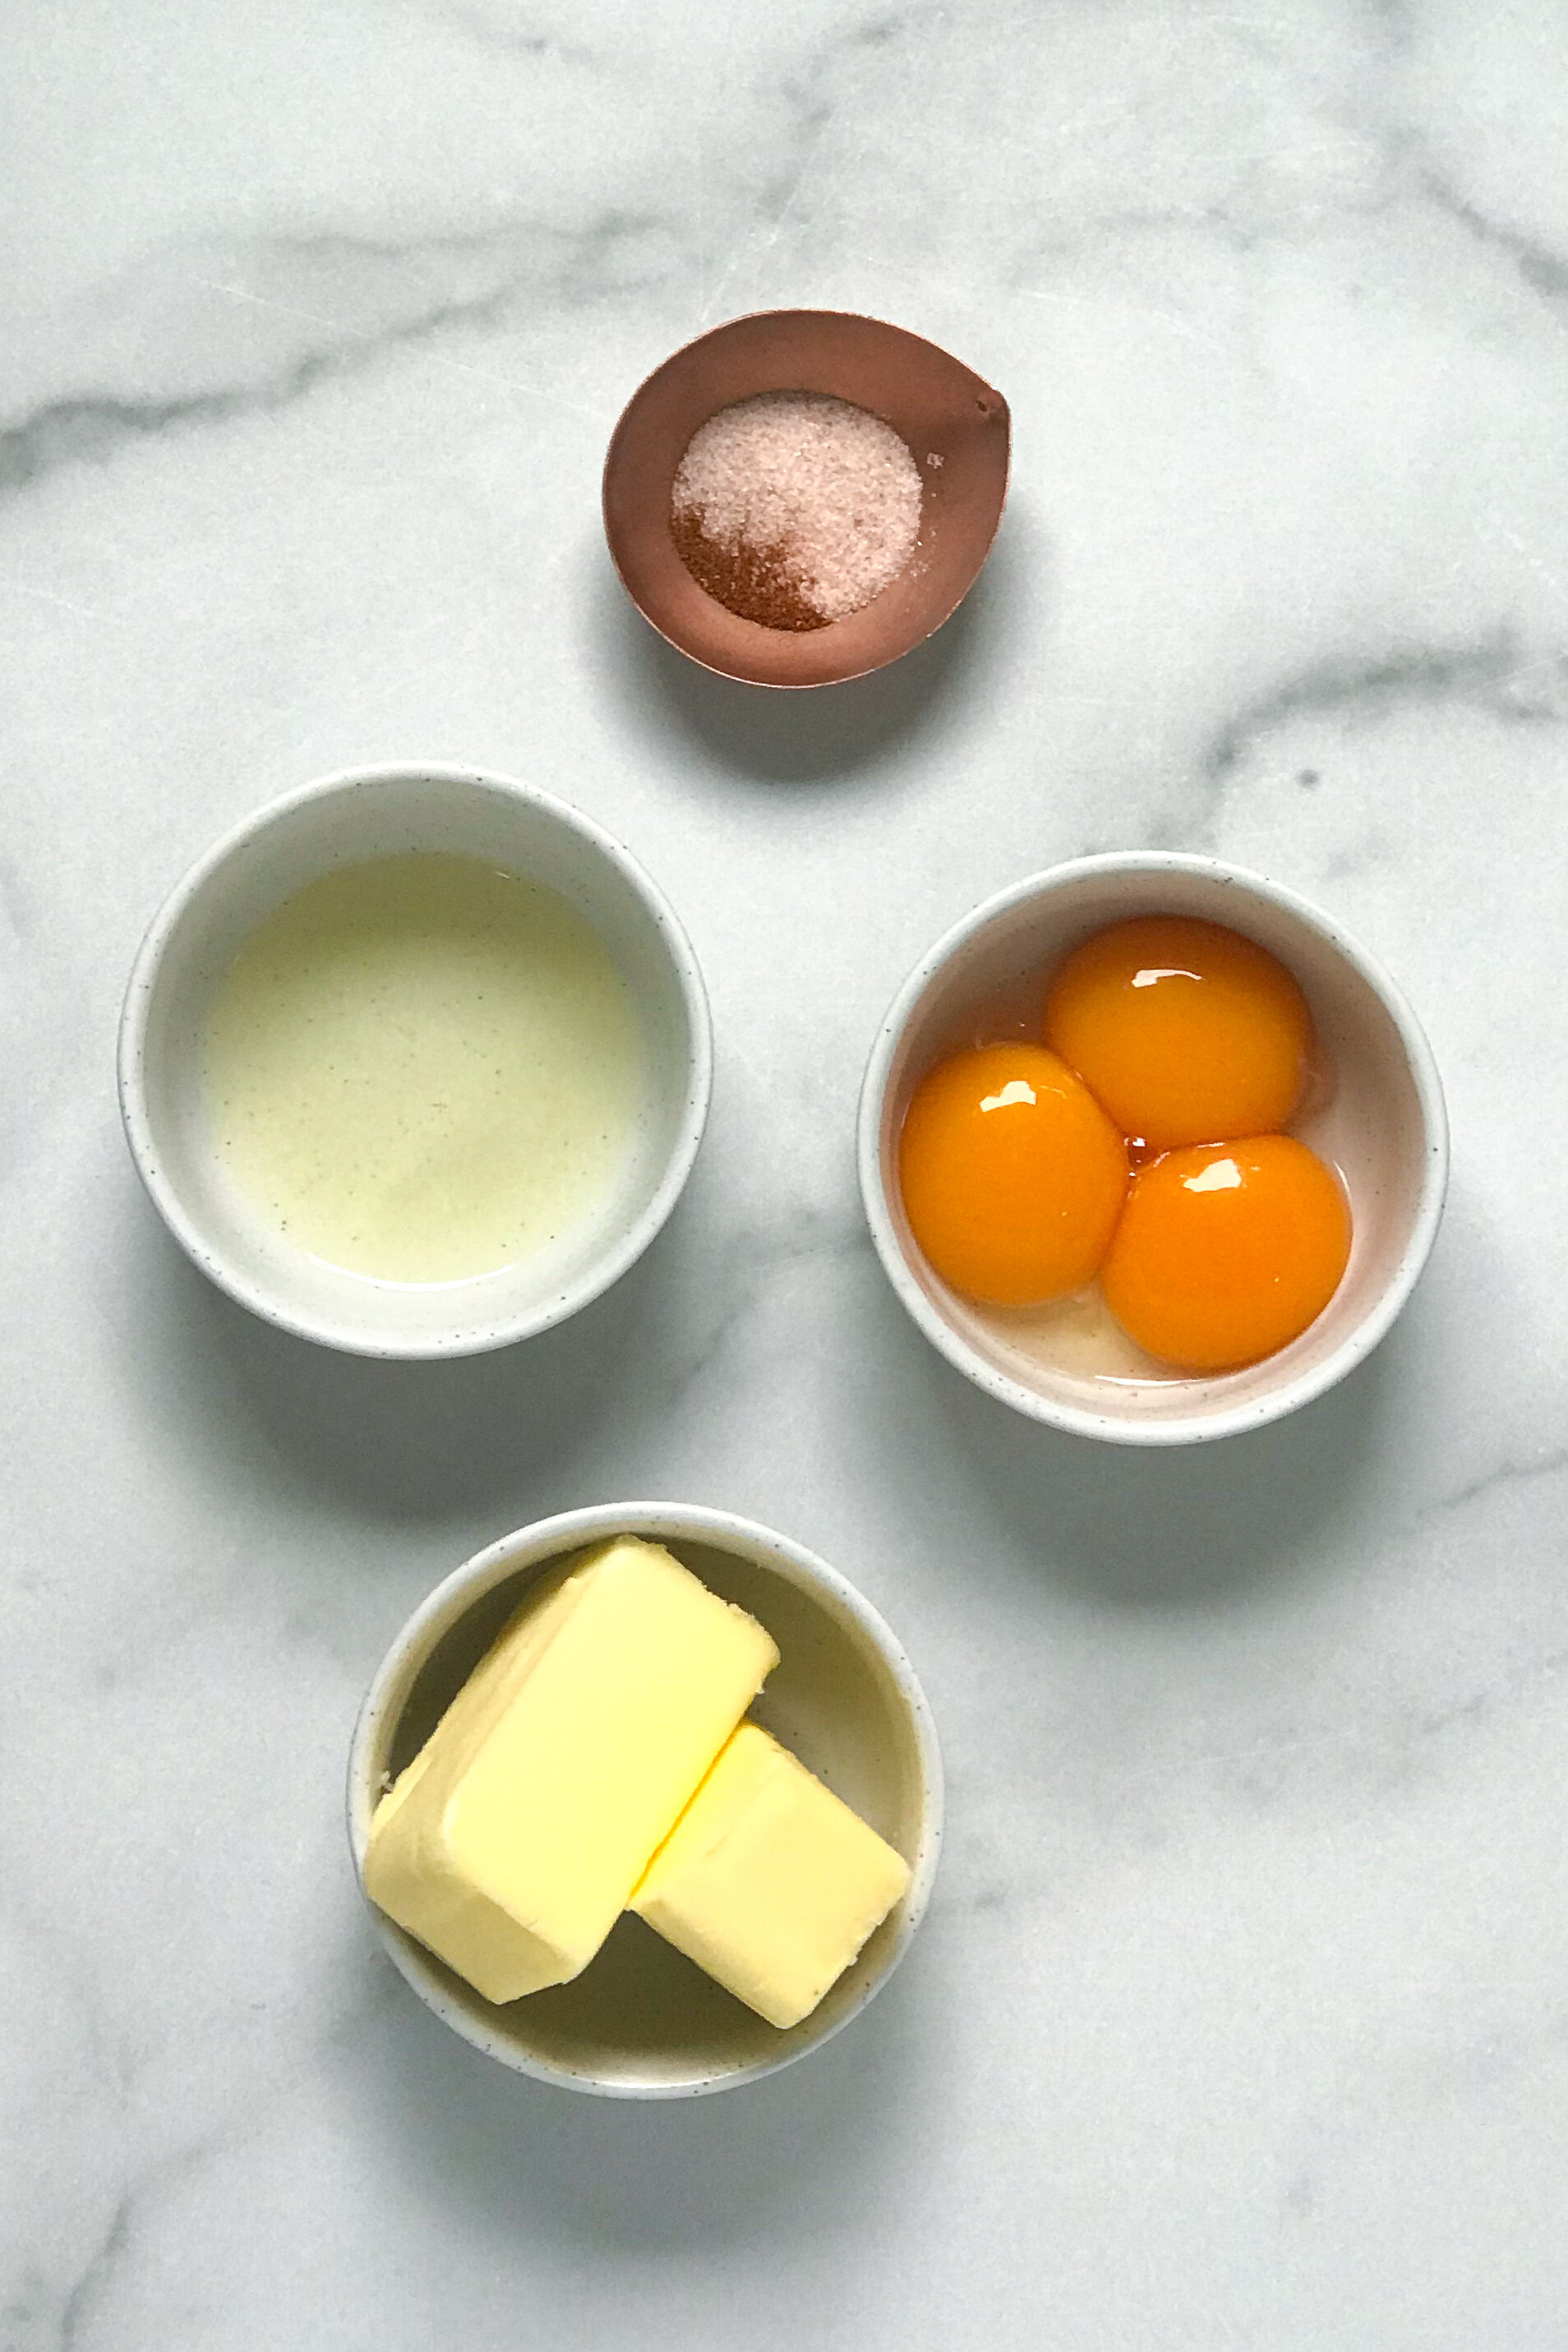
Mise en place — a French term for "everything in its place" — is not just for the pros. As a home cook, mise en place is about having everything you need before you start cooking and it allows you to focus on the task at hand. Take a moment to organize + make sure you’ve got your eggs, butter, lemon juice, sea salt, cayenne and blender ready to go so you’re able to focus on the process.
Hollandaise is meant to be served warm. It’s best if used as soon as it’s read, so I usually wait until all the other components of the meal are ready. Store it in a warm spot, like next to the stovetop, until you’re ready to serve. Serve within about 30 minutes or so. If you need to store sauce for more than 30 minutes before serving, transfer to a heatproof bowl, cover tightly with plastic wrap, and set in a small saucepan of very hot water to keep warm. Whisk until smooth before serving.
Cooking for a crowd or wanting to make your hollandaise ahead? Hollandaise can be made up to two days ahead. To serve, simply reheat in a saucepan over low heat, whisking constantly.
If your hollandaise sauce breaks, all is not lost! Try blending in 1-2 teaspoons of hot water. Run the blender for 30 to 60 seconds. If the sauce looks good, you can continue adding butter and/or serve.

easy blender hollandaise
This quick & easy take on a creamy, classic French hollandaise sauce is the perfect complement for roasted veggies, fresh seafood, and of course, eggs Benedict! My Easy Blender Hollandaise fresh and lemony, and just takes a few minutes to make.
INGREDIENTS:
- 10 tablespoons unsalted butter
- 3 egg yolks, room temperature
- 1-2 tablespoons fresh lemon juice
- 1/2 teaspoon sea salt
- pinch cayenne pepper
INSTRUCTIONS:
- Fill a blender with hot water and set aside.
- Melt butter slowly in a small saucepan over medium heat until foaming. Remove pan from the stove.
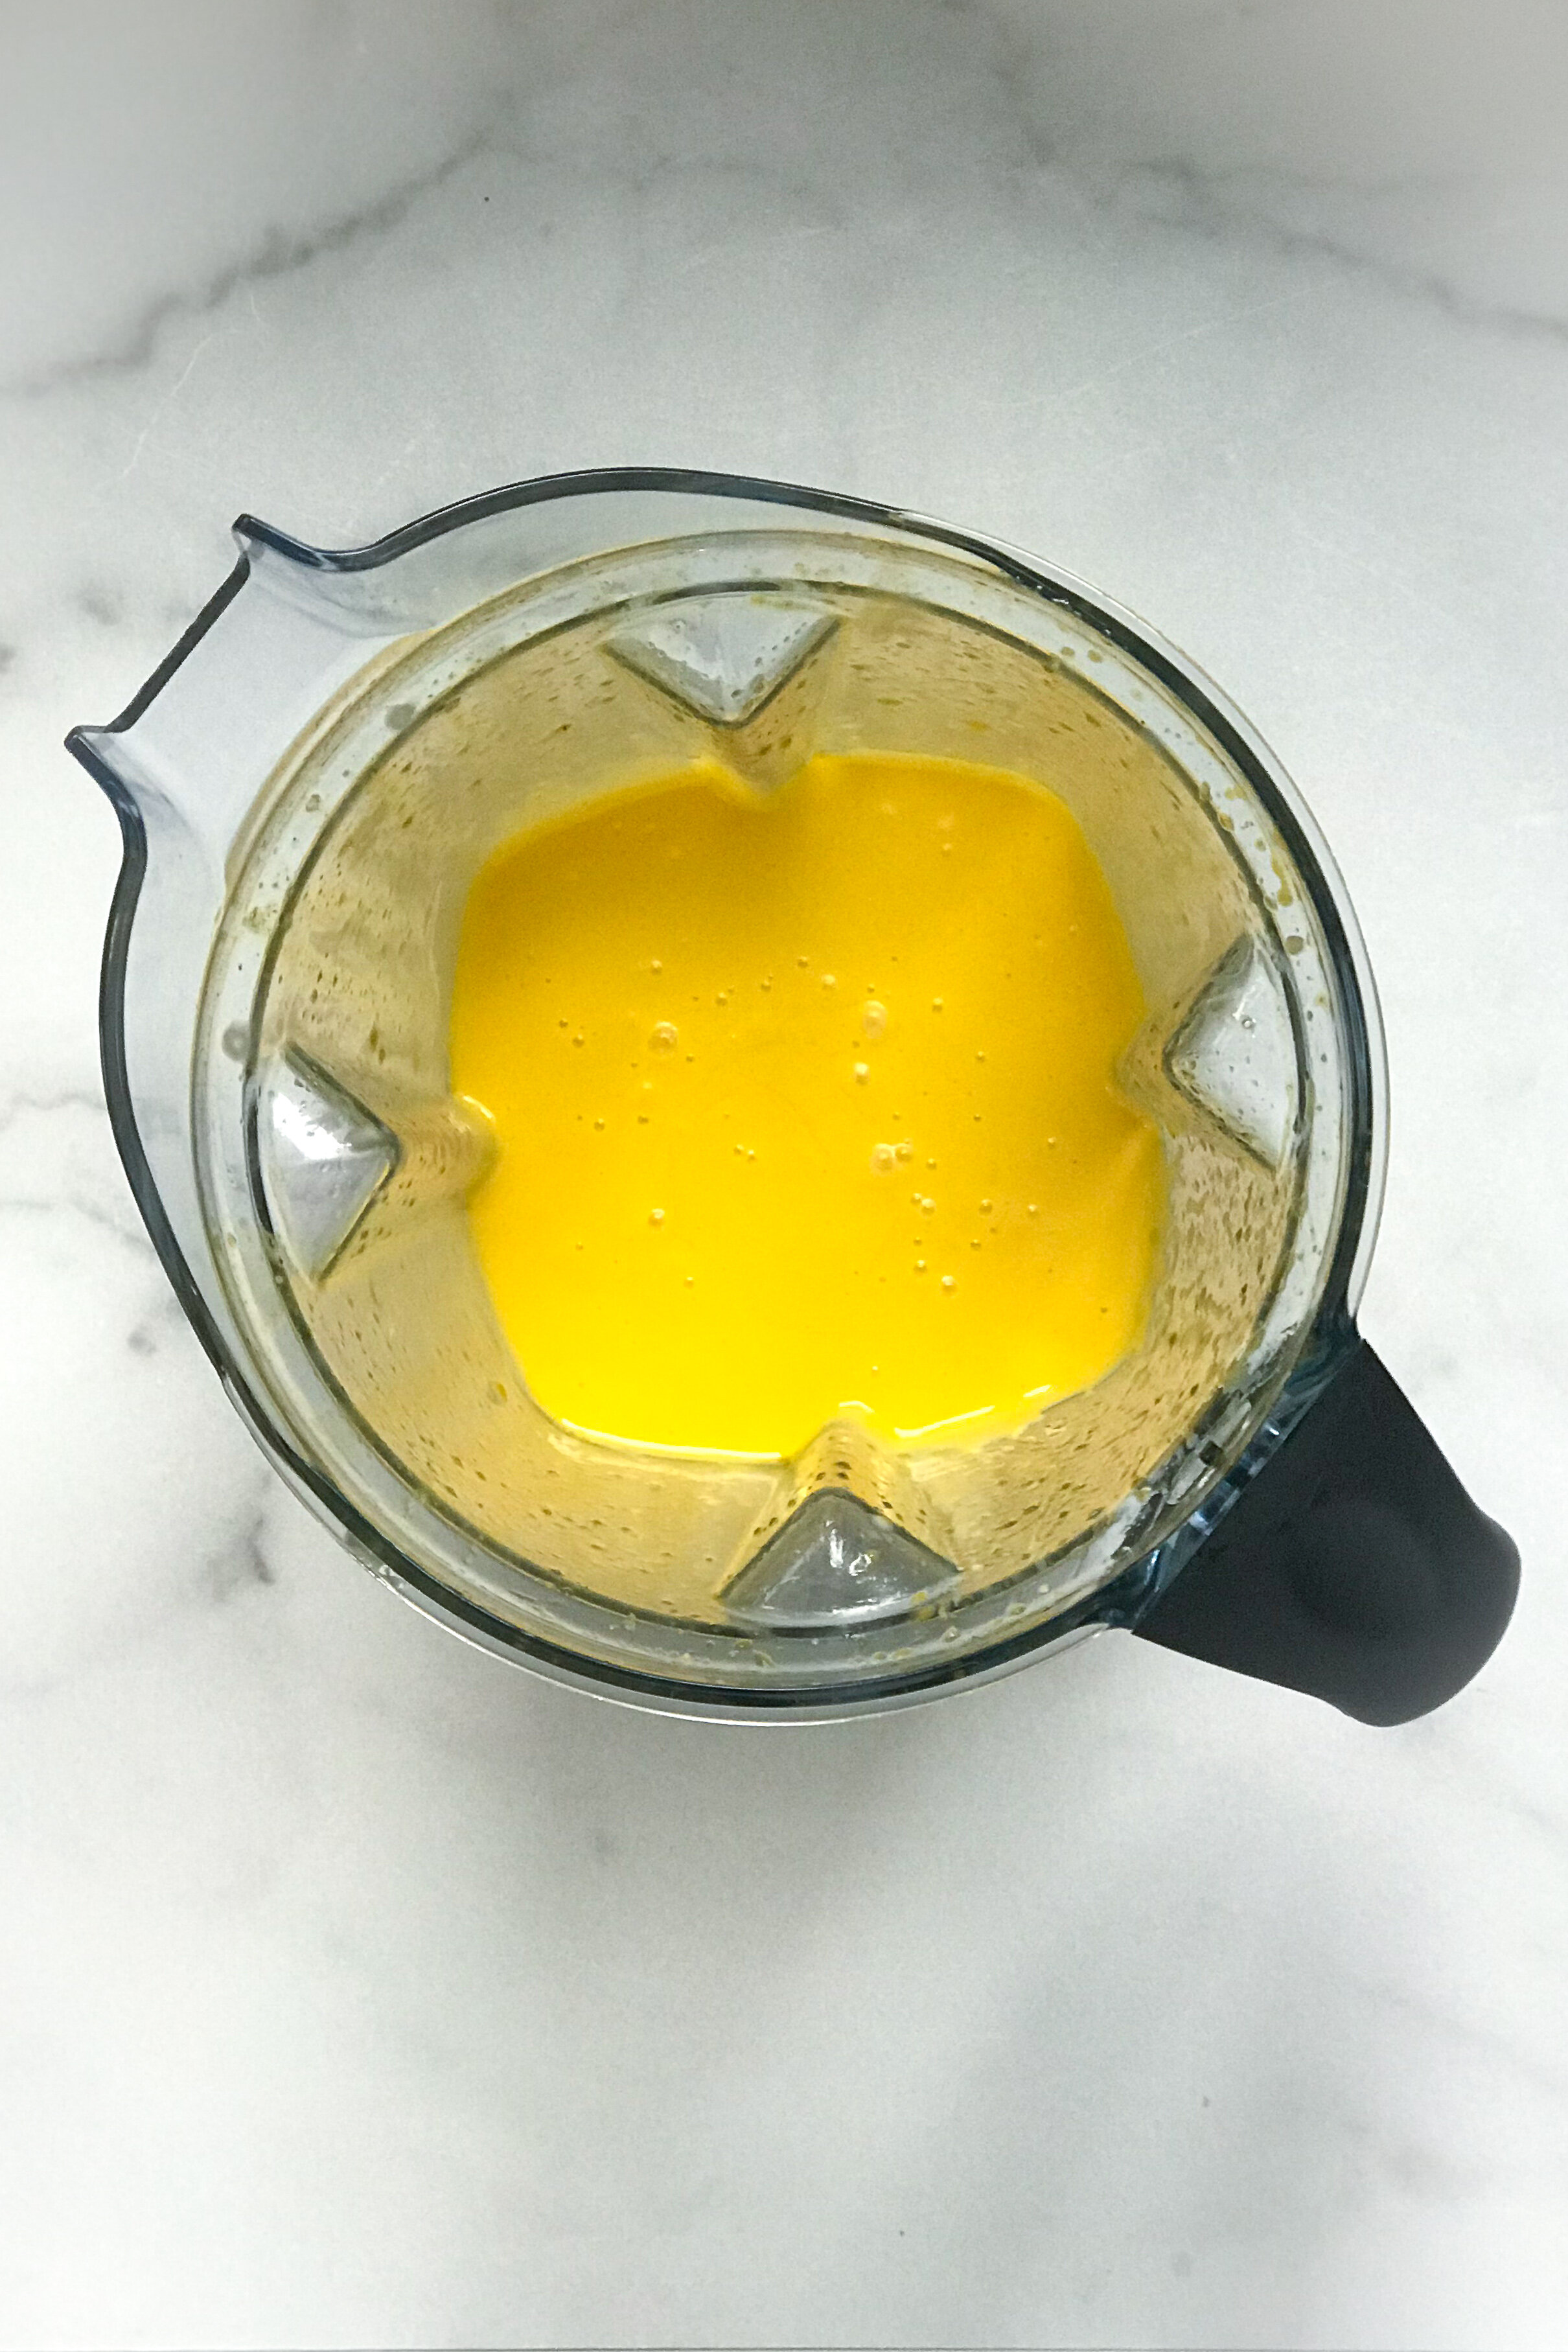
- Discard water from the blender and dry well. Add egg yolks, 1 tablespoon lemon juice, salt and cayenne to blender and cover. Blend on medium high speed egg yolk mixture until lightened in color, about 30 seconds.
- Turn blender to lowest setting, remove fill cup from lid and slowly pour hot butter into blender in a thin stream, discarding the milk solids in bottom of the saucepan. Blend until creamy sauce forms.
- Adjust salt and lemon juice to taste. It should be buttery, lemony and just lightly salty. If you like a thinner consistency, add a little warm water. Pulse briefly to incorporate the ingredients one more time.
- Store until needed in a warm spot, like next to the stovetop. Serve within about 30 minutes or so. If you need to store sauce for more than 30 minutes before serving, transfer to a heatproof bowl, cover tightly with plastic wrap, and set in a small saucepan of very hot water to keep warm. Whisk until smooth before serving.
NOTES:
- Make Ahead: Hollandaise can be made up to two days ahead. To serve, simply reheat in a saucepan over low heat, whisking constantly. If the sauce breaks while you're reheating, mix in 1 teaspoon warm water and the sauce will come together.
Don't forget to tag us @thenorthwestkitchen on Instagram when you make this Easy Blender Hollandaise!

How to: Poach An Egg
There’s nothing better than a runny, buttery yolk from a perfectly poached egg! And, with this how-to you too can learn How to Poach an Egg perfectly in your home kitchen. Jump to recipe.

Poached eggs are seriously underrated. The unsung hero of brunch. Poached eggs can turn any dish into an unctuous, buttery, saucy thing of glory.
You’re smart + have great taste — so I know you’re over there ordering poached eggs at restaurants. But when it comes to poaching at home, I’m guessing you’re feeling a little stuck. Am I right?
In our house, brunch isn't brunch without poached eggs. Just enough luxury, not too terribly fussy, and super delicious on top of roasted asparagus, a piece of sourdough toast or dressed up with smoked salmon and hollandaise.
Even to a skilled home chef, there are certain cooking techniques that seem to feel inherently intimidating — grilling a medium-rare steak, baking a soufflé that doesn't collapse [still haven't mastered this one myself!], making hollandaise that doesn't break, and poaching the perfect egg.
And while there are plenty of gadgets you can use to streamline the at-home poaching process, you don't need a single one. I promise.
With this how-to you will learn how to poach an egg perfectly in your home kitchen!

There are two main methods that will allow you to get the perfect poach sans fancy gadgets — the vortex method and the no fuss method. And neither one involve using vinegar. Shocker, I know.
The Vortex Method: The traditional French method which calls for dropping an egg into a whirlpool of simmering water. This method works wonderfully if you’re only poaching a few eggs [think breakfast for two].
The No Fuss Method: This is, in my opinion, a foolproof method for cooking perfectly poached eggs. Simply strain and drop the eggs into barely simmering water and don’t touch anything for a few minutes. The only kicker is that you have to monitor the eggs and the temperature of the water a little more closely as the eggs cook. This is my go-to poaching method when we’ve got company or I’m cooking brunch for a crowd.

Some notes for the home chef before getting started:
Mise en place — a French term for "everything in its place" — is not just for the pros. As a home cook, mise en place is about having everything you need before you start cooking and it allows you to focus on the task at hand. Take a moment to organize + make sure you’ve got your eggs, strainer, thermometer, pan, and a clean kitchen towel ready to go so you’re able to focus on the process.
Use the freshest eggs possible. Fresh eggs have firmer whites and tend to hold their shape better, which means less whispies. Old eggs aren’t a deal breaker if you use the two methods below, but it does result in a much tidier + tastier poached egg.
Yes, you do need a thermometer. This is the moment as a home chef where you have to decide it’s finally time. This is the one I use for cooking and baking.
Cold eggs work best for both of the poaching methods below, but it’s important to note that cold eggs drop the water temperature. This is where the thermometer comes in handy! As you’re poaching, you can check the temp of the water to see if you need to adjust the burner heat.
Using a strainer or fine mesh sieve is key to preventing all those little whispies! It also allows you to forgo the vinegar which, in my opinion, results in a much tastier egg.
Cook Ahead Pro Tip: If you're making them ahead, poach as many eggs as needed and store the eggs in a sealed container of cold water. To reheat, simply place them in a bowl of hot water for 30-60 seconds before serving. I use this method when I’m making eggs benedict for a crowd and it works beautifully!

how to poach an egg — vortex method
There’s nothing better than a runny, buttery yolk from a perfectly poached egg! And, with this how-to you too can learn how to poach an egg perfectly in your home kitchen. This method works best if you’re only cooking for 1-2 people.
INGREDIENTS:
- 3 quart saucepan
- small fine mesh sieve & pinch bowl
- slotted spoon
- fresh, cold eggs
INSTRUCTIONS:
- Bring the water to a simmer (with bubbles forming on the bottom of the pan and only slight activity on the top). The water should be between 190-195 degrees Fahrenheit since the eggs will bring the water temp down to the optimal spot of about 180-185 degrees.
- Create a vortex of water with a spoon, crack the egg over a fine mesh sieve placed over the pinch bowl and gently slide it into the middle of the vortex directly from the seive. If you're making a bigger batch for meal prep or for a larger family, use the no fuss method below!
- Set a timer for 3 minutes, remove the egg from the water using the slotted spoon, and you've got a near-perfect poached egg. Let drain on a clean kitchen towel.
- Serve over dressed or sautéed greens, roasted vegetables, or a slice of toast.
NOTES:

how to poach an egg — no fuss method
There’s nothing better than a runny, buttery yolk from a perfectly poached egg! And, with this how-to you too can learn how to poach an egg perfectly in your home kitchen. This no fuss method is perfect if you’re poaching eggs for the whole family.
INGREDIENTS:
- 6 quart saute pan
- small fine mesh sieve & pinch bowl
- slotted spoon
- fresh, cold eggs
INSTRUCTIONS:
- Bring the water to a simmer (with bubbles forming on the bottom of the pan and only slight activity on the top). The water should be between 190-195 degrees Fahrenheit since the eggs will bring the water temp down to the optimal spot of about 180-185 degrees.
- Crack each egg, one at a time, over a fine mesh sieve placed over the pinch bowl to catch the runny part of the egg white. Transfer the eggs to a small bowl as you strain them.
- Gently slide the eggs into the pot with an inch or so in between. You can poach up to four eggs at a time in this liquid; work in batches for more. Keep in mind that throughout the process, both the eggs and the water should move as little as possible for this method.
- Set a timer for 4-5 minutes, remove the egg from the water using the slotted spoon when it's reached your desired texture, and you've got a near-perfect poached egg. Let drain on a clean kitchen towel.
- Serve over dressed or sautéed greens, roasted vegetables, or a slice of toast.

Foolproof Gluten-Free Pancakes
These Foolproof Gluten-Free Pancakes are just as fluffy as their gluten containing counterparts. They are simple but decadent, not overly sweet, and perfectly fluffy. These pancakes are thick enough that you could add some fruit or chocolate chips and they will stand up to the challenge. Jump to recipe.

Have you ever noticed that the world at large is in a committed relationship with pancakes?
This phenomenon is something that has honestly baffled me over the years.

Confession time: I’m actually not a big fan of maple syrup and I prefer their sweet, crunchy counterpart — WAFFLES. While pancakes tend to send people into a whirlwind of nostalgia, I only have one very clear + fond memory of pancakes — I ate one pancake slathered in butter and blackberry jam most mornings at my first restaurant job and it just feels like home.
Despite my preferences, I've been trying to recreate that pancake ever since. And to think I’ve found it in a gluten-free version makes me giddy!


In our house, there’s a bit of a difference between weekday and weekend pancakes. Weekday pancakes are mixed with a fork, usually made from nutrient packed ingredients like coconut flour, eggs, and pumpkin puree. But weekend pancakes don’t have to pretend to be superfoods. They are simple but decadent in their own way. Not overly sweet and perfectly fluffy.
These pancakes are thick enough that you could add some fruit or chocolate chips and they will stand up to the challenge.
A few notes for the chef:
use coconut oil or avocado oil for frying these beauties, butter will burn at the heat needed to cook a proper pancake
stick to a 3-4 inch pancake — I use a 1/4 or 1/3 cup measuring cup to measure out the perfect amount of batter
use cast iron if possible - you’ll get a perfectly crispy edge and fluffy interior. For a large cast-iron skillet or griddle, heat it on low for a few minutes to get the heat evenly distributed. Just before ladling in your batter, turn it up to medium–low.
your first pancake probably won’t turn out quite right as it takes a bit of adjustment to get the right cooking temp & timing the flip. Just think of that first pancake as your reward for being the cook.
the most challenging part of making pancakes, of course, is keeping them warm while assembling breakfast for the whole family. My trick — heat the oven to 325 degrees, and store the pancakes there on a wire rack-lined baking tray until all the pancakes are made.
are you a sourdough geek like me? add about 200g of discard starter to the final batter for this recipe — it adds to the fluffy goodness and increases the depth of flavor.

foolproof gluten-free pancakes
These Foolproof Gluten-Free Pancakes are just as fluffy as their gluten containing counterparts. They are simple but decadent, not overly sweet, and perfectly fluffy. These pancakes are thick enough that you could add some fruit or chocolate chips and they will stand up to the challenge.
INGREDIENTS:
- 1 1/3 cups Bob's Redmill Gluten Free 1-to-1 Baking Flour [if using another brand of gf flour see note below]
- 1 teaspoon baking powder
- 1/2 teaspoon baking soda
- 1/2 teaspoon sea salt
- 2 eggs, lightly beaten
- 1 teaspoon vanilla extract
- 1/2-1 cup buttermilk OR non-dairy milk + 1-2 teaspoons white vinegar [start with 1/2 cup add more as needed]
- 2 tablespoons avocado oil
INSTRUCTIONS:
- Begin preheating a cast iron pan to low heat.
- Combine the flour, baking powder, baking soda and salt in a medium bowl.
- In a separate bowl, whisk together the eggs, 1/2 cup buttermilk [or non-dairy milk + vinegar] and oil.
- With a wire whisk, stir wet ingredients into dry ingredients until smooth. Add more buttermilk or non-dairy milk as needed.
- Let the batter rest for a 5 minutes.
- Just before ladling in your batter, turn it up to medium–low.
- Ladle approximately ⅓ cup pancake batter onto cast iron. Flip when bubbly and edges are slightly dry, about 3 - 4 minutes per side. Serve hot with your desired toppings.
*NOTES:
- if you're using an alternative brand of gluten free flour make sure it contains xanthan gum, if not add 1 tsp xanthan to the recipe
Don't forget to tag us @thenorthwestkitchen on Instagram when you make these Foolproof Gluten Free Pancakes!

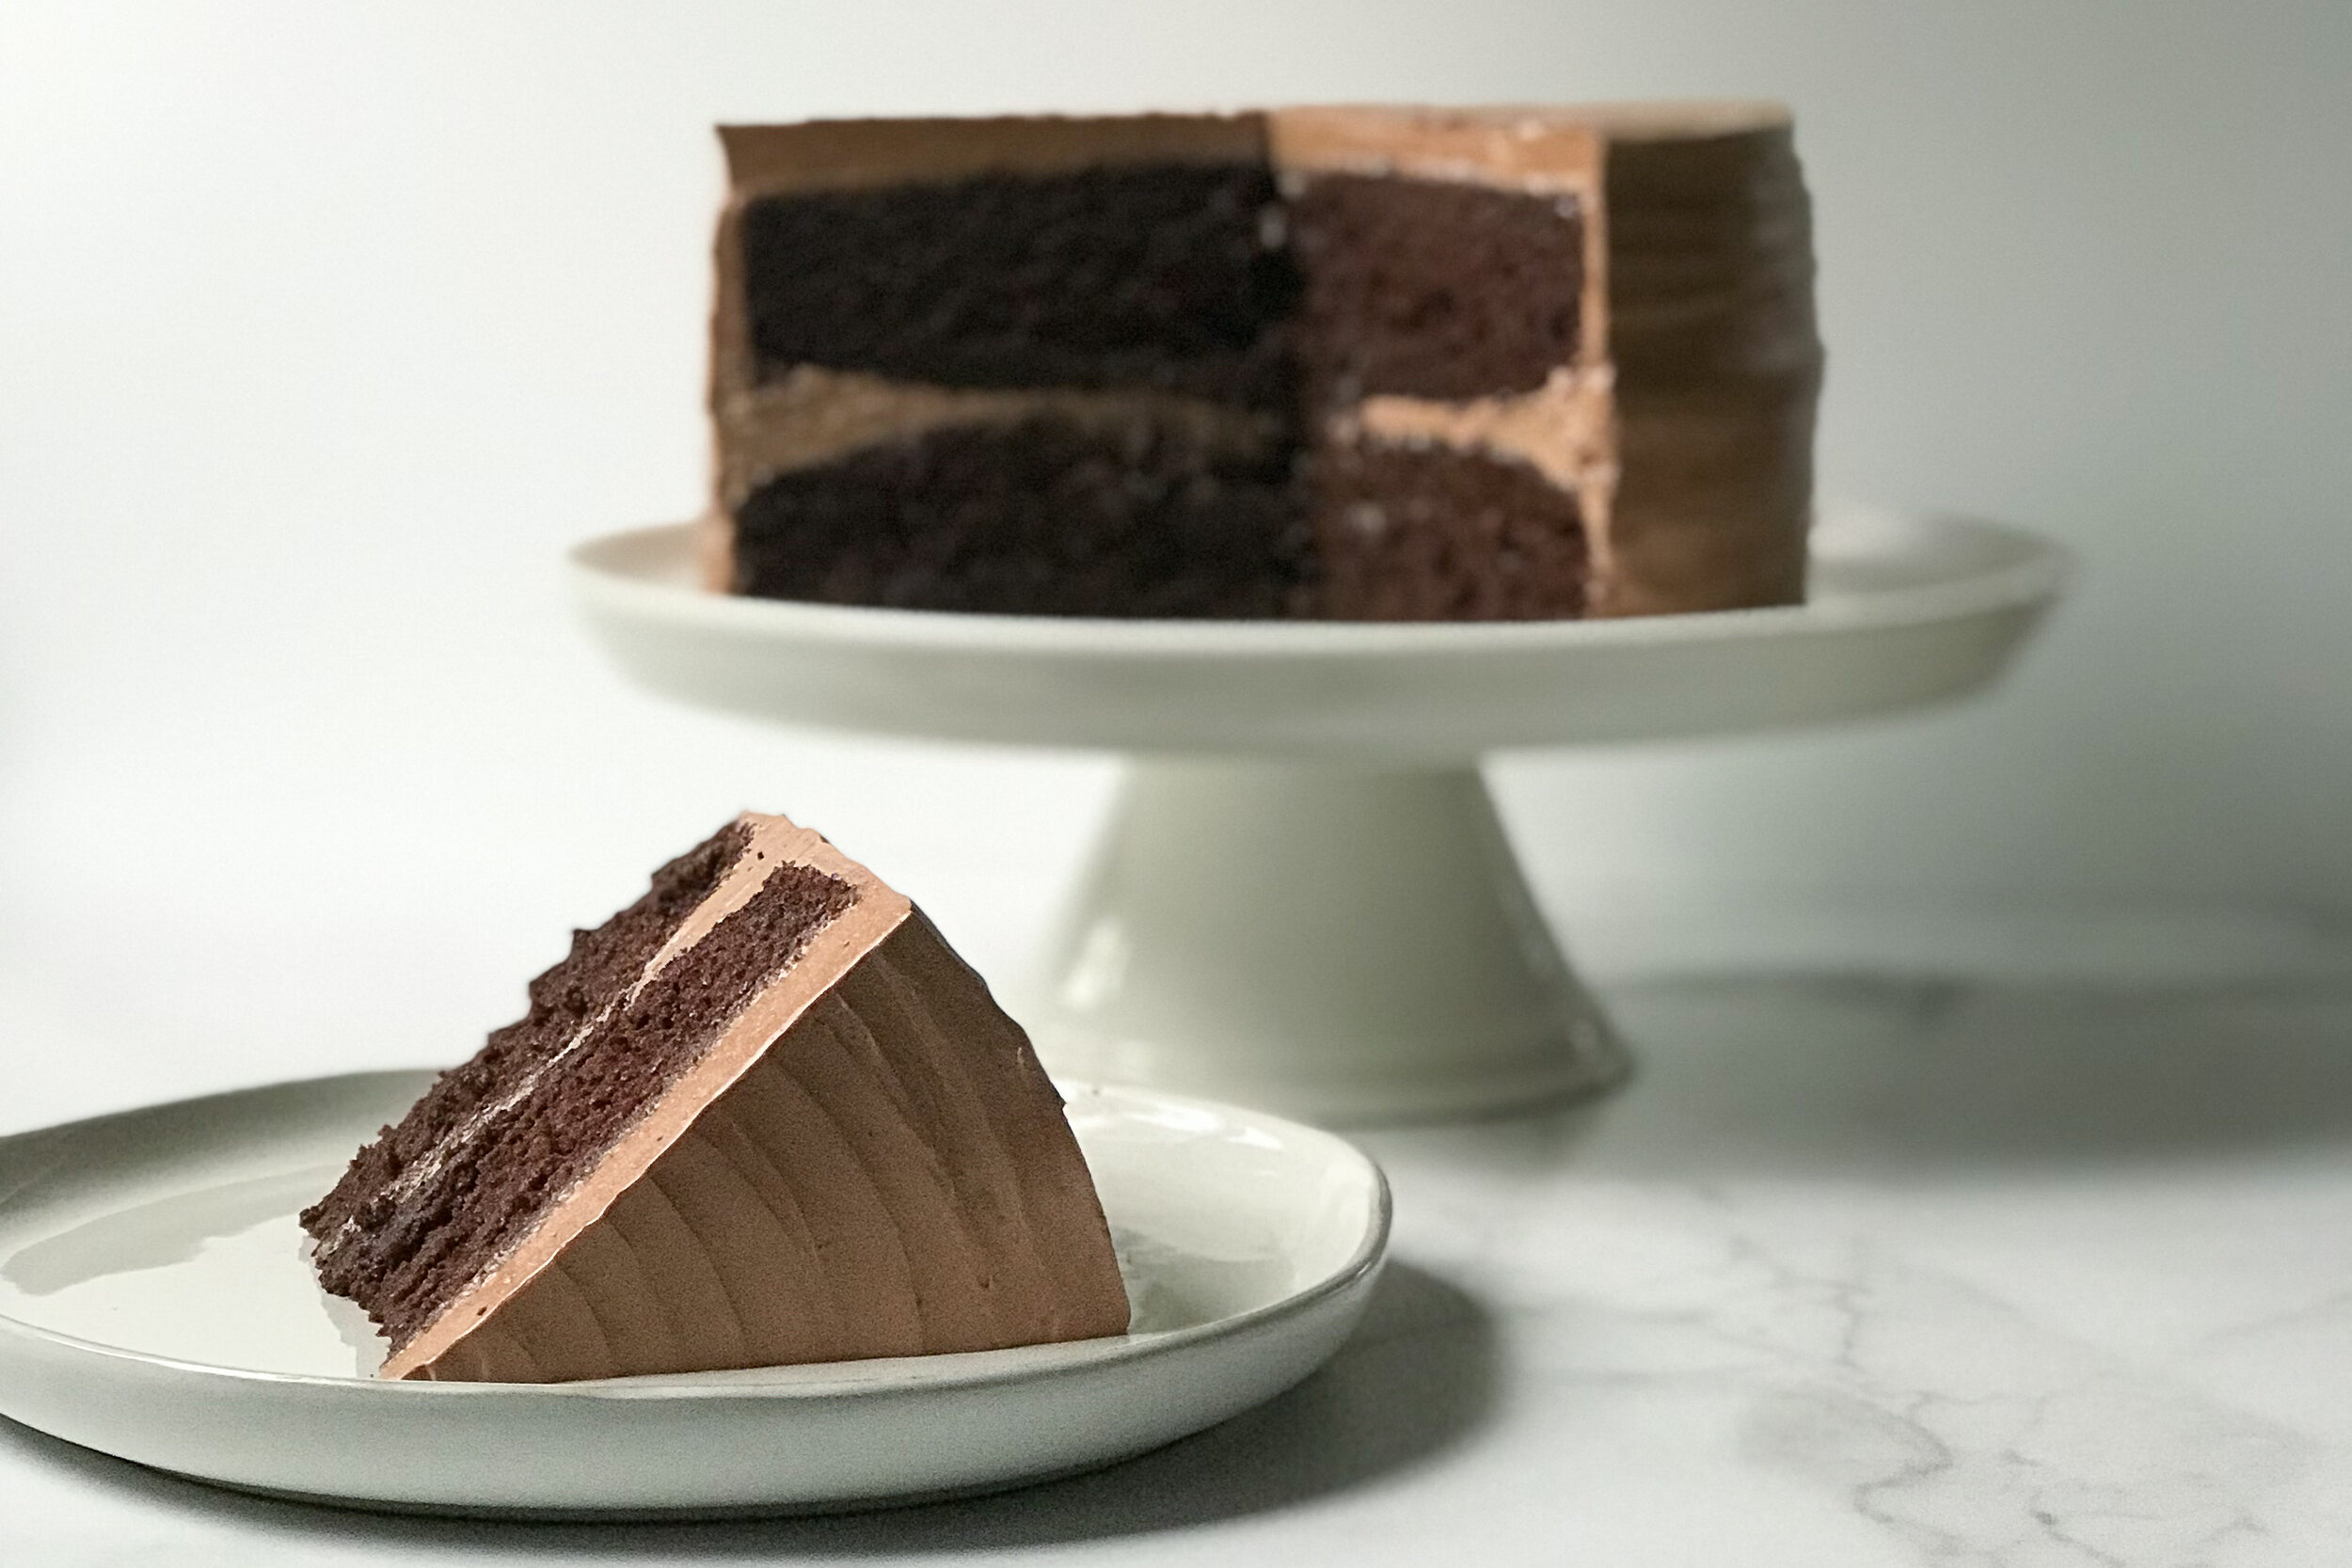
Fudgy Gluten Free Chocolate Cake with Chocolate Swiss Meringue Buttercream
This Fudgy Gluten Free Chocolate Cake isn't nearly as fussy to make as you might think. Decadent chocolate cake is layered with Chocolate Swiss Meringue Buttercream — the result is a moist cake that keeps well without refrigeration and tastes gorgeous! Jump to recipe.

Listen up friends — I am here to tell you that you don't have to settle for mediocre gluten-free cake.
Here's the real real: I understand that pretty much every blogger out there with a chocolate cake recipe says that theirs is the best ever, and you know what -- they probably believe it to be true. But I'm just arrogant enough to tell you they're wrong.
This is it. THIS is the most delicious, fudgy, moist, gluten-free chocolate cake out there.

Anyone else in a LOVE-LOVE relationship with cake? I like mine full of flavor and definitely not overly sweet!
My love affair with cake started early. Growing up my mom would make elaborate cakes for my brother and I on our birthdays. In fact, the night before my 3rd birthday party I got caught sitting on the kitchen counter nearly diving head first into my birthday cake -- hands and face covered in frosting. My mom recalls snapping a few photos before bursting out laughing and saying aloud, "I can't blame you!" I'd like to think I would have the same sense of humor for my kiddo after putting in all that hard work.
Over the years, my love for cake has only grown stronger. While others may have stories of growing up in the kitchen at their mom's hip, learning how to bake cakes & cookies -- that was a rare occurrence in my home.
Although my mom was [and still is] a very talented baker, she spent most of my childhood working 2-3 jobs to support our family, which didn't leave much time for baking. Plus, I was preoccupied with ballet and getting perfect grades so I could get out of our tiny town one day.
What I did pick up from my sweet mama: independence and a kick-ass work ethic, which landed me my first restaurant job at the age of 14 in a cute little bakery & cafe. By 15, I was making croissants, baking cakes, and playing barista. I spent my weekends and summers there throughout high school and fell in love with the process.


I know putting together a layer cake can feel a little daunting, but don't worry friend! This recipe is simple and so very doable.
Some notes for the baker before you get started:
Mise en place — a French term for "everything in its place" — is not just for the pros. As a home cook, mise en place is about having everything you need before you start cooking and it allows you to focus on the task at hand. Take a moment to organize + measure all your ingredients and gather your tools in advance. When it comes to baking + frosting a cake — it’s all about that mise en place.
An offset spatula, parchment paper, and nice serrated knife are well worth the investment.
Chill your cake layers for at least 2 hours before frosting. Do not attempt to spread frosting onto cake layers that are even remotely warm. Without fail, it will make a mess of your cake and leave you frustrated. Better yet, chill your cake layers overnight in the fridge.
If you love baking [or at least, cake-making] like me, consider buying a rotating cake turntable on a pedestal. It’s not essential, but it helps you get that smooth finish quickly and easily. A simple cake carrier will help you transport your cake to the any shindig [I can’t tell you how many times I regretted not having a carrier].
fudgy gluten free chocolate cake with chocolate swiss meringue buttercream
This Fudgy Gluten Free Chocolate Cake isn't nearly as fussy to make as you might think. Decadent chocolate cake is layered with Chocolate Swiss Meringue Buttercream — the result is a moist cake that keeps well without refrigeration and tastes gorgeous!
INGREDIENTS:
For the cake:
- 1¾ cups Bob's Redmill Gluten Free 1-to-1 Baking Flour [if using another brand of gf flour see note below]
- 1¾ cups sugar
- 1 cup cacao powder
- 1 teaspoons baking soda
- 1 teaspoons baking powder
- 1 teaspoon sea salt
- 3 eggs, room temperature
- ½ cup avocado oil
- 1 tablespoon vanilla extract
- 1 cup full-fat coconut milk [we like Aroy-D or Thai Kitchen]
- 1 cup [strong] hot coffee
For the swiss meringue buttercream:
- 1 1/4 cups sugar
- 5 large egg whites
- 3 sticks unsalted butter [room temperature]
- 9 ounces bittersweet chocolate [melted and cooled]
INSTRUCTIONS:
For the cake layers:
- Heat the oven to 350 degrees. Prepare two 8-inch cake pans with avocado oil and line the bottom with a parchment round.
- Combine the sugar, flour, cacao, baking powder, baking soda, and salt in a large bowl. Whisk gently to combine.
- Whisk together, eggs, oil, vanilla and coconut milk until well combined. Add the egg mixture to the dry ingredients and whisk until smooth.
- Carefully whisk in the hot coffee. Note: the batter will be runny -- not to worry, it bakes up beautifully!
- Divide batter evenly among prepared pans and Bake 30 to 35 minutes, rotating pans if necessary, until a cake tester inserted into the center of each cake comes out clean. Let cool in pans set on a cooling rack for 15 minutes, then turn out onto a rack to finish cooling completely.
For the swiss meringue buttercream:
- Whisk sugar and egg whites in a heatproof mixing bowl. Place over a pot of simmering water and whisk constantly until sugar is completely dissolved, 2 to 3 minutes. Test by rubbing some of the egg white mixture between your fingers -- if you don't feel any sugar granules, it's ready! Remove from heat.
- With an electric mixer fitted with the whisk attachment, whisk on high speed until cool [test by touching bottom of bowl], 7 to 10 minutes.
- Switch to the paddle attachment. With mixer on medium-high speed, add softened butter, 2 tablespoons at a time, until combined.
- Slowly pour in the cooled chocolate and mix until fully combined.
- Frost the [completely cooled] cake layers as your heart desires!
*NOTES:
- if you're using an alternative brand of gluten free flour make sure it contains xanthan gum, if not add 1 tsp xanthan to the recipe
- Chill your cake layers for at least 2 hours before frosting. Do not attempt to spread frosting onto cake layers that are even remotely warm. Without fail, it will make a mess of your cake and leave you frustrated. Better yet, chill your cake layers overnight in the fridge.
- Troubleshooting with the buttercream: If the buttercream [or your kitchen] seems too warm, stick the bowl in the fridge for a few minutes, then continue beating. If it's too cold, let the frosting warm up to room temperature, then continue beating until it comes together. This can take several minutes, so don't give up!
Don't forget to tag us @thenorthwestkitchen on Instagram when you make this Fudgy Gluten-Free Chocolate Cake!

Ginger Green Smoothie
This Ginger Green Smoothie is made with frozen greens, lemon, fresh ginger, and boosted with moringa, golden flax, maca, and goat milk protein. It’s the perfect not-so-sweet, refreshing green smoothie! Jump to recipe.

You know that phrase “once you know, you can unknow” that I use so often? Smoothies fall into that category for me. When I went into my nutritional therapy program back in 2013 — I was convinced that a green smoothie packed with frozen fruit was one of the healthiest breakfast options in front of me. What I didn’t know? Fruit laden smoothies aren’t necessarily great for someone with a history of blood sugar issues and no matter how lovely the ingredients, if you’re not chewing your food, you’re not releasing salivary amylase [the enzyme that helps you break down carbohydrates and triggers the cascade of digestion].
My favorite smoothie hack? Add some crunchy goodness to the top of your smoothie that compliment the flavor and take a few bites before you dive in with your reusable straw! My favorite cruncheis for this ginger green smoothie are sliced blanched almonds and hemp seeds!

This Ginger Green Smoothie is the first smoothie recipe I tackled when this new Vitamix hit my doorstep and it’s been on repeat ever since! It’s super refreshing + detoxifying and packed with protein. With my family history of blood sugar + metabolic issues, I always opt for a low sugar option. Fruit-laden smoothies tend to spike my blood sugar and leave me feeling like dirt — so you best believe this recipe is packed with healthy fat, fiber, and protein to support digestion + blood sugar balance.
I boosted the nutrient density of this smoothie by adding pasture-raised goat whey protein [a mouthful, I know], gelatinized maca, golden flax, and moringa. I personally don’t tolerate traditional cow’s milk whey protein but I do really well with goat milk whey protein and it’s packed with amino acids for cellular repair + growth and glutathione production.
The moringa plant is native to Africa & Asia and it’s an excellent source of Vitamin A, Potassium, Calcium, and Vitamin C. It’s also a powerful antioxidant, anti-inflammatory, protects & nourishes skin, and slows aging. Note: Moringa can have laxative effects in large quantities, so don’t overdo it in this smoothie!

My tips for thick, creamy, and well-balanced smoothies:
Use a high power blender! If you’ve never owned a high power blending like a Vitamix — you truly don’t know what you’re missing. It has truly transformed the texture of my smoothies and made blending so much more efficient. I have the Explorian E320 from Costco — it’s a great, budget-friendly option for those of us who don’t want to spend $700+ on our first high-speed blender and it comes with a 7-year warranty.
For easier blending, start with your liquid, then add frozen veggies & fruit, then finish with boosts, powders, and fiber.
Add some healthy fat and a complete protein to create a balanced meal — I like this grass-fed beef protein isolate from Equip Foods and this pasture-raised goat whey protein from Mt. Capra. Collagen, however good for your hair, skin, and gut is more of a nutrient boost than a complete protein since it doesn’t have a full amino acid profile.

GINGER GREEN SMOOTHIE
This Ginger Green Smoothie is made with frozen greens, lemon, fresh ginger, and boosted with moringa, golden flax, maca, and goat milk protein. It’s the perfect not-so-sweet, refreshing green smoothie!
INGREDIENTS:
1½- 2 cups unsweetened almond milk (or other non-dairy milk)*
juice of 1/2 lemon
½ frozen banana* OR 3-4 drops stevia extra & 4 ice cubes
1 cup frozen chopped greens like spinach or kale
1 inch peeled fresh ginger, chopped
2 scoops Mt. Capra Goat Whey Protein or protein of choice
1 tablespoon ground flaxseed
1 teaspoon maca
pinch of sea salt
sprinkle with sliced blanched almonds & hemp seeds
INSTRUCTIONS:
- Starting with the almond milk + lemon juice first, add all of the ingredients to your high speed blender.
- Blend until smooth and creamy — this may take a moment, so be patient!
- Pour into your favorite bowl or cup, top with sliced blanched almonds & hemp seeds, and enjoy!
*NOTES:
- Start with 1½ cup milk (if using frozen bananas) and increase as needed.
- If you don't have frozen bananas on hand, just use fresh bananas, 4 ice cubes and about 1 cup almond milk instead, adding more as needed.
- I use this grass-fed beef protein isolate from Equip Foods and this pasture-raised goat whey protein from Mt. Capra

Roasted Cauliflower Hummus
This Roasted Cauliflower Hummus is every bit as smooth, creamy, and flavorful as the real deal. It’s also keto-friendly and a fantastic way to sneak more veggies into your day. Jump to recipe.

Cauliflower has taken many false forms over the years as we attempt to “low-carb” everything to death. Most folks are just tired of hearing yet another way they can manipulate the vegetable into being something it’s not. One of the reasons cauliflower is beloved by many is how versatile it really is but let’s be honest — cauliflower is a lousy substitute for mashed potatoes and an even lousier substitute for pizza crust [don’t even get me started].
While I may not get the cauliflower craze, here’s what I do get — navigating food intolerances. Which, for me, include legumes and garlic. Yep, I said it. Let us all grieve together…
My conundrum? I love hummus — my college roommate got me hooked on it many years ago after she returned from a trip to Israel. We’d pop over to her place for a snack in between classes and she’d spread hummus on bread and top it with cheese and place it in the toaster oven until the cheese was just melted. I have no idea what she called it, but it was damn delicious.

When I figured out my food intolerances many years ago, I realized hummus and I would have to part ways and to say their was a mourning process would be an understatement. Enter cauliflower.
This Roasted Cauliflower Hummus is a cauliflower cameo I can get into.
It’s not weird to dip your vegetables in vegetables right? I hope not, because this dip is every bit as smooth, creamy, and flavorful as the real deal.
You’ll notice the ingredients list in this roasted cauliflower hummus are very similar to traditional hummus — including lemon juice, tahini, olive oil, and salt. It’s as simple as replacing the chickpeas with the roasted cauliflower and adding a little extra punch with one of my favorite seasonings - za’atar.
If you aren’t familiar, za’atar is a Middle Eastern Spice mixture made up of thyme, oregano, sesame seeds, sumac, and sea salt. It’s fragrant, herbal, and tangy — and you’re going to want to put it on everything. I picked up this za’atar blend from Amazon since it’s not available at my local grocery store but you can also make a batch yourself by combining:
2 tablespoons ground thyme [if using regular dried thyme, double the amount]
2 tablespoons toasted sesame seeds
2 teaspoons sumac
1/2 teaspoon coarse salt
Store in an airtight container.

My tips for smooth & creamy hummus:
Use a high power blender! If you’ve never owned a high power blending like a Vitamix — you truly don’t know what you’re missing. I have the Explorian E320 from Costco — it’s a great, budget-friendly option for those of us who don’t want to spend $700+ on our first high-speed blender and it comes with a 7-year warranty.
For easier blending, start with liquid then add everything else.

roasted cauliflower hummus
This Roasted Cauliflower Hummus is every bit as smooth, creamy, and flavorful as the real deal. It’s also keto-friendly and a fantastic way to sneak more veggies into your day.
INGREDIENTS:
- 1 medium head cauliflower, broken into small pieces
- 1/4 cup olive oil
- 1 tablespoon za'atar
- 2 teaspoons coarse sea salt, divided
- 2 green onions
- 1/3 cup tahini
- juice of 1 lemon
- 1/2-1 cup water
- parsley, olive oil, and za'atar for garnish
- crackers or flat bread and fresh veggies for serving
INSTRUCTIONS:
Preheat oven to 400 degrees. Place cauliflower on sheet pan, drizzle with 1/4 cup olive oil, top with za'atar, and 1 teaspoon sea salt and toss to combine. [I know this seems like a lot of oil but trust me - the oil will soak up all of the roasted cauliflower bits and seasonings.]
Roast for 25 minutes, stirring halfway through. Remove from oven and cool.
Pour 1/2 cup water into a high speed blender or food processor. Then add roasted cauliflower [make sure to pour in all that glorious olive oil], green onions, tahini, lemon juice, remiaining salt. Blend on high until smooth and creamy. Add water as needed for a thinner consistency or if it's not blending easily.
Transfer to a serving bowl and garnish with olive oil, za'atar, and chopped parsley. Serve with crackers or flatbread and fresh veggies.
NOTES:
- Start with 1/2 cup water and increase as needed to reach your desired consistency.
Don't forget to tag us @thenorthwestkitchen on Instagram when you make our Roasted Cauliflower Hummus!

Boosted Tahini Espresso Smoothie
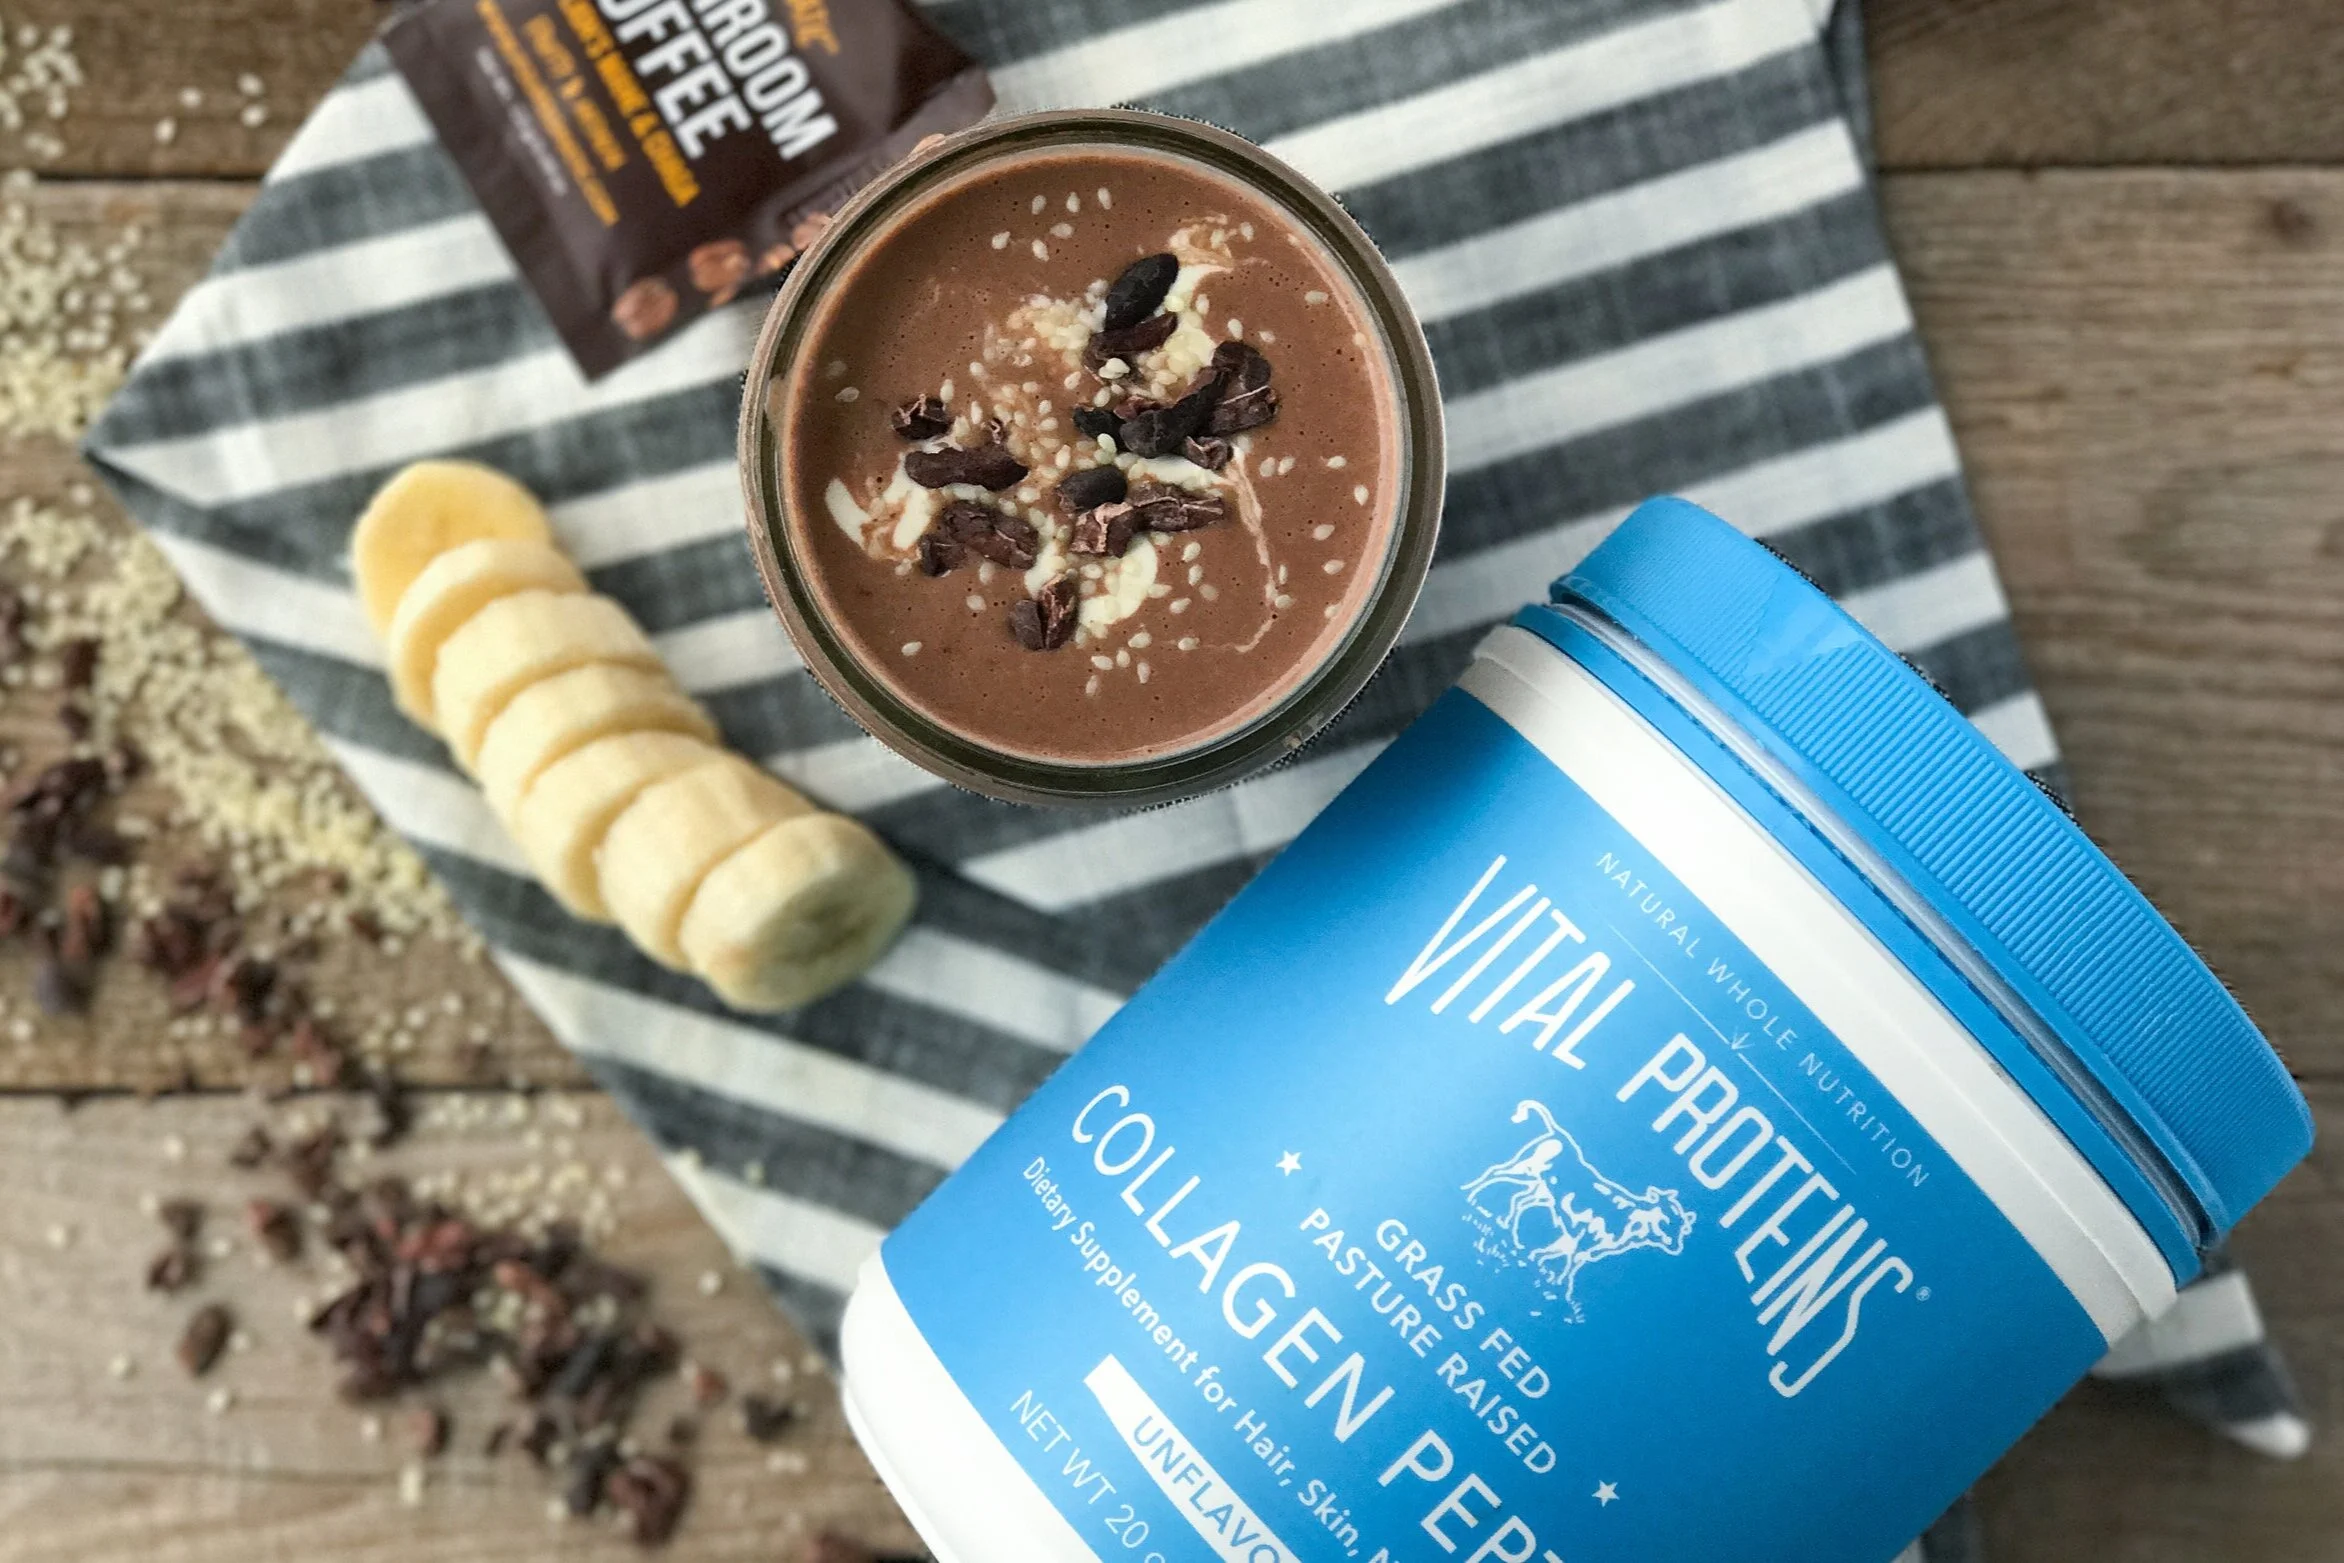
This Boosted Tahini Espresso Smoothie is made with banana, cacao, tahini and boosted with maca, collagen, mushroom coffee. Not only is this smoothie packed with nutrients, it’s thick enough to eat with a spoon! Jump to recipe.
You know that phrase “once you know, you can unknow” that I use so often? Smoothies fall into that category for me. When I went into my nutritional therapy program back in 2013 — I was convinced that a green smoothie packed with frozen fruit was one of the healthiest breakfast options in front of me. What I didn’t know? Fruit laden smoothies aren’t necessarily great for someone with a history of blood sugar issues and no matter how lovely the ingredients, if you’re not chewing your food, you’re not releasing salivary amylase [the enzyme that helps you break down carbohydrates and triggers the cascade of digestion].
My favorite smoothie hack? Add some crunchy goodness to the top of your smoothie that compliment the flavor and take a few bites before you dive in with your reusable straw!

This Boosted Tahini Espresso Smoothie has all the flavor you’d expect without a ton of sugar. With my family history of blood sugar + metabolic issues, I always opt for a low sugar option. Fruit-laden smoothies tend to spike my blood sugar and leave me feeling like dirt — so you best believe this recipe is packed with healthy fat, fiber, and protein to support digestion + blood sugar balance.
I boosted the nutrient density of this smoothie by adding raw cacao, gelatinized maca, Vital Proteins Collagen Peptides, beef protein isolate and Four Sigmatic Mushroom Coffee! This particular mushroom coffee blend from Four Sigmatic has Lion's Mane and Chaga as well as the high quality shade-grown coffee and rhodiola.

My tips for thick, creamy, and well-balanced smoothies:
Use a high power blender! If you’ve never owned a high power blending like a Vitamix — you truly don’t know what you’re missing. It has truly transformed the texture of my smoothies and made blending so much more efficient. I have the Explorian E320 from Costco — it’s a great, budget-friendly option for those of us who don’t want to spend $700+ on our first high-speed blender and it comes with a 7-year warranty.
For easier blending, start with your liquid, then add frozen veggies & fruit, then finish with boosts, powders, and fiber.
Add some healthy fat and a complete protein to create a balanced meal — I like this grass-fed beef protein isolate from Equip Foods and this pasture-raised goat whey protein from Mt. Capra. Collagen, however good for your hair, skin, and gut is more of a nutrient boost than a complete protein since it doesn’t have a full amino acid profile.

BOOSTED TAHINI ESPRESSO SMOOTHIE
This Boosted Tahini Espresso Smoothie is made with banana, cacao, tahini and boosted with maca, collagen, mushroom coffee. Not only is this smoothie packed with nutrients, it’s thick enough to eat with a spoon!
INGREDIENTS:
¾- 1 cups unsweetened almond milk (or other non-dairy milk)*
½ frozen banana* OR 3-4 drops stevia extract & 4 ice cubes
1 cup frozen riced cauliflower (or frozen zucchini)
1 tablespoon raw cacao or unsweetened cocoa powder
1 packet four stigmatic mushroom coffee (lions make & chaga) or 2 teaspoons espresso powder
1 scoop Vital Proteins Collagen Peptides
2 scoops protein powder of choice
2 tablespoons tahini
1 tablespoon ground flaxseed
1 teaspoon maca
pinch of sea salt
sprinkle with cacao nibs & toasted sesame seeds
INSTRUCTIONS:
- Starting with the almond milk first, add all of the ingredients to your high speed blender.
- Blend until smooth and creamy — this may take a moment, so be patient!
- Pour into your favorite bowl or cup, top with cacao nibs and sesame seeds, and enjoy!
*NOTES:
- Start with ¾ cup milk (if using frozen bananas) and increase as needed.
- If you don't have frozen bananas on hand, just use fresh bananas, 4 ice cubes and about 1 cup almond milk instead, adding more as needed.
- I use this grass-fed beef protein isolate from Equip Foods and this pasture-raised goat whey protein from Mt. Capra
Don't forget to tag us @thenorthwestkitchen on Instagram when you make this Boosted Tahini Espresso Smoothie!

Sausage Egg Bites with Chimichurri
These Sausage Egg Bites with Chimichurri are my favorite go-to fat & protein filled breakfast! They are keto + paleo friendly and you can make them ahead of time and reheat them in the morning for a quick breakfast. Jump to recipe.

One of the biggest struggles for our family is getting in a nourishing + filling breakfast before heading out the door, so I’m all about having some options pre-prepped and ready to reheat in the morning. I make these Sausage Egg Bites on Sundays and we use them for weekday mornings — they are delicious, convenient and portable.
This recipe is a step up from your normal sausage & egg cups — instead of mixing all the ingredients together you maintain the taste and integrity [yes I said integrity!] of the whole egg and the sausage. The chimichurri — while optional — really elevates these Sausage Egg Bites. I’ve also served these at many a brunch gathering and they are a hit! Bonus — they are easy to make ahead so I can enjoy my company instead of being stuck in the kitchen.

The chimichurri sauce really makes this recipe! Chimichurri is a traditional Latin American condiment made of parsley, lemon juice, and olive oil that brings brightness to any dish -- especially for these rich + decadent sausage egg bites! And while you can technically leave it off to make this recipe even simpler...I'd think twice before doing that!

sausage egg bites with chimichurri
These Sausage Egg Bites with Chimichurri are my favorite go-to fat & protein filled breakfast! They are keto + paleo friendly and you can make them ahead of time and reheat them in the morning for a quick breakfast.
INGREDIENTS:
For the egg bites:
- 1 pounds breakfast sausage
- 6 eggs
- 1 green onion
- sea salt to taste
For the chimichurri:
- 1 cup flat leaf parsley [1 bunch]
- 4 green onions, chopped [white section included]
- 1 lemon, juiced
- ¼ cup extra virgin olive oil
- ¼ cup avocado oil
- 1 tsp sea salt
- ½ tsp black pepper
- ¼ tsp red pepper flakes
INSTRUCTIONS:
For the egg bites:
- Preheat oven to 350°F.
- Divide the sausage into 6 portions, and place each into its own individual ramekin. Use your hands to push the sausage around the bottom and up the sides of the ramekin, creating a “crust” for the egg to bake in.
- Crack an egg into each sausage crust. For a scrambled variation, whisk the eggs before pouring in.
- Top with a sprinkle of salt and a few slices of green onion.
- Bake until the eggs are set, about 30 minutes.
For the chimichurri:
- Thoroughly rinse parsley and remove leaves from stems.
- In a food processor or high speed blender or food processor, combine parsley, olive oil, avocado oil, green onions, and lemon juice.
- Add salt, pepper, and red pepper flakes and pulse gently until combined.
- Reserve ½ cup to drizzle over sausage egg bites after cooled. Store remainder in the refrigerator for another use*.
NOTES:
- chimichurri is delicous on grilled meat & roasted vegetables, served over tacos, and makes a tasty salad dressing
Don't forget to tag us @thenorthwestkitchen on Instagram when you make these Sausage Egg Bites with Chimichurri!
The North + West Kitchen & Cassie Kanable, LLC partner with affiliate platforms including Amazon Services LLC Associates Program where commission may be earned based on clicks and/or purchases, and I would love it if you decided to use the links above! This means if you make a purchase using the links here on the blog – your cost remains the same, but I earn a small percentage to help support this blog. Thank you! Affiliate links help educators like me to fund the free content that we provide.