How to: Bone Broth + Common Mistakes [Instant Pot & Stovetop Method]
Homemade Bone Broth is the unsung hero of home kitchens across the world. Use this broth as a base for a quick weeknight soup, in sauces or braises, or drink it straight from a mug. The added step of roasting the bones develops rich, long-cooked flavor that will transform almost any dish into one that’s exponentially more delicious. Simple + doable for any home cook! Jump to recipe.
A great bone broth is a home chef’s secret weapon. There’s a reason that every restaurant makes it daily and why every home cook should keep a few quarts in the freezer. Keeping broth on hand means access to instant flavor for any dish. Add meat, veggies, and noodles and you have an instantly satisfying soup. Drink it straight from a mug with fresh grated garlic + ginger for a bit of nourishment. Use it as a cooking liquid for grains or legumes, or as a flavorful base for sauces, soups, and braises. Taking the time to create a great base of flavor is actually the ultimate shortcut, and sometimes it doesn’t take that long at all — especially when you use a pressure cooker.
Below, I’ll walk you through both a stovetop and Instant Pot [pressure cooker] method as well as common mistakes you may be making. I prefer the Instant Pot method for ease and speed, but either method produce a rich, flavorful broth that can be used for a myriad of applications.

COMMON MISTAKES YOU MIGHT BE MAKING:
Not hanging on to your kitchen scraps: every professional chef out there has a freezer full of root ends of onions, scallion butts, leafy tops and root ends of celery, and herb stems stowed away in their freezer. Not only is this a great way to reduce food waste, it’s an opportunity to impart flavor with something you would have otherwise tossed out [or composted]. I recommend keeping a large freezer bag [I like these half-gallon size reusable Stasher bags] on hand for adding some choice vegetable scraps to throughout the week for a flavorful weekend broth. I wouldn’t both saving the carrots unless you’re using them for a veggie stock.

Skipping the blanching step: If you’ve ever had a bone broth that tastes a bit funky, this is likely the culprit. Before roasting and simmering your bones, cover the bones with cold water, bring to a boil, and let them cook at an aggressive simmer for about 20 minutes before draining and roasting. If you are using the Instant Pot method below, you can do this using the sauté setting — see directions below.
Not roasting the bones: repeat after me, “I will always roast my bones.” While roasting your bones isn’t a required step in putting together a simple broth, it will most certainly give your broth a richer, more long-cooked flavor. Roasting the bones browns and caramelizes them, lending to tons of flavor.

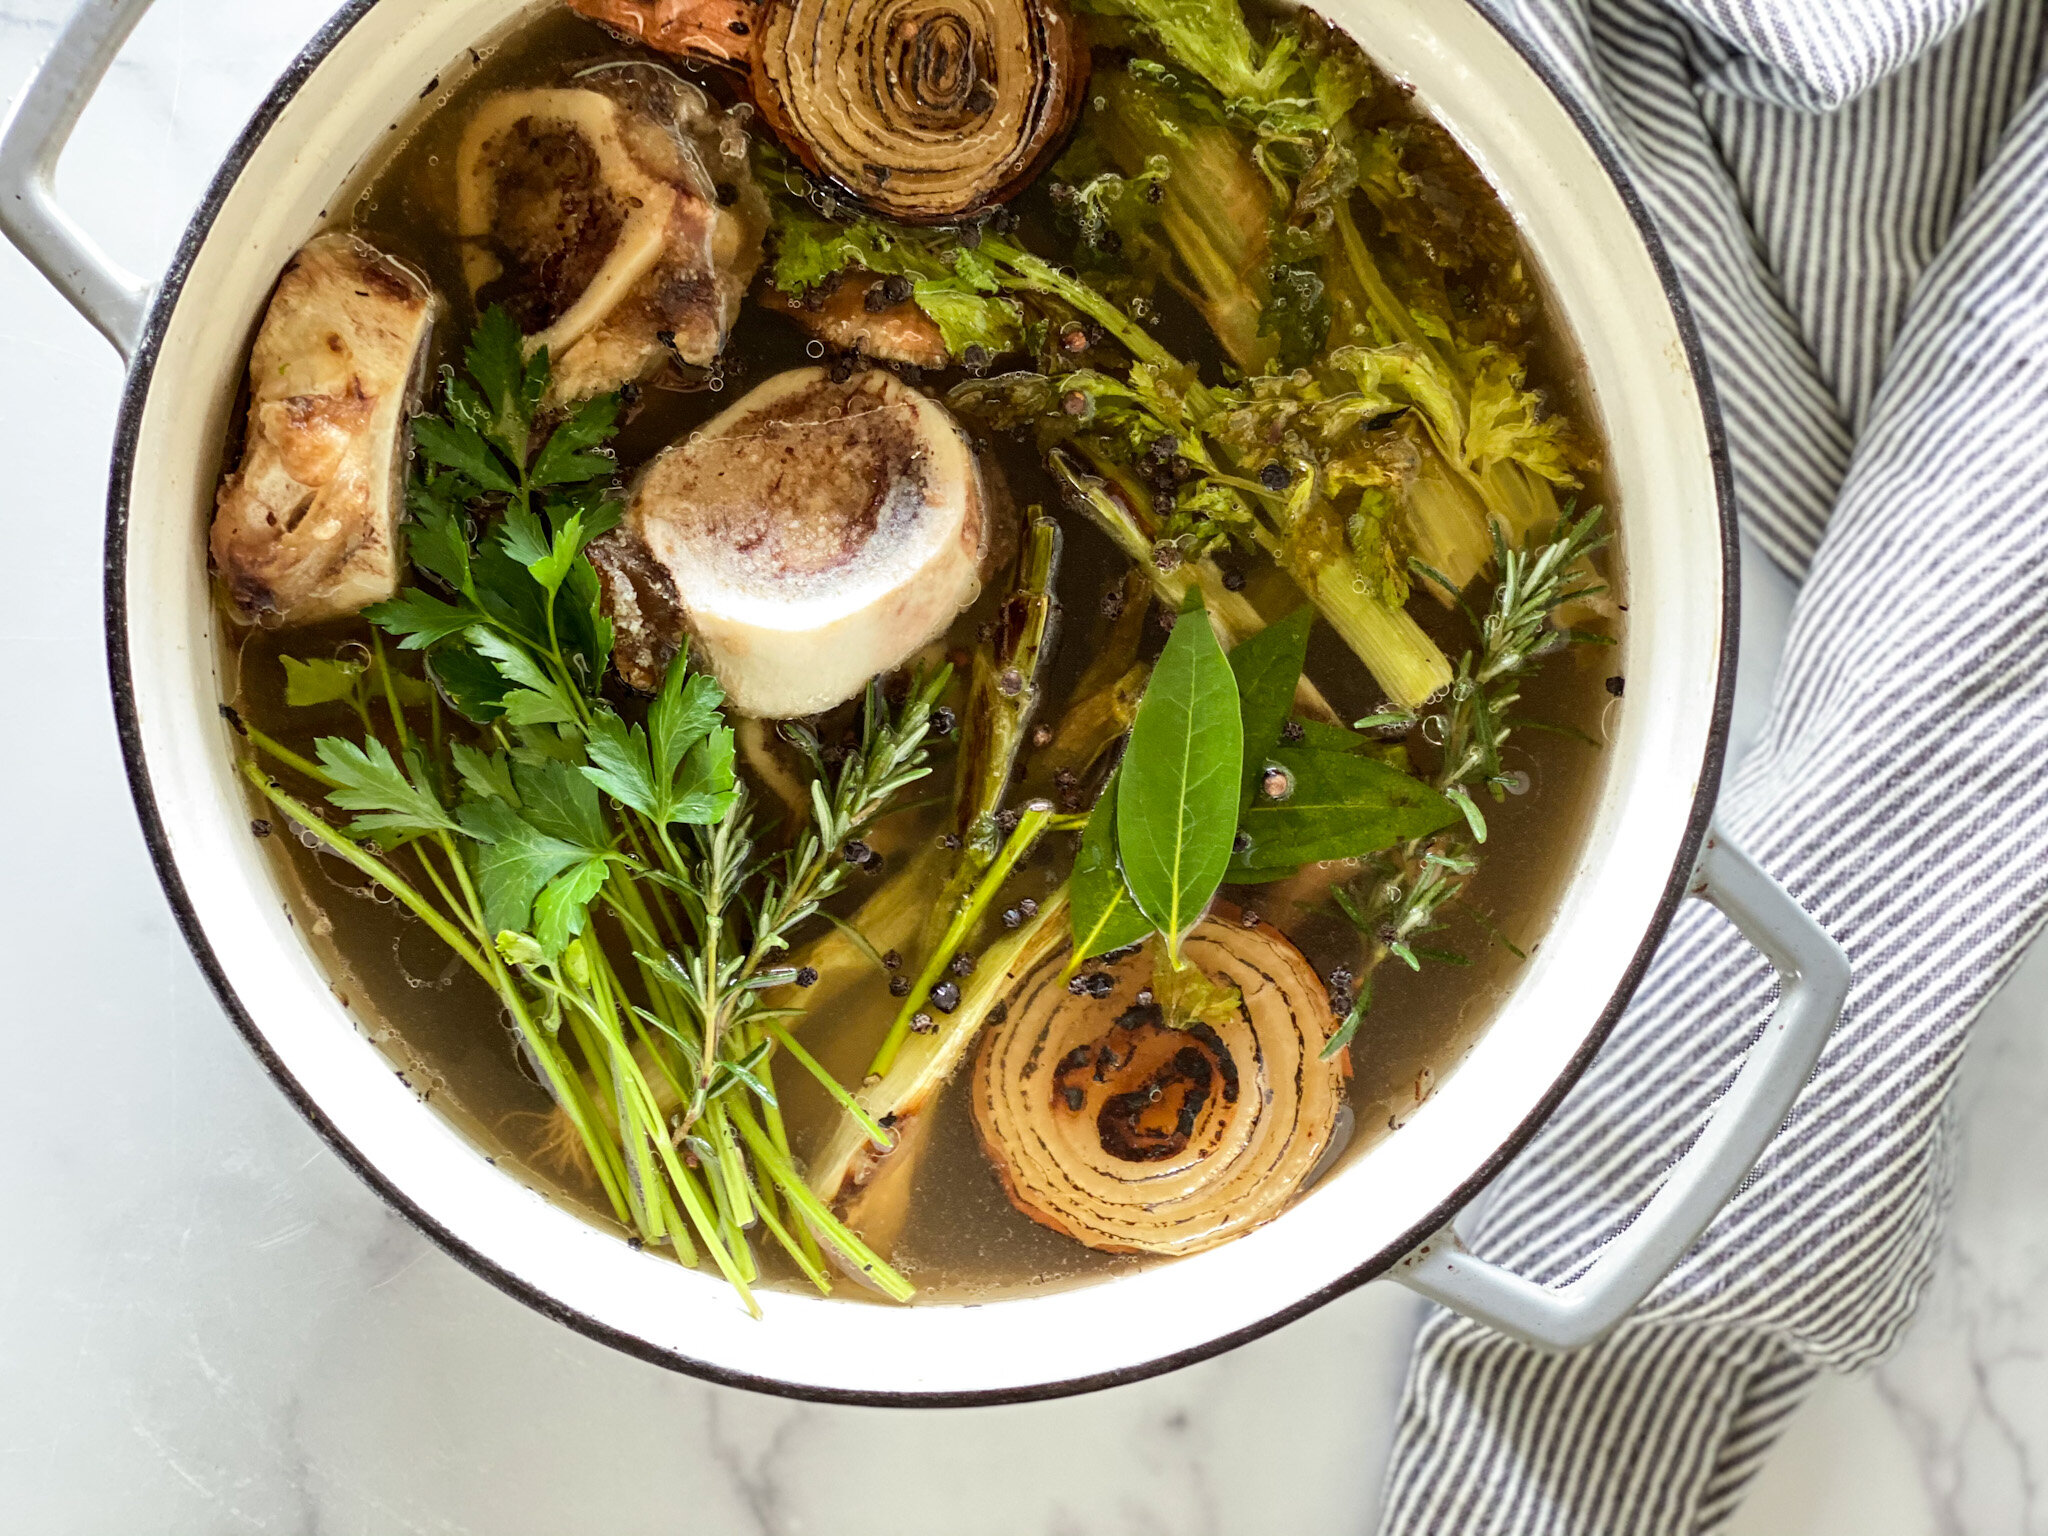
Adding too much stuff to your broth: a good broth doesn’t need a bunch of add-ins. I recommend a few aromatics like fresh herbs/herb stems, onion ends, garlic, black peppercorns, and plenty of sea salt. Pro tip: keep the carrots out unless you want a sweeter broth. Keep the flavor focused and concentrated will allow your broth to fit a myriad of applications.
Letting the finished broth cool slowly: In professional kitchens, broth chilling is serious business. Letting your broth cool slowly means the potential for harmful bacteria to grow. Once you've strained out the bones + other bits, transfer your broth to a shallow and wide container, where it will lose heat more rapidly. You can even add a few cups of ice to speed up the process — don't worry about the ice diluting the broth; it's so intensely flavored that the ice won't drastically impact the flavor. Whatever you do, don't put hot broth in the fridge — it will invite bacterial growth almost immediately and raise the temperature of the fridge.
Adding vinegar to your broth: Don’t worry, I was making this mistake for years! It was widely accepted for some time that apple cider vinegar would aid in pulling the mineral content out of the bones, making a more nutrient dense broth. After attending this talk by Dr. Kayla Daniels at the Ancestral Health Symposium in 2014, I stopped using vinegar in my bone broth and the flavor is much improved.
Freezing broth in jars instead of a silicone mold/ice tray: After making a batch of broth, I tend to reserve as much broth as I need for cooking/drinking purposes over the course of 4 or 5 days and store it in an airtight container in the fridge. Whatever’s left gets frozen in a silicone mold and transferred to a freezer bag. The broth cubes freeze in about 6 hours and will keep in the freezer for up to 6 months, making it a cinch to take one out when you need broth for a recipe. Each block is also the perfect amount to defrost for a quick mug of broth or you can defrost two blocks for an individual serving of soup.

Now that you know how to avoid these common mistakes, let’s get to it!

how to: bone broth
Homemade Bone Broth is the unsung hero of home kitchens across the world. Use this broth as a base for a quick weeknight soup, in sauces or braises, or drink it straight from a mug. The added step of roasting the bones develops rich, long-cooked flavor that will transform almost any dish into one that’s exponentially more delicious. Simple + doable for any home cook!
INGREDIENTS:
- 4 pounds beef bones (I like a mix of marrow, knuckle, and oxtail)
- 1 tablespoon olive oil
- 1 teaspoon kosher salt
- 2 onion root ends with skin, 1 celery root end + leafy top, 1 bunch of herb stems (such as parsley, cilantro, rosemary, and/or thyme)
- 2 garlic cloves or 1 bunch scallion ends
- 2 bay leaves
- 1/2 teaspoon black peppercorns
- 1 tablespoon sea salt
INSTRUCTIONS:
Preheat oven to 400°F.
Blanch your bones: place bones in large stock pot or instant pot insert and cover the bones with cold water, bring to a boil, and let them cook at an aggressive simmer for about 20 minutes (if you're using the Instant Pot method, simply use the sauté setting to bring to a rolling boil). While the bones cook, skim any brown foam that rises to the top with a slotted spoon. Drain the bones and pat dry.
Place bones on a rimmed baking sheet and coat evenly with olive oil and a bit of salt. Roast until bones are crispy and caramelized, about 30 minutes.
STOVETOP METHOD
- Place roasted bones, onion, celery, herbs, garlic or scallions, bay leaves, peppercorns, salt, and 6 quarts cold water in a large stock pot and bring to a boil, skimming any foam that rises to the top. Turn heat down to medium-low for a gentle simmer and set a lid on top, leaving a bit of room for venting. Simmer, stirring and skimming every 2 hours or so for 6-12 hours. As the broth cooks, edge heat down to low and add water as needed.
INSTANT POT METHOD:
- Place roasted bones, onion, celery, herbs, garlic or scallions, bay leaves, peppercorns, and salt in Instant Pot insert. Add cold water to the max fill line (no more than 2/3 of the way up the pot). Secure the lid and set vent to sealing. Cook at high pressure for 3 hours. Allow broth to naturally release, do not adjust the steam valve. This will take about 90 minutes.
STRAIN & STORE:
- Strain out & discard the bones + other bits using a fine mesh seive into a shallow and wide container, where it will lose heat more rapidly.
- Fill a sink or basin with ice water and place your container of broth in the ice bath. Stir regularly until the broth is cooled to about 50°F, about 15-20 minutes. Transfer the broth to airtight containers or jars. Refrigerate or allow broth to chill in the fridge overnight and freeze the following day.
NOTES:
- You can use this recipe with any mix of beef, pork, or chicken bones.
- Broth can be refrigerated for up to 5 days or frozen for up to 6 months. I tend to reserve as much broth as I need for cooking/drinking purposes over the course of 4 or 5 days and store it in an airtight container in the fridge. Whatever’s left gets frozen in a silicone mold like this one and transferred to a freezer bag. The broth cubes freeze in about 6 hours and will keep in the freezer for up to 6 months, making it a cinch to take one out when you need broth for a recipe. Each block is also the perfect amount to defrost for a quick mug of broth or individual serving of soup.
Don't forget to tag us @thenorthwestkitchen on Instagram when you give this simple Beef Bone Broth a try!