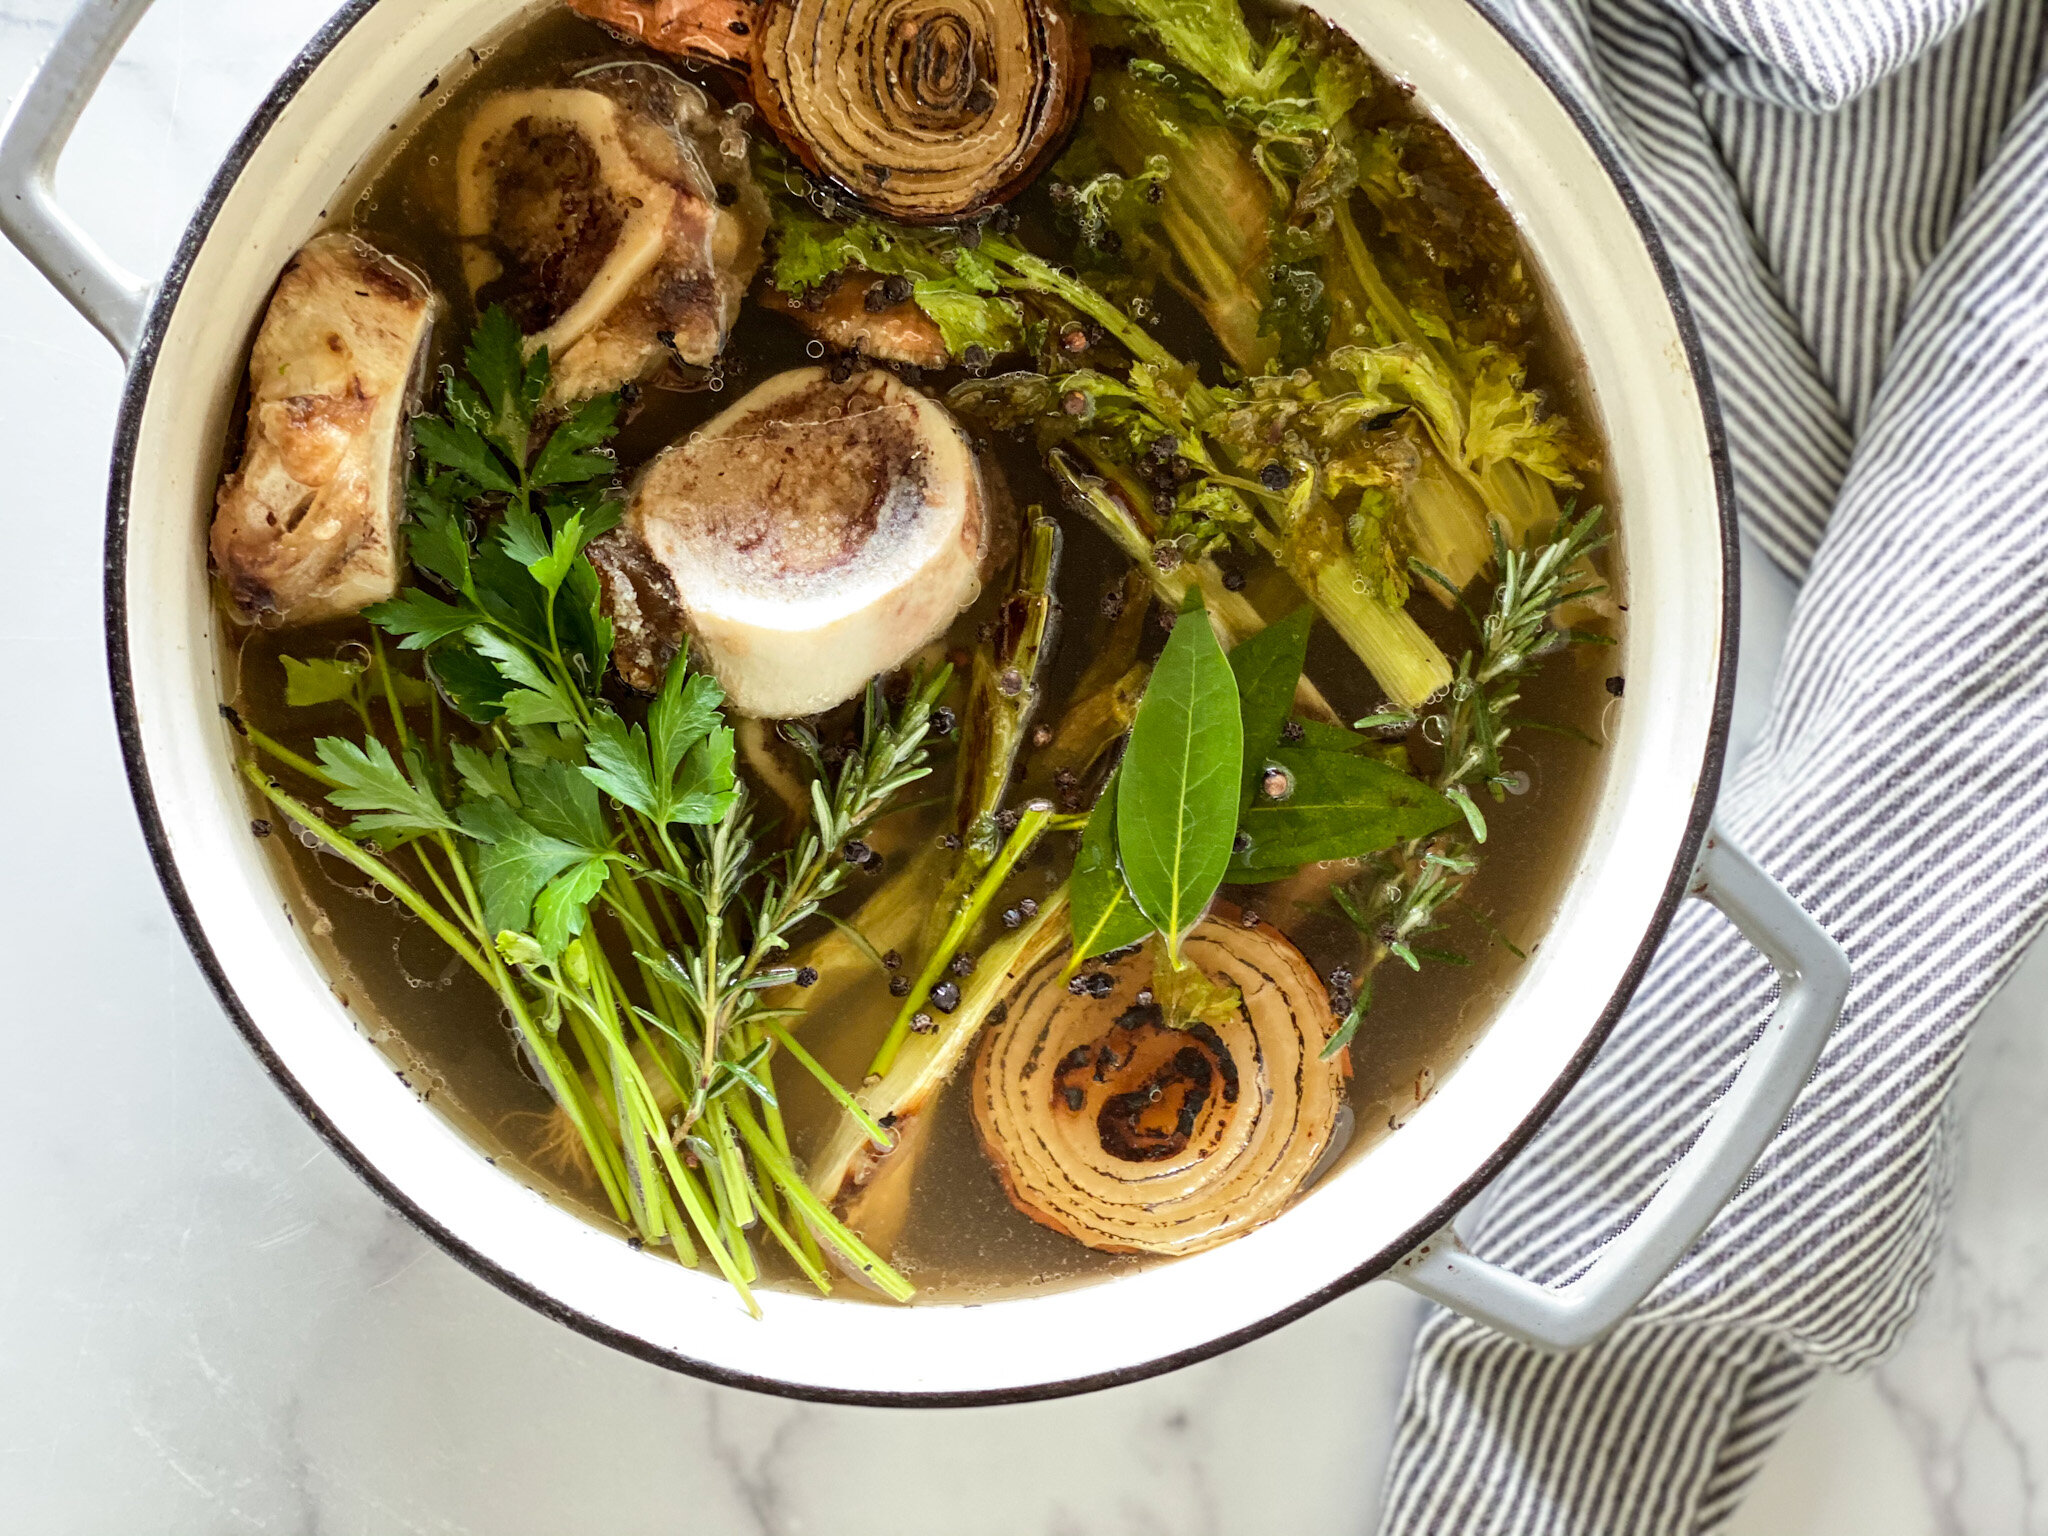
![How to: Bone Broth + Common Mistakes [Instant Pot & Stovetop Method]](https://images.squarespace-cdn.com/content/v1/5cae4a324d87112fb4f0c0c7/1619893985558-ITUC6JYEECHVO1WWEMXK/IMG_8845_jpg.jpg)
How to: Bone Broth + Common Mistakes [Instant Pot & Stovetop Method]
Homemade Bone Broth is the unsung hero of home kitchens across the world. Use this broth as a base for a quick weeknight soup, in sauces or braises, or drink it straight from a mug. The added step of roasting the bones develops rich, long-cooked flavor that will transform almost any dish into one that’s exponentially more delicious. Simple + doable for any home cook! Jump to recipe.
A great bone broth is a home chef’s secret weapon. There’s a reason that every restaurant makes it daily and why every home cook should keep a few quarts in the freezer. Keeping broth on hand means access to instant flavor for any dish. Add meat, veggies, and noodles and you have an instantly satisfying soup. Drink it straight from a mug with fresh grated garlic + ginger for a bit of nourishment. Use it as a cooking liquid for grains or legumes, or as a flavorful base for sauces, soups, and braises. Taking the time to create a great base of flavor is actually the ultimate shortcut, and sometimes it doesn’t take that long at all — especially when you use a pressure cooker.
Below, I’ll walk you through both a stovetop and Instant Pot [pressure cooker] method as well as common mistakes you may be making. I prefer the Instant Pot method for ease and speed, but either method produce a rich, flavorful broth that can be used for a myriad of applications.

COMMON MISTAKES YOU MIGHT BE MAKING:
Not hanging on to your kitchen scraps: every professional chef out there has a freezer full of root ends of onions, scallion butts, leafy tops and root ends of celery, and herb stems stowed away in their freezer. Not only is this a great way to reduce food waste, it’s an opportunity to impart flavor with something you would have otherwise tossed out [or composted]. I recommend keeping a large freezer bag [I like these half-gallon size reusable Stasher bags] on hand for adding some choice vegetable scraps to throughout the week for a flavorful weekend broth. I wouldn’t both saving the carrots unless you’re using them for a veggie stock.

Skipping the blanching step: If you’ve ever had a bone broth that tastes a bit funky, this is likely the culprit. Before roasting and simmering your bones, cover the bones with cold water, bring to a boil, and let them cook at an aggressive simmer for about 20 minutes before draining and roasting. If you are using the Instant Pot method below, you can do this using the sauté setting — see directions below.
Not roasting the bones: repeat after me, “I will always roast my bones.” While roasting your bones isn’t a required step in putting together a simple broth, it will most certainly give your broth a richer, more long-cooked flavor. Roasting the bones browns and caramelizes them, lending to tons of flavor.

Adding too much stuff to your broth: a good broth doesn’t need a bunch of add-ins. I recommend a few aromatics like fresh herbs/herb stems, onion ends, garlic, black peppercorns, and plenty of sea salt. Pro tip: keep the carrots out unless you want a sweeter broth. Keep the flavor focused and concentrated will allow your broth to fit a myriad of applications.
Letting the finished broth cool slowly: In professional kitchens, broth chilling is serious business. Letting your broth cool slowly means the potential for harmful bacteria to grow. Once you've strained out the bones + other bits, transfer your broth to a shallow and wide container, where it will lose heat more rapidly. You can even add a few cups of ice to speed up the process — don't worry about the ice diluting the broth; it's so intensely flavored that the ice won't drastically impact the flavor. Whatever you do, don't put hot broth in the fridge — it will invite bacterial growth almost immediately and raise the temperature of the fridge.
Adding vinegar to your broth: Don’t worry, I was making this mistake for years! It was widely accepted for some time that apple cider vinegar would aid in pulling the mineral content out of the bones, making a more nutrient dense broth. After attending this talk by Dr. Kayla Daniels at the Ancestral Health Symposium in 2014, I stopped using vinegar in my bone broth and the flavor is much improved.
Freezing broth in jars instead of a silicone mold/ice tray: After making a batch of broth, I tend to reserve as much broth as I need for cooking/drinking purposes over the course of 4 or 5 days and store it in an airtight container in the fridge. Whatever’s left gets frozen in a silicone mold and transferred to a freezer bag. The broth cubes freeze in about 6 hours and will keep in the freezer for up to 6 months, making it a cinch to take one out when you need broth for a recipe. Each block is also the perfect amount to defrost for a quick mug of broth or you can defrost two blocks for an individual serving of soup.

Now that you know how to avoid these common mistakes, let’s get to it!

how to: bone broth
Homemade Bone Broth is the unsung hero of home kitchens across the world. Use this broth as a base for a quick weeknight soup, in sauces or braises, or drink it straight from a mug. The added step of roasting the bones develops rich, long-cooked flavor that will transform almost any dish into one that’s exponentially more delicious. Simple + doable for any home cook!
INGREDIENTS:
- 4 pounds beef bones (I like a mix of marrow, knuckle, and oxtail)
- 1 tablespoon olive oil
- 1 teaspoon kosher salt
- 2 onion root ends with skin, 1 celery root end + leafy top, 1 bunch of herb stems (such as parsley, cilantro, rosemary, and/or thyme)
- 2 garlic cloves or 1 bunch scallion ends
- 2 bay leaves
- 1/2 teaspoon black peppercorns
- 1 tablespoon sea salt
INSTRUCTIONS:
Preheat oven to 400°F.
Blanch your bones: place bones in large stock pot or instant pot insert and cover the bones with cold water, bring to a boil, and let them cook at an aggressive simmer for about 20 minutes (if you're using the Instant Pot method, simply use the sauté setting to bring to a rolling boil). While the bones cook, skim any brown foam that rises to the top with a slotted spoon. Drain the bones and pat dry.
Place bones on a rimmed baking sheet and coat evenly with olive oil and a bit of salt. Roast until bones are crispy and caramelized, about 30 minutes.
STOVETOP METHOD
- Place roasted bones, onion, celery, herbs, garlic or scallions, bay leaves, peppercorns, salt, and 6 quarts cold water in a large stock pot and bring to a boil, skimming any foam that rises to the top. Turn heat down to medium-low for a gentle simmer and set a lid on top, leaving a bit of room for venting. Simmer, stirring and skimming every 2 hours or so for 6-12 hours. As the broth cooks, edge heat down to low and add water as needed.
INSTANT POT METHOD:
- Place roasted bones, onion, celery, herbs, garlic or scallions, bay leaves, peppercorns, and salt in Instant Pot insert. Add cold water to the max fill line (no more than 2/3 of the way up the pot). Secure the lid and set vent to sealing. Cook at high pressure for 3 hours. Allow broth to naturally release, do not adjust the steam valve. This will take about 90 minutes.
STRAIN & STORE:
- Strain out & discard the bones + other bits using a fine mesh seive into a shallow and wide container, where it will lose heat more rapidly.
- Fill a sink or basin with ice water and place your container of broth in the ice bath. Stir regularly until the broth is cooled to about 50°F, about 15-20 minutes. Transfer the broth to airtight containers or jars. Refrigerate or allow broth to chill in the fridge overnight and freeze the following day.
NOTES:
- You can use this recipe with any mix of beef, pork, or chicken bones.
- Broth can be refrigerated for up to 5 days or frozen for up to 6 months. I tend to reserve as much broth as I need for cooking/drinking purposes over the course of 4 or 5 days and store it in an airtight container in the fridge. Whatever’s left gets frozen in a silicone mold like this one and transferred to a freezer bag. The broth cubes freeze in about 6 hours and will keep in the freezer for up to 6 months, making it a cinch to take one out when you need broth for a recipe. Each block is also the perfect amount to defrost for a quick mug of broth or individual serving of soup.
Don't forget to tag us @thenorthwestkitchen on Instagram when you give this simple Beef Bone Broth a try!

Creamy Gingersnap Latte
This dreamy winter latte has all the flavors of the holidays in one cozy cup. Ginger, molasses, cinnamon, nutmeg, pecan butter, rich espresso and steamed milk of your choice combine to make this Creamy Gingersnap Latte. You’ll want to sip on this latte long after the holidays have passed. Jump to recipe.

When winter hits, I start to embrace my inner homebody. The days are shorter, the temp drops, and I’m perfectly content to stay under layers of blankets until mid morning – as long as I've got this tasty latte in my hand. This Creamy Gingersnap Latte definitely fits the bill.
When I set out to create this cozy winter latte for The North + West Kitchen Holiday cookbook, all my at-home latte research landed me on what felt like some of the most complicated recipes out there. Adding just-brewed coffee, a handful of nuts, dates, spices, etc to a blender and all you’ve got is one latte out of all that effort. And while that may seem simple to some, I’m not trying to combine a bunch of ingredients for my morning coffee each day, and I’m guessing you’re not either.
Then I remembered my barista days, we had different flavor “bases” to add to coffee + frothed milk to get some really dreamy results. So I set out to make a gingersnap latte base that you could prep in advance and add a bit to your coffee + milk of choice in the morning for the perfect cozy cup with minimal morning-of effort.
In Spring 2020, when quarantine began — and when I realized it might be months before I got to sit down at my favorite coffee shop and enjoy a gorgeously frothy almond milk latte — I decided it was time to improve my at-home latte experience.
⠀⠀⠀⠀⠀⠀⠀⠀⠀
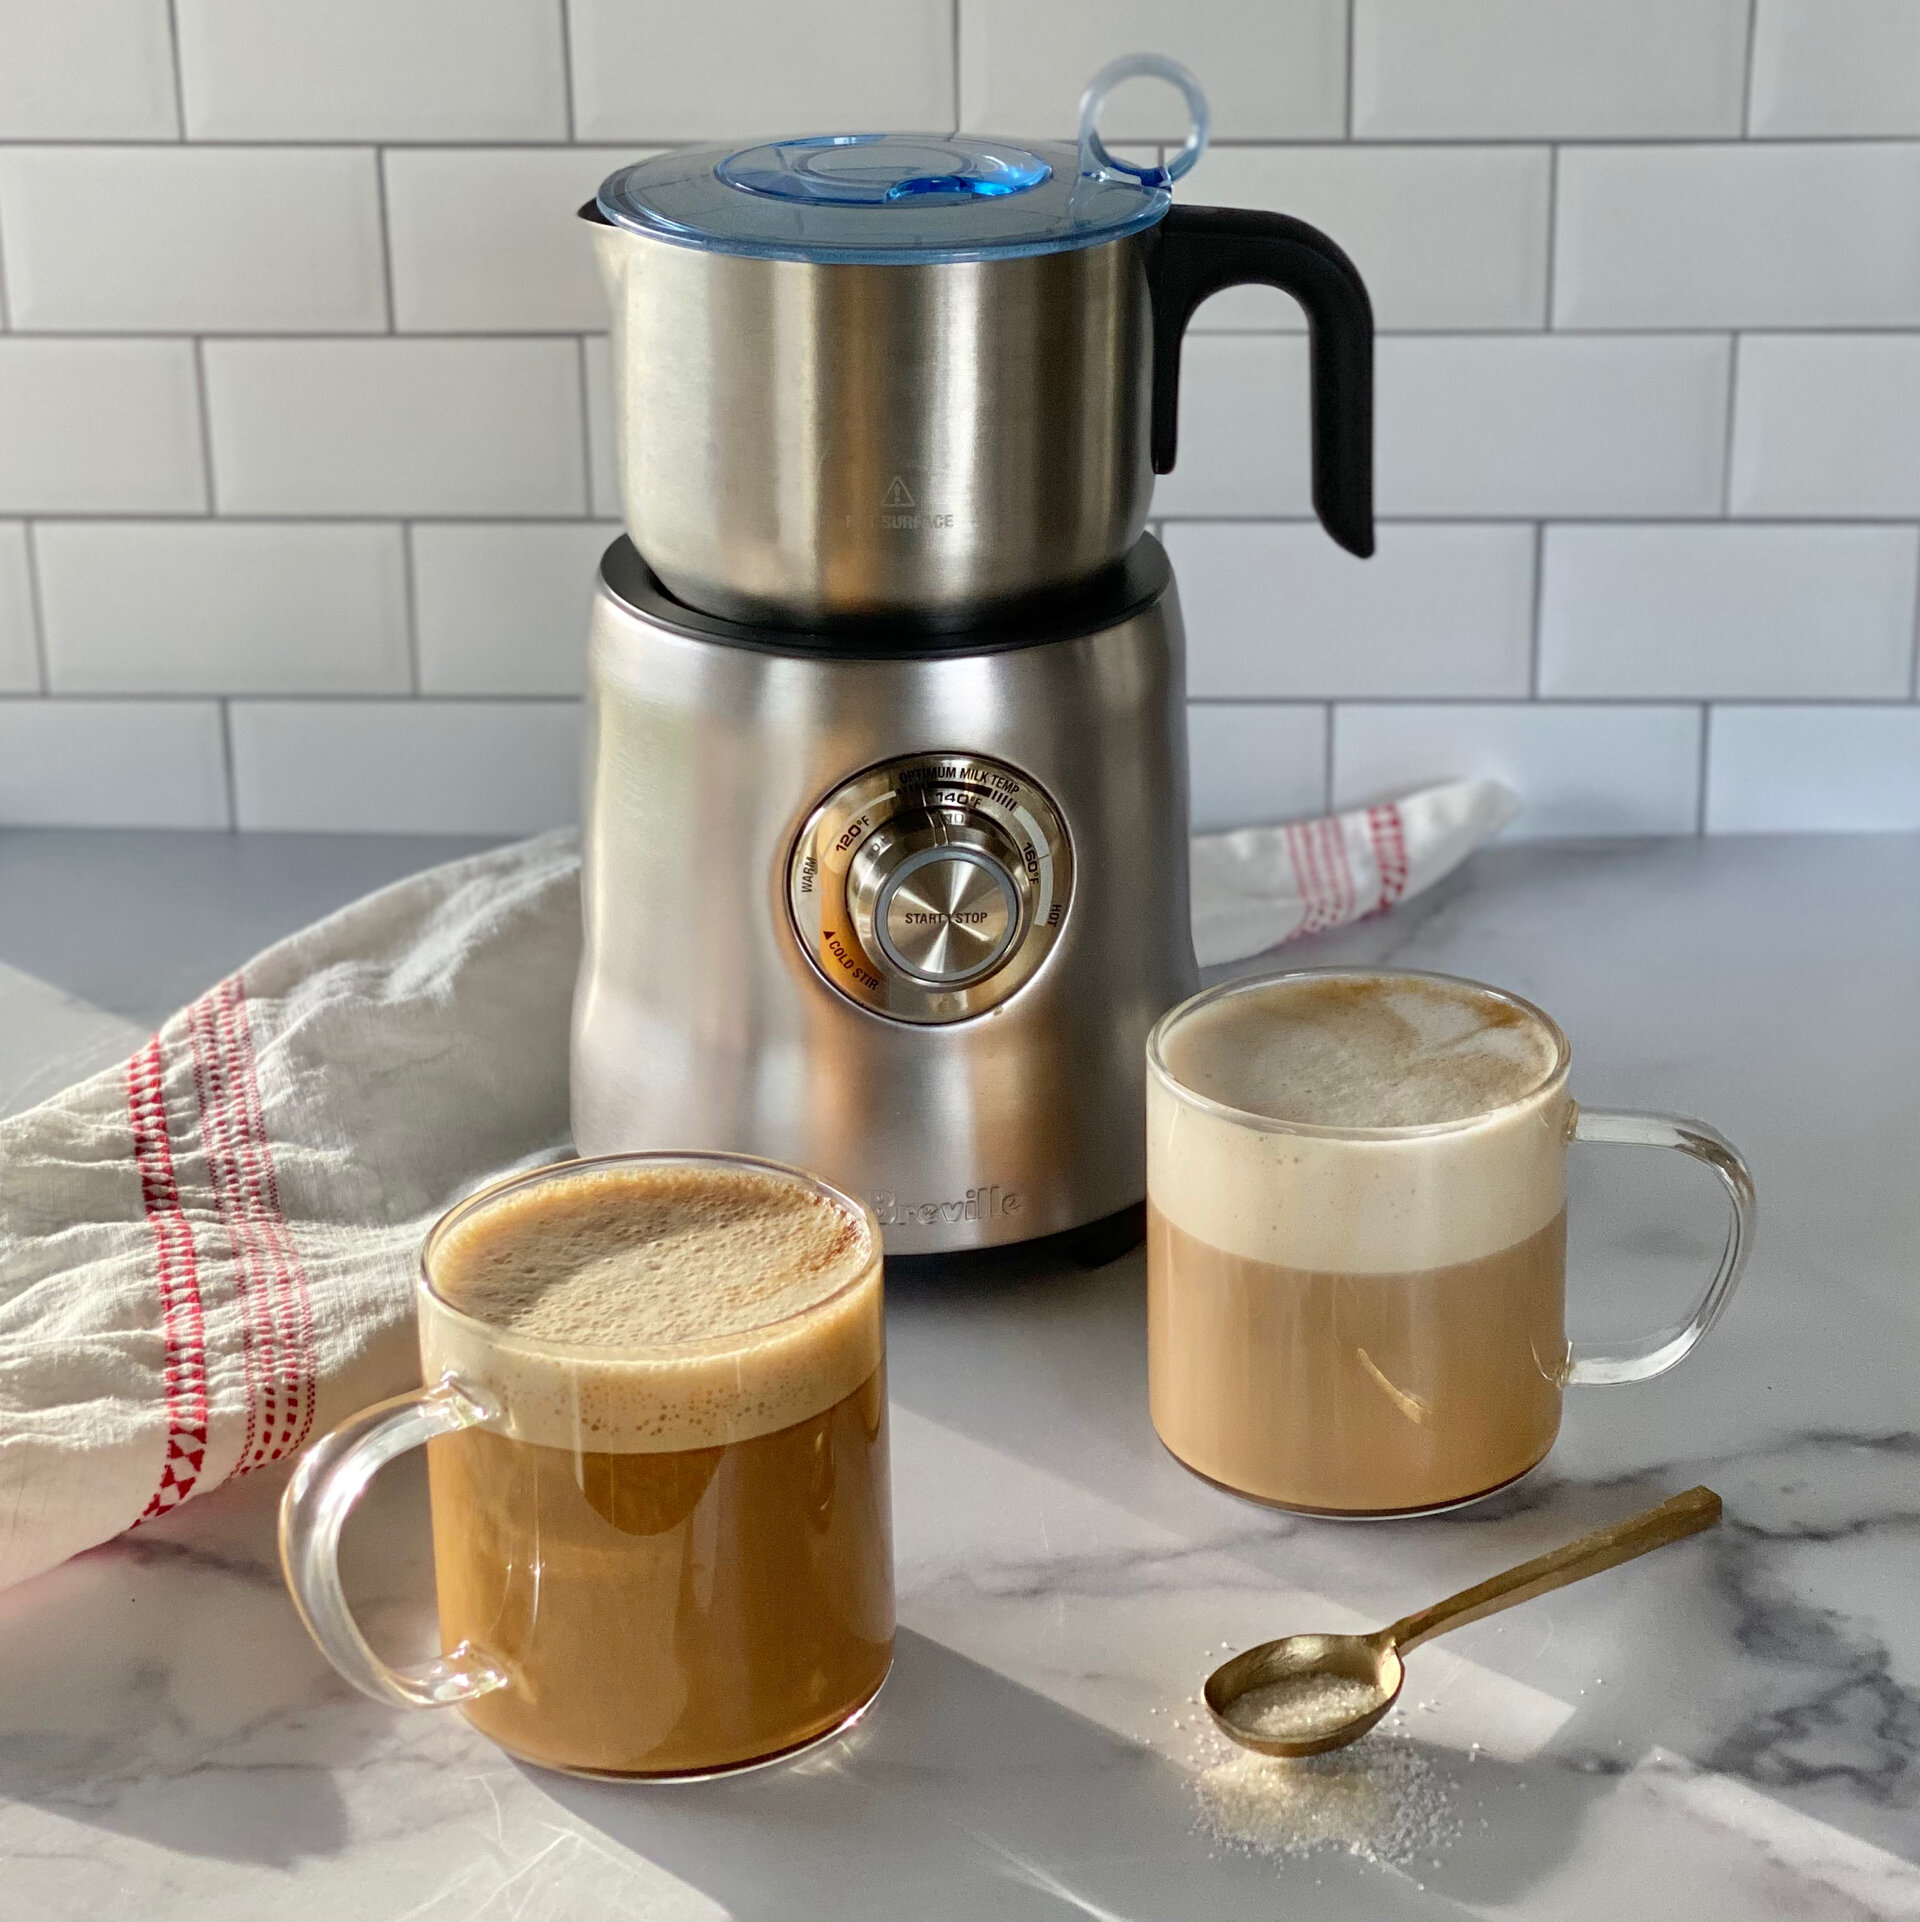
I donated my old milk frother, which I loved but had pretty limited capabilities, and upgraded to this sleek Breville Milk Cafe and larger Bialetti Stovetop Espresso Maker. I love how easy the Milk Cafe is to operate, simply add any milk or milk alternative, select the temperature, hit start and get ready for the perfect frothy latte. And no, this blog post is not sponsored, but the folks at Breville should feel free to reach out at any time. 😆
Now, you don’t technically need an electric milk frother to make this recipe, but it definitely takes it to a whole new level! Below, you’ll find instructions to prepare your latte in a saucepan or electric frother. Whether you prepare this latte in a fancy frother or on the stovetop, I hope you love it!

creamy gingersnap latte
This dreamy winter latte has all the flavors of the holidays in one cozy cup. Ginger, molasses, cinnamon, nutmeg, pecan butter, rich espresso and steamed milk of your choice combine to make this Creamy Gingersnap Latte. You’ll want to sip on this latte long after the holidays have passed.
INGREDIENTS:
gingersnap base:
- ¼ cup plus 2 tablespoons pecan butter (cashew or almond would work here too)
- 1 tablespoon molasses
- 1 teaspoon cinnamon
- ¼ cup ground ginger
- ⅛ teaspoon nutmeg
- 4 tablespoons maple syrup
- pinch salt
for one latte:
- 4-6 ounces espresso or strong coffee
- 6 ounces milk of your choice
- 1 tablespoon gingersnap base
INSTRUCTIONS:
For the gingersnap base: Combine the nut butter, molasses, cinnamon, ginger, nutmeg, maple syrup, and salt in a mixing bowl and mix until completely combined. Transfer to a airtight container and store in the refrigerator for up to 2 weeks.
Saucepan instructions: Add milk to a small saucepan, warm gently until milk reaches 160°F. Add gingersnap base and blend with an immersion blender or whisk.
Electric milk frother instructions: Add milk and froth with desired setting. Add gingersnap base and blend on "cold froth" or "mix" setting (this mixes the base in without further heating the milk).
Make the espresso and pour into desired mug. Add the frothy gingersnap milk mixture. Top with a sprinkle of pumpkin pie spice, cinnamon, or nutmeg if desired.
NOTES:
Make Ahead: Make + store gingersnap base in airtight container in the refrigerator for up to two weeks.
Don't forget to tag us @thenorthwestkitchen on Instagram when you make this Creamy Gingersnap Latte!
References
[1] — https://draxe.com/nutrition/top-5-maca-root-benefits-and-nutrition/
[2] — https://blog.daveasprey.com/using-vanilla-to-increase-your-mental-performance/
[3] — https://draxe.com/nutrition/ghee-benefits/
[4] — https://draxe.com/nutrition/what-is-collagen/

Velvety Celery Root Puree
This Velvety Celery Root Puree is a gorgeous alternative to mashed potatoes and just happens to be bit lower in carbs. It’s silky smooth and full of nuanced flavor. I love serving it with my Instant Pot Balsamic Roast Beef! Jump to recipe.

CELERY ROOT. The unsung vegetable. When we had our first CSA share a few years ago, I was honestly a little stumped at this ugly duckling tucked away in my basket.

What I did know about celery root was that it stored well at cool temperatures. So I proceeded to stash it away in my fridge and forgot about it for a solid 5 weeks before it was time to cook everything in the fridge because I couldn’t be bothered to go to the store.
Celery root [ also called celeriac] has a surprisingly refreshing flavor. It’s like parsley, celery, and potatoes came together and had a delicious but very ugly little baby. For celery root newbies, celery root is a variety of celery grown specifically for its root. It does taste like celery but it’s flavor is considerably mild in comparison.

The real real: sometimes my best recipes come from being forced to get acquainted with a new ingredient — this recipe for Velvety Celery Root Puree is no exception.
Listen — I know most everyone loves mashed potatoes, but this Velvetly Celery Root Puree is a worthy competitor in my book. It’s silky & flavorful and presents a great lower-carb option to traditional mashed potatoes.

velvety celery root puree
This Velvety Celery Root Puree is a gorgeous alternative to mashed potatoes and just happens to be bit lower in carbs. It’s silky smooth and full of nuanced flavor.
INGREDIENTS:
- 1 tablespoon olive oil
- 1 small shallot, peeled & diced
- 6 cups celery root, peeled and diced into ½ inch cubes
- 1 ¾ cups full-fat coconut milk
- 1 sprig thyme
- ½-¾ teaspoon sea salt
- ½ teaspoon fresh ground pepper
INSTRUCTIONS:
- Heat the olive oil in a 4-quart pot on medium heat and sweat the shallots for 2-3 minutes, until translucent. Add the chopped celery root, coconut milk, thyme, 1/2 teaspoon salt and pepper. Bring to a boil, then reduce the heat to low, cover and simmer for 15-20 minutes or until celery root is fork tender.
- Remove pot from the heat and discard thyme step. Use an immersion blender to puree the celery root mixture until silky smooth [or carefully pour the ingredients into a high-powered blender to puree].
- Season with remaining ¼ teaspoon sea salt to taste. Cover the pot to keep warm until ready to serve.
NOTES:
- top with a generous amount of ghee/butter [pictured here] or serve alongside this gorgeous Instant Pot Balsamic Roast Beef.
Don't forget to tag us @thenorthwestkitchen on Instagram when you make this Velvety Celery Root Puree!

Boosted Vanilla Bean Coffee
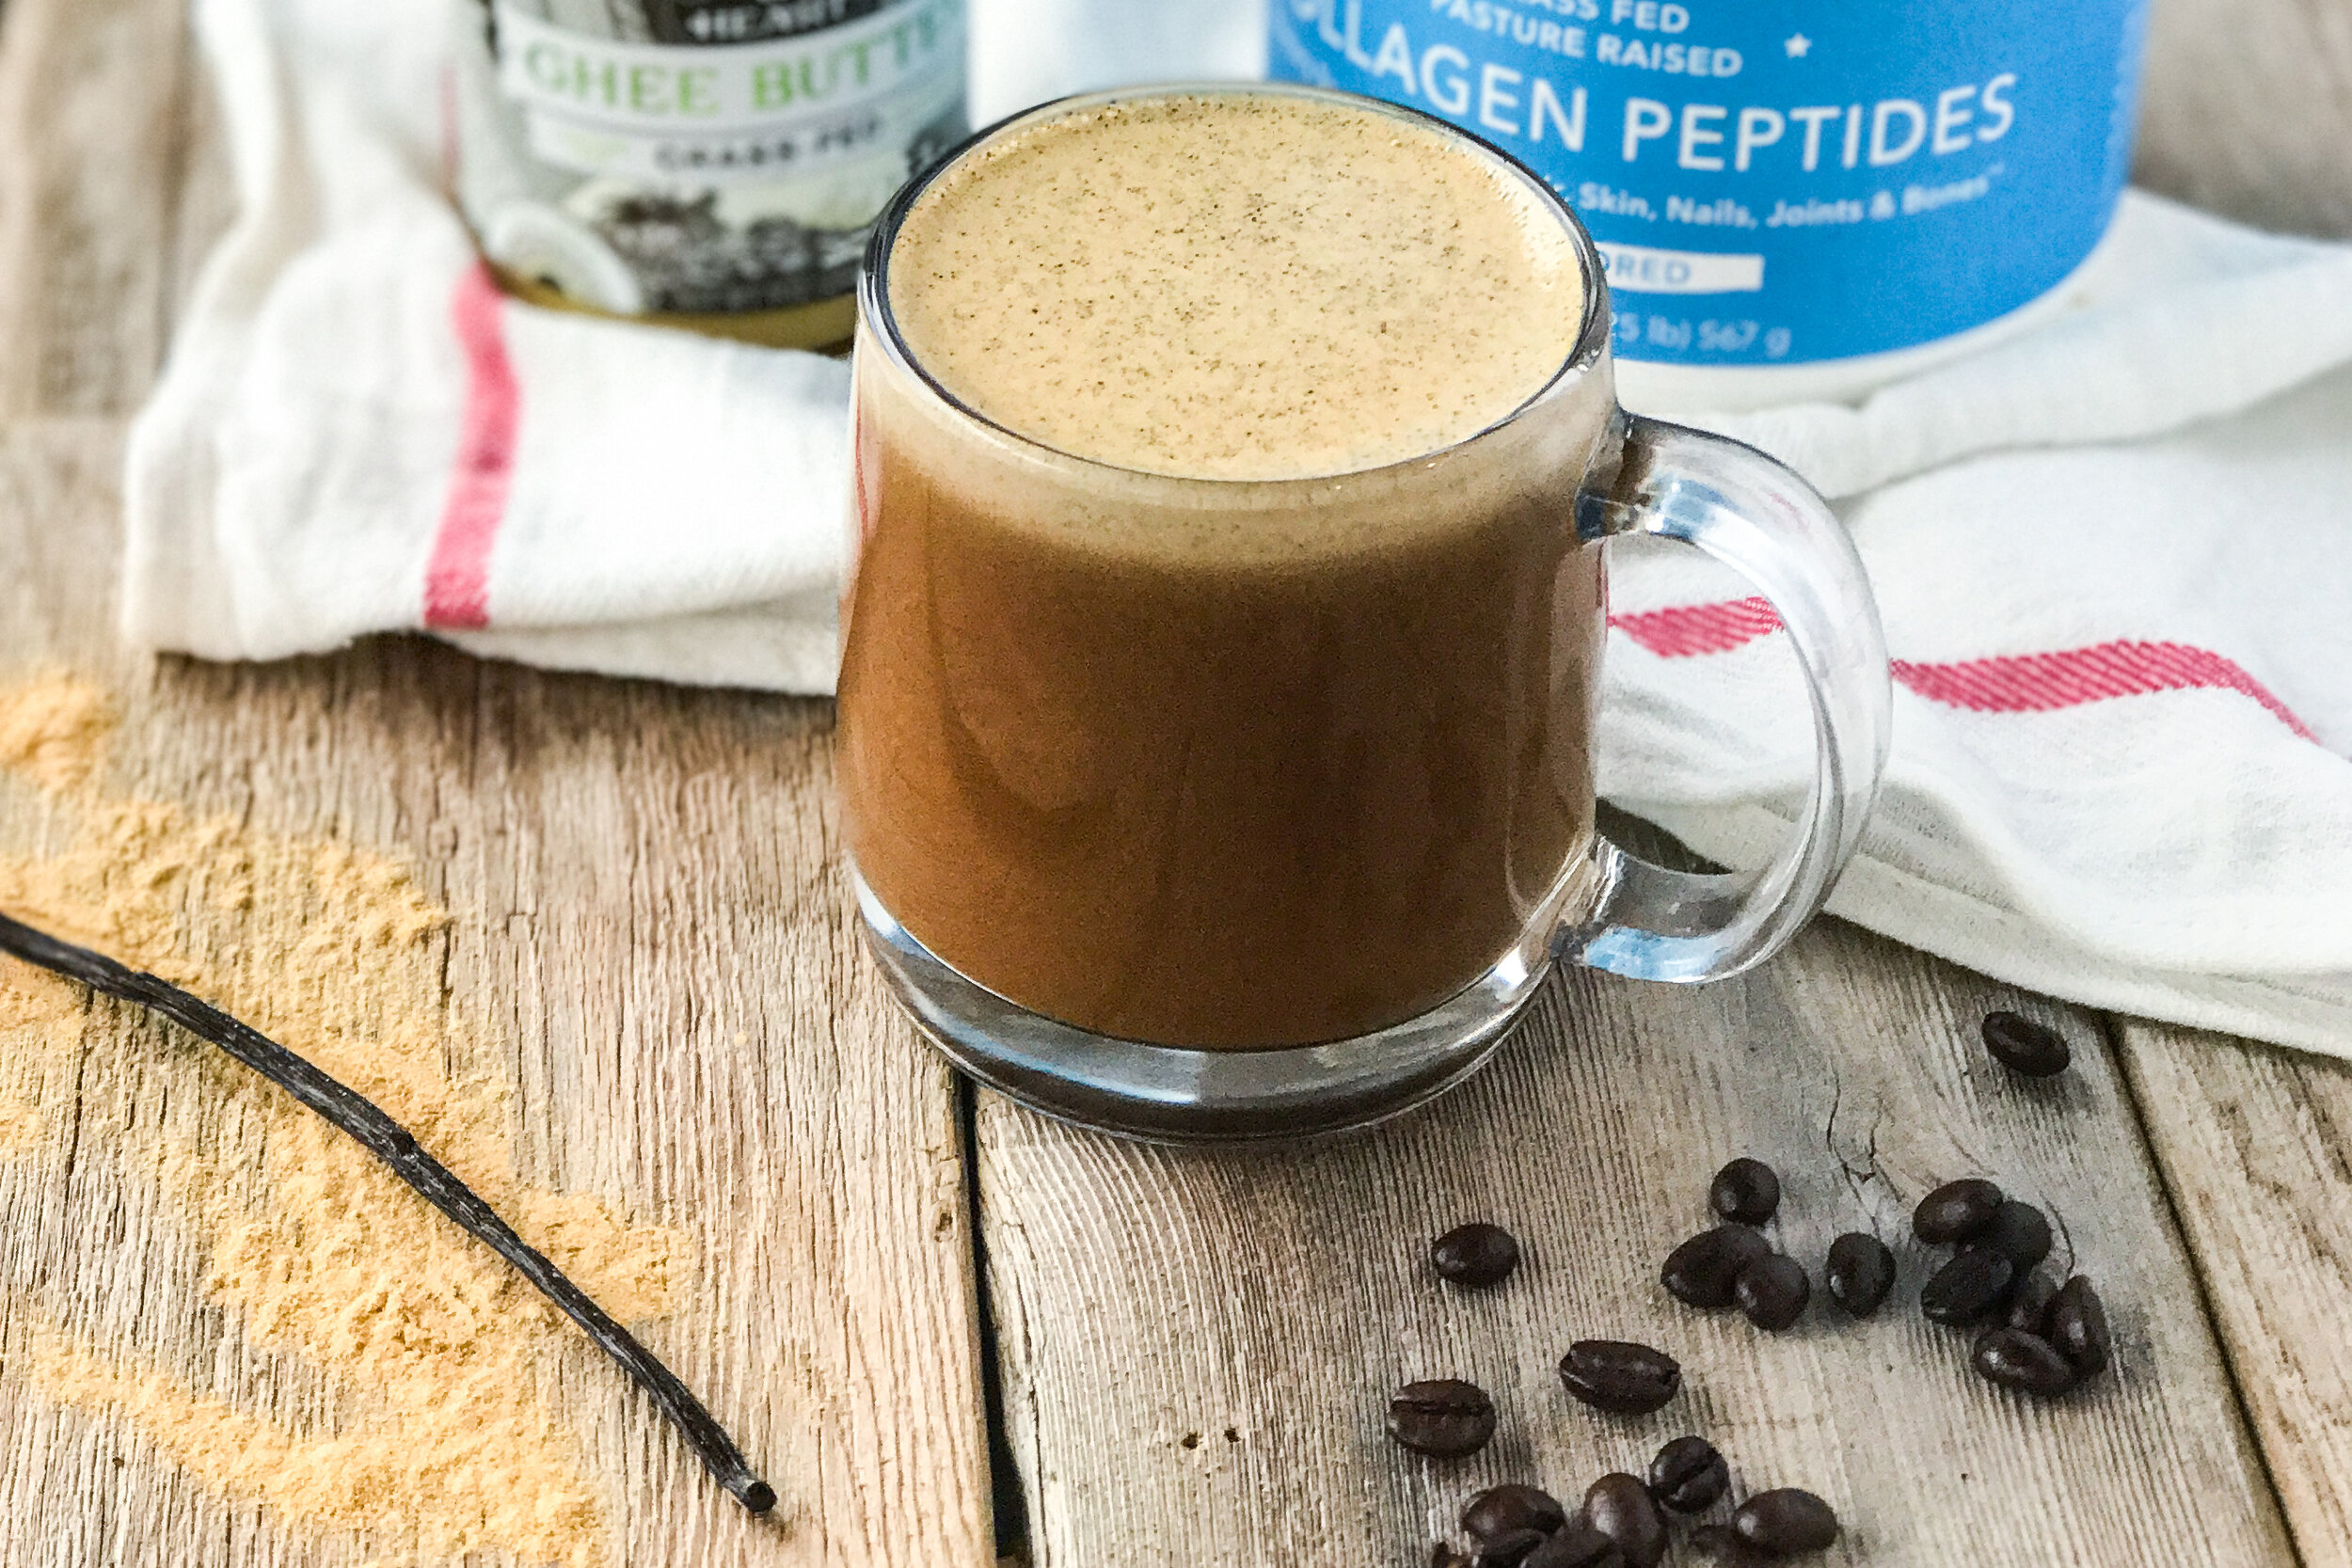
This Boosted Vanilla Bean Coffee is made with vanilla bean ghee and boosted with maca and collagen — a fun & flavorful twist on butter coffee or “bulletproof” coffee.
This Boosted Vanilla Bean Coffee is made with vanilla bean ghee and boosted with maca and collagen — a fun & flavorful twist on butter coffee or “bulletproof” coffee. Jump to recipe.
If you’ve never heard of bulletproof coffee, it probably sounds a little bonkers to put ghee in your coffee — but I promise you it’s super yummy + frothy and packed with nutrients!
The bulletproof coffee trend has seriously blown up over the past few years and often goes hand in hand with intermittent fasting. But here’s the one caveat I’ll offer — boosted coffee is not a meal. Fasting works great for some folks and not so great for others. And that’s all I’ll say about that.
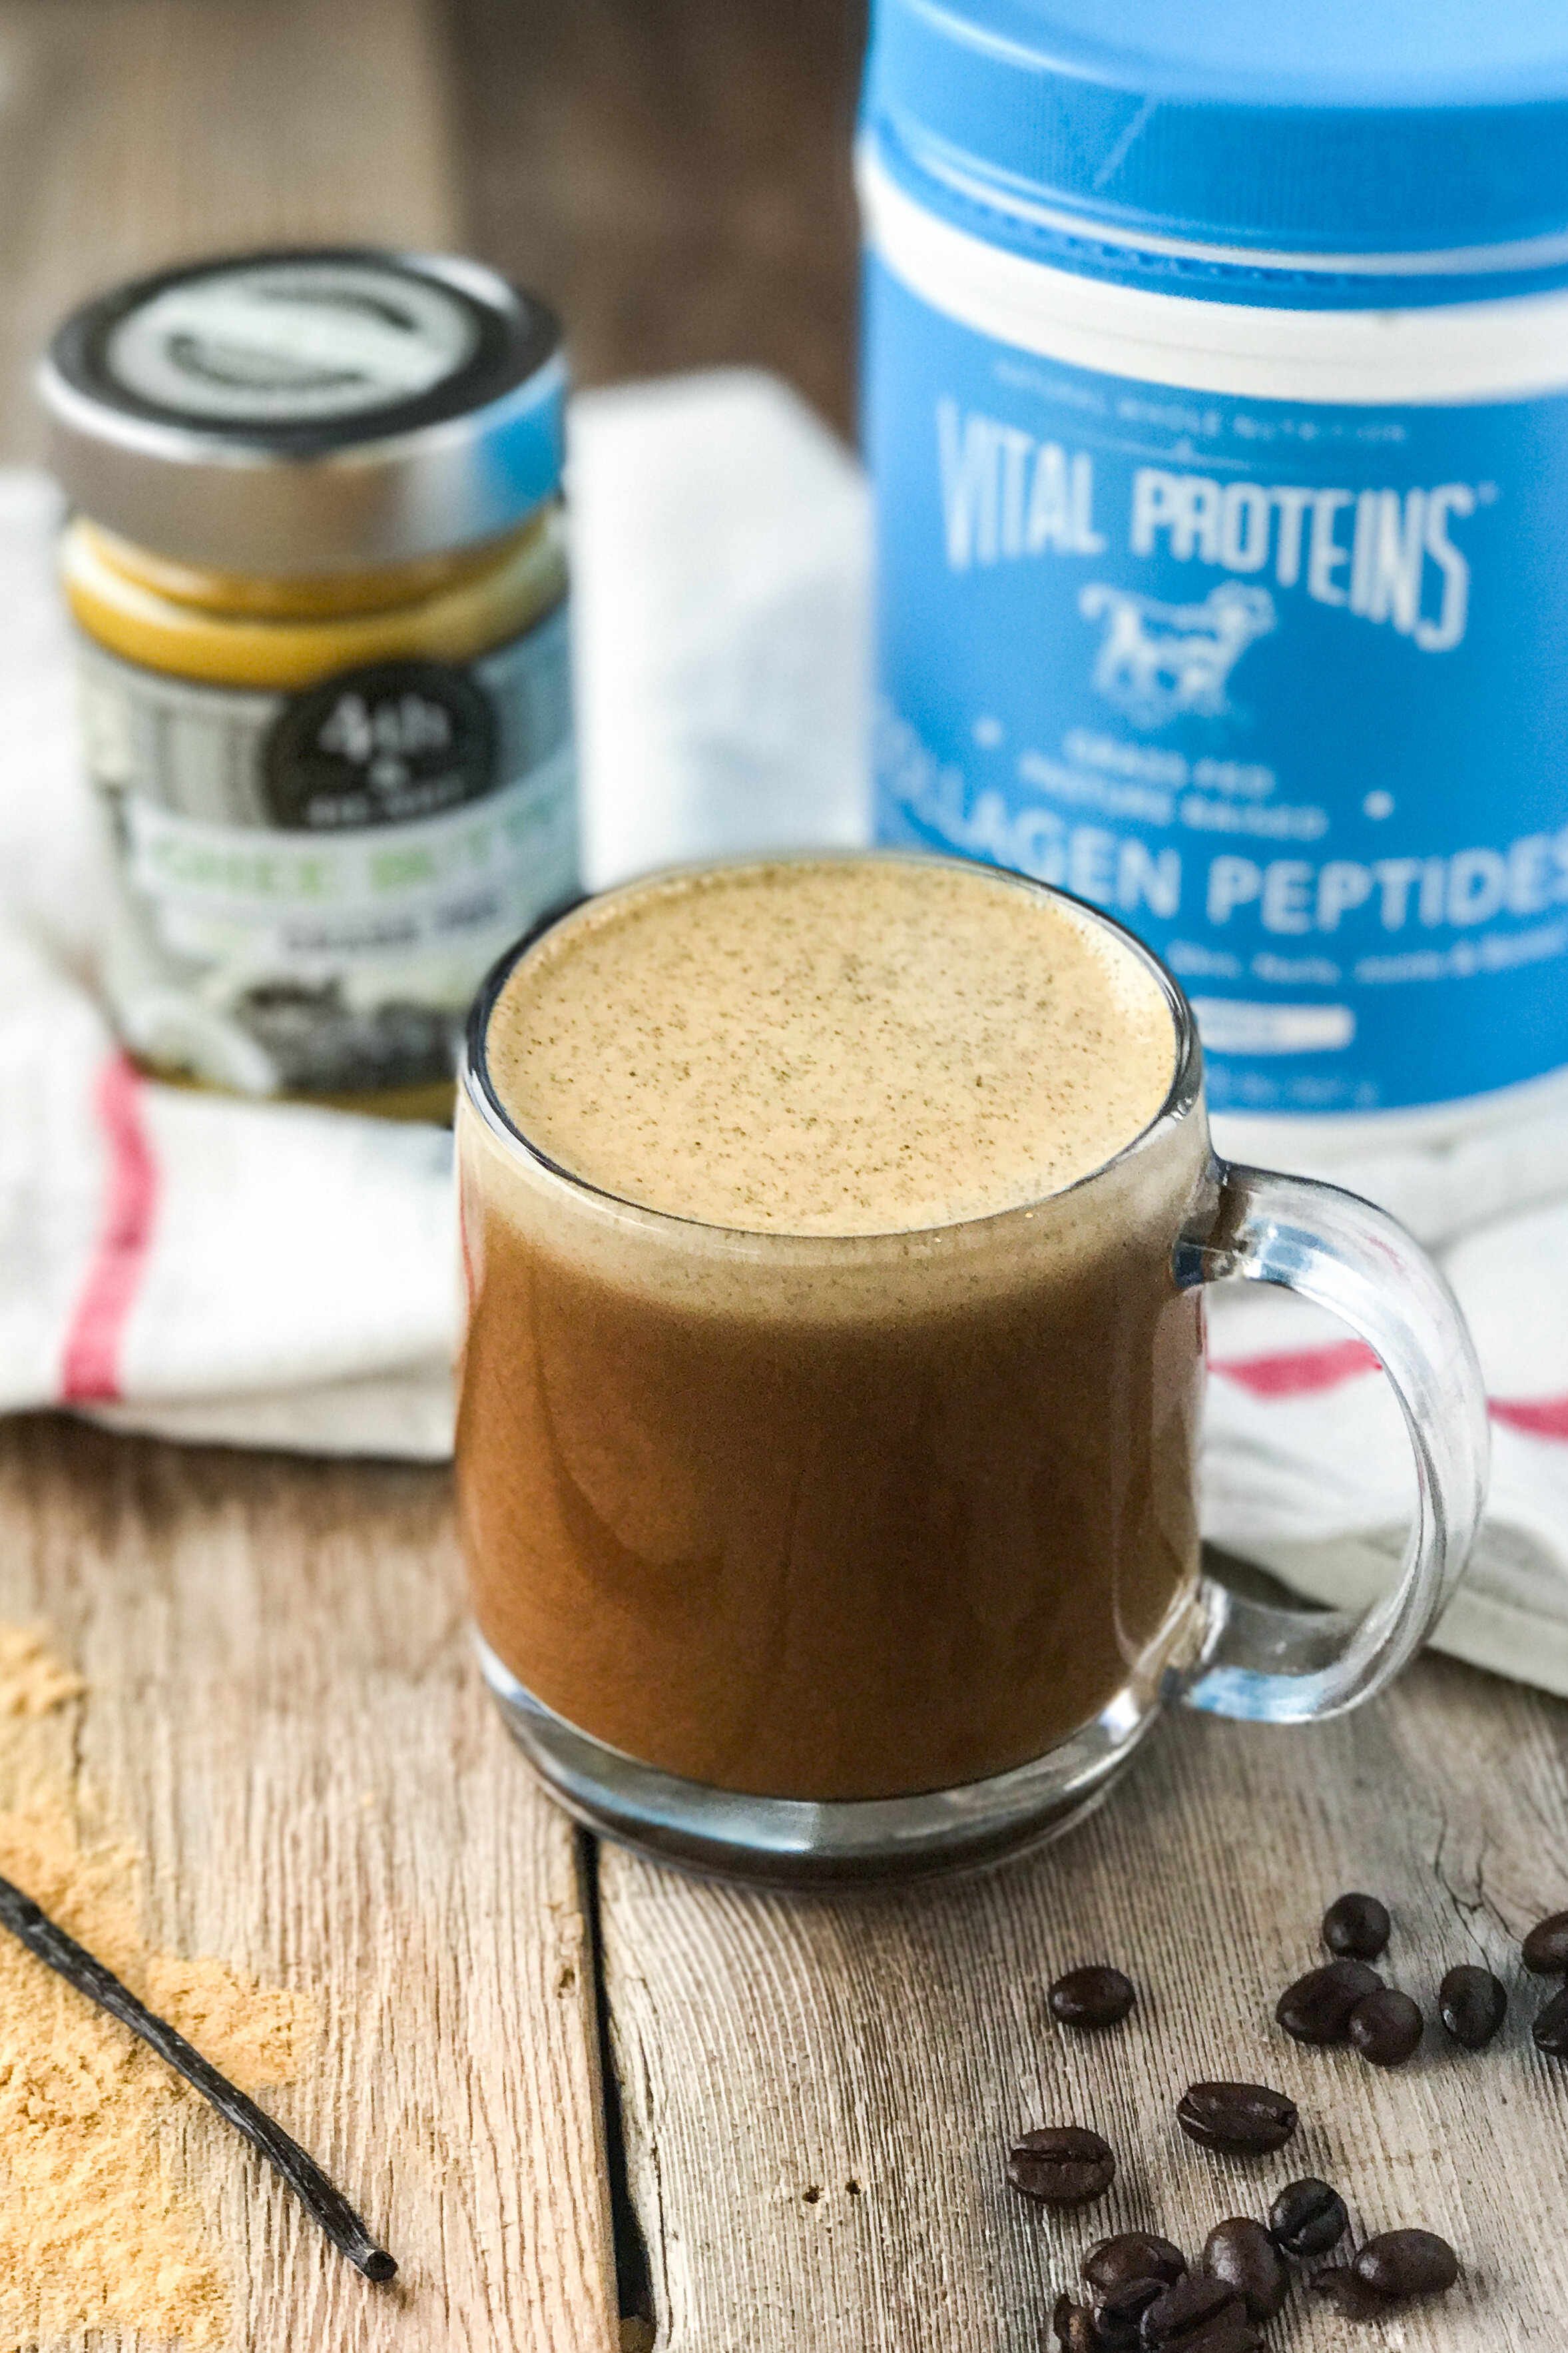
Why I boost my coffee: to enjoy the added nutrients and a bit of extra brain-boosting health fat to fuel my day. This Vanilla Bean Coffee is boosted with gelatinized maca, Vital Proteins Collagen Peptides, and 4th & Heart Vanilla Bean Ghee.
Maca root is an adaptogen and a member of the cruciferous family. It supports hormone balance, energy levels, and immune health. Maca is full of amino acids, rich in minerals, and has shown to help improve menstruation symptoms. [1]
Vanilla was used by healers for centuries as a powerful medicinal plant. It’s packed with antioxidants and the vanilloid in vanilla is known to relieve stress, calm stomach pain, and reduce joint pain. [2]
Ghee is similar to clarified butter, which is produced by heating butter to remove the milk solids and water but ghee is simmered longer to remover any remaining water. Ghee has all of the health benefits of grass-fed butter without the lactose and casein [milk solids], plus it’s packed with fat-soluble vitamins A, E, and K, butyrate [which supports gut health], and conjugated linoleic acid which aids in reducing body fat, prevents cancer formation, acts as an antiinflammatory. [3] My favorite ghee is Fourth & Heart, the Madagascar Vanilla Bean, it adds a gorgeous but subtle taste to this boosted coffee!
Collagen is high in glycine, proline, and hydroxyproline, the three main amino acids that your body uses to make connective tissue and therefore provides lots of benefits for hair, skin, & nails and supports healing & recovery. [4] My favorite collagen is Vital Proteins Collagen Peptides. Their collagen is odorless + tasteless, pasture-raised, and sourced from the hides of grass-fed cattle.

boosted vanilla bean coffee
This Boosted Vanilla Bean Coffee is made with vanilla bean ghee and boosted with maca and collagen — a fun & flavorful twist on butter coffee or “bulletproof” coffee.
INGREDIENTS:
- 1 cup strong coffee
- 2 teaspoons 4th & Heart Madagascar Vanilla Bean Grass-Fed Ghee*
- 1 scoop Vital Proteins collagen
- 1 teaspoon organic raw maca powder
- 2-3 drops stevia or 1 tsp maple syrup
INSTRUCTIONS:
- Make your coffee as you normally would. [I recommend making in a French Press or stovetop espresso maker]
- starting with the coffee first, add all of the ingredients to your high speed blender. Blend until smooth and everything is dissolved.
- Pour into your favorite coffee mug and enjoy!
NOTES:
- If you don't have this ghee you can use plain ghee and and a pea-sized amount of vanilla bean paste. You can also use coconut oil instead of ghee, if preferred.
Don't forget to tag us @thenorthwestkitchen on Instagram when you make this Boosted Vanilla Bean Coffee!
References
[1] — https://draxe.com/nutrition/top-5-maca-root-benefits-and-nutrition/
[2] — https://blog.daveasprey.com/using-vanilla-to-increase-your-mental-performance/
[3] — https://draxe.com/nutrition/ghee-benefits/
[4] — https://draxe.com/nutrition/what-is-collagen/

Instant Pot Balsamic Roast Beef
This juicy, tender Instant Pot Balsamic Roast Beef is the perfect Sunday night meal. Top it off with a simple pan sauce made right in the Instant Pot and instantly elevate your meal with little effort. Jump to recipe.

I have a serious foodie confession to make — I loath pot roast. Like really really hate it.
Like most Americans, I grew up eating pot roast almost weekly and while my mom is an incredible cook, I could not get myself to like it. The vegetables were soft, the meat was dry & stringy and the gravy tasted more sweet than savory.
My husband however, puts pot roast on his short list of childhood favorites [alongside boxed scalloped potatoes, cue face palm]. After about three years of marriage, my husband asked my why I never made pot roast — after all I was a budding chef and it’s such a classic dish. My explanation: I REALLY HATE IT. I had eaten too many mushy carrots and endured far too many servings of dry meat. I know a lot of folks swear that you can’t screw up pot roast, but I promise you really can.

What I’ve learned over the years: there is a right way to cook pot roast. You’ve got to use the right roast and make sure you brown it. Use wine or balsamic vinegar to deglaze the pan and please [I beg you] don’t cook the vegetables for too long!
Cue my Instant Pot Balsamic Roast Beef — although this isn’t a true pot roast recipe, I created it on my quest to do pot roast right and it’s since become a staple in our household during the fall and winter months. It all started when I made a perfect roast in my dutch oven and deglazed the pan with balsamic vinegar and coconut aminos. The result was a tangy, deeply savory gravy that left us licking the pan after dinner and wondering where our leftovers for the next day had gone.

This is the perfect Sunday night meal that you don’t have to babysit for hours in the oven. It’s ready in just 90 minutes in the Instant Pot and renders an incredible gravy full of flavor. Serve it with roasted vegetables [roasted radicchio + onions pictured here] and this Velvety Celery Root Puree.
Cooking Tips:
Remember — the kind of roast you use matters! Use a collagen-rich chuck roast with some fat on it, bone-in if you can. DO NOT use a lean roast like bottom or top round, this will product a dry, stringy roast. My favorite is a 7-bone roast — it’s not always easy to find but it doesn’t hurt to ask your butcher.
If your pot roast isn’t tender enough after 90 minutes [and after the pressure drops naturally], cook it for another 10-15 minutes under high pressure or until a fork pierces the meat easily. Chuck roast is a forgiving cut, and it actually gets more tender with additional cooking time.
Reducing the liquid into a sauce takes a little extra time but it’s well worth it. Plus you can make the gravy right in the Instant Pot which saves you from cleaning yet another to dish.
This roast beef freezes well but make sure to include some of the cooking liquid or gravy with the meat when storing.

instant pot balsamic roast beef
This juicy, tender Instant Pot Balsamic Roast Beef is the perfect Sunday night meal. Top it off with a simple pan sauce made right in the Instant Pot and instantly elevate your meal with little effort.
INGREDIENTS:
- 1 (3-4 pound) bone-in beef roast (we prefer a 7-bone roast)
- 2 cups beef bone broth
- ½ cup balsamic vinegar
- 1 tablespoon gluten free worcestershire sauce
- 2 tablespoons coconut aminos or tamari
- ½ teaspoon red pepper flakes
- 1 shallot, peeled & halved
- 3 sprigs rosemary or thyme
- 3 teaspoons kosher salt, split
- 2 tablespoons ghee
INSTRUCTIONS:
For the roast:
- Pat the roast dry with paper towels, and season it with 2 teaspoons kosher salt and a few generous grinds of pepper.
- Press the “Sauté” button on your Instant Pot and add 1 tablespoon of ghee. Once the ghee is melted, sear the roast evenly, about 3 minutes per side [you can skip this step if you're in a hurry - it will still taste amazing!].
- Add the bone broth, worcestershire sauce, coconut aminos, red pepper flakes, shallot, rosemary and addition teaspoon of salt.
- Lock the lid. Make sure the valve on the lid is in the sealed position. Press “Manual” or “Pressure Cook” and set the cooking time to 90 minutes under high pressure.
- Allow the pressure to drop naturally [this takes about 20 minutes]. Remove lid and poke with a fork to make sure it’s fork-tender. If the meat is still tough, cook under high pressure for another 10-15 minutes and let the pressure drop naturally.
- Once the roast beef is fork tender, remove from Instant Pot and lightly tent with foil in a serving dish.
- Shred meat gently with two forks [you want some larger pieces for serving].
For the sauce:
- Skim the fat off the top of the cooking liquid, if desired. Discard the rosemary and shallot.
- Press the “Sauté” button on your Instant Pot and bring the cooking liquid to a simmer.
- In a small bowl, combine 2 tablespoons of potato starch with 2-3 tablespoons of cold water and stir until smooth. This is your slurry.
- Whisk the slurry into the hot, simmering liquid and simmer sauce is thickened. If the sauce doesn't thicken right away - assemble another slurry and repeat this process [different roast cuts result in varying levels of liquid].
- Ladel desired amount* of gravy over the shredded roast beef and serve.
NOTES:
- *This recipe makes quite a bit of gravy. Store any remaining gravy in an airtight container in the refrigerator or freezer. This gravy is so packed with flavor that I like to use it as a flavor booster in sauces and soups like a demi. You can freeze it in ice cube form and use only the amount you need!
Don't forget to tag us @thenorthwestkitchen on Instagram when you make this Instant Pot Balsamic Roast Beef!
The North + West Kitchen & Cassie Kanable, LLC partner with affiliate platforms including Amazon Services LLC Associates Program where commission may be earned based on clicks and/or purchases, and I would love it if you decided to use the links above! This means if you make a purchase using the links here on the blog – your cost remains the same, but I earn a small percentage to help support this blog. Thank you! Affiliate links help educators like me to fund the free content that we provide.